Development

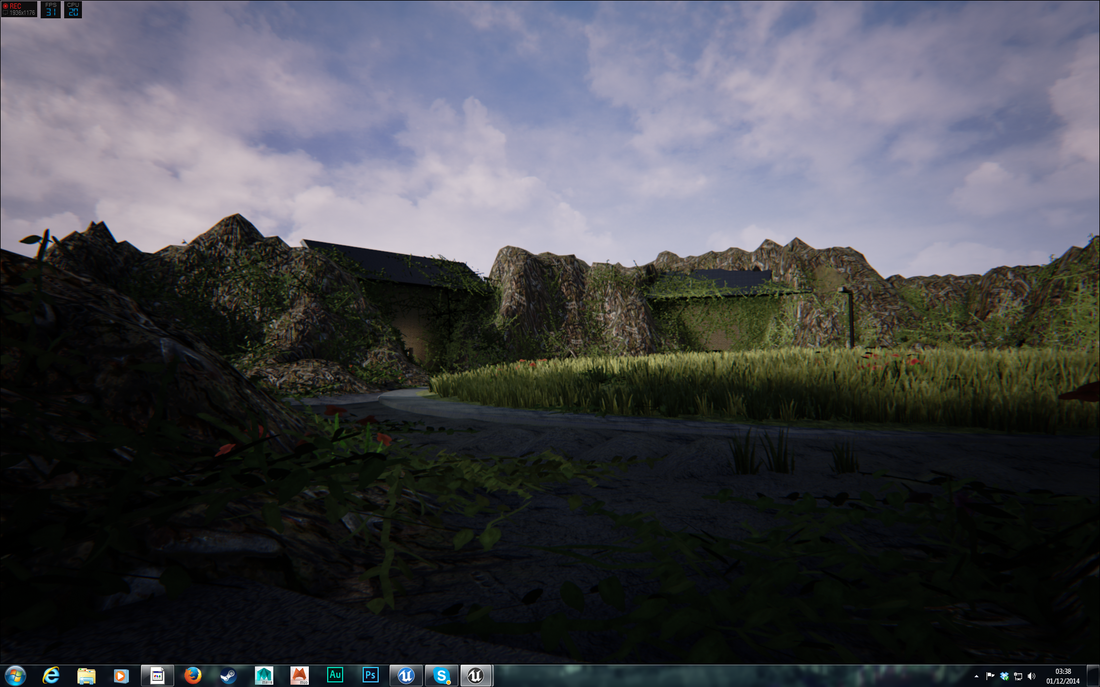
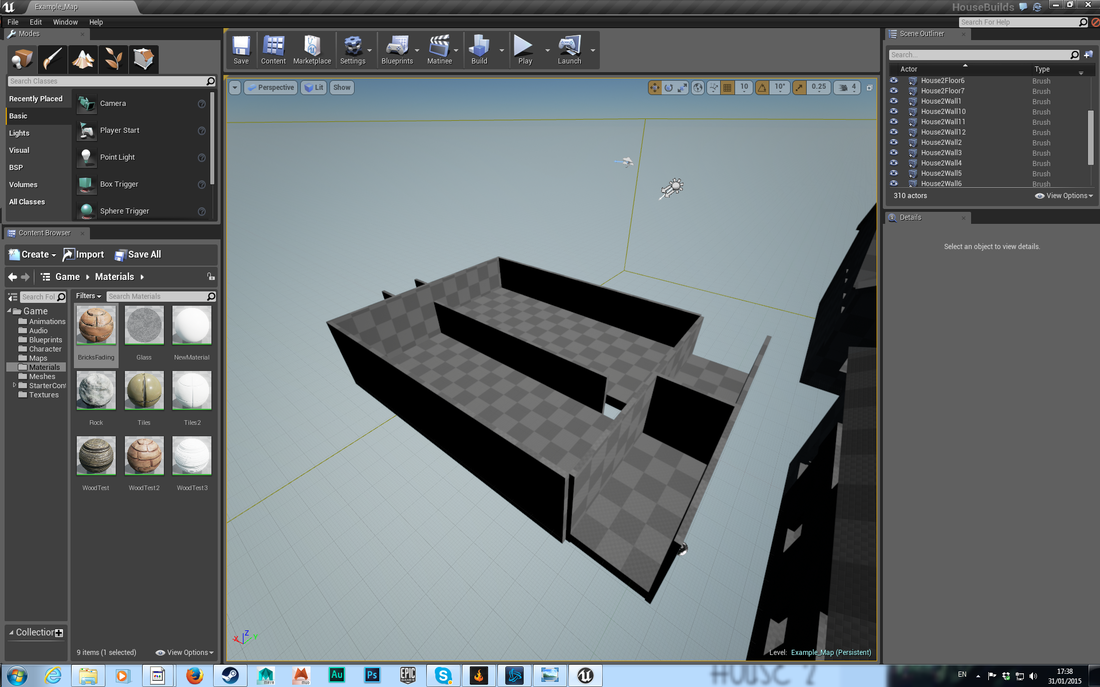
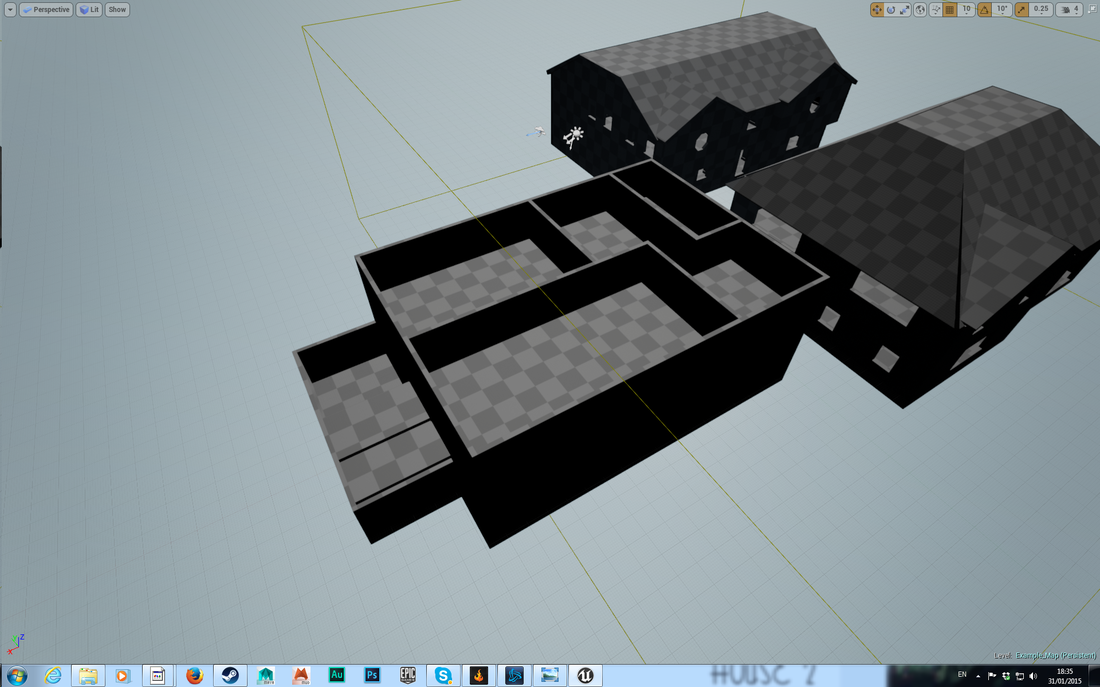
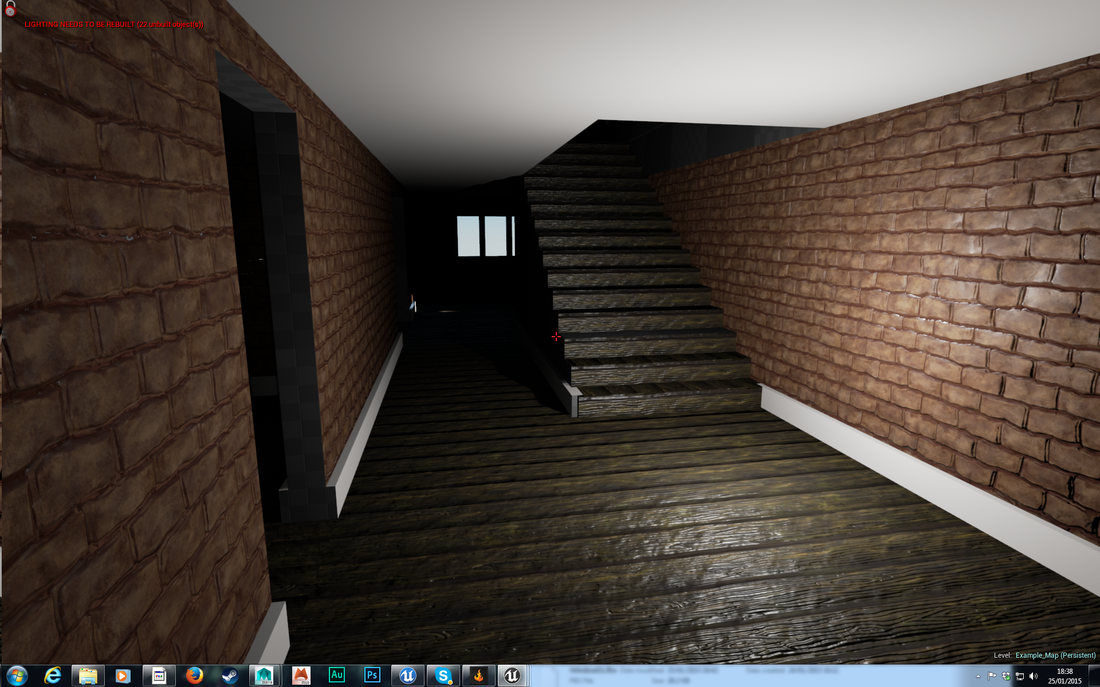
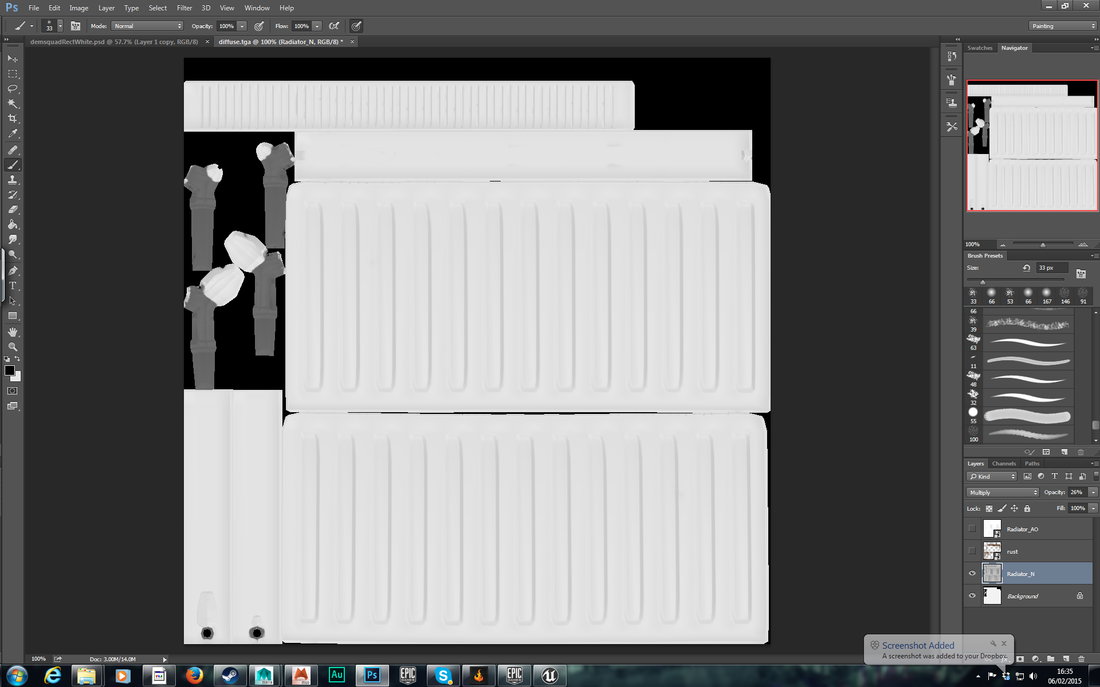
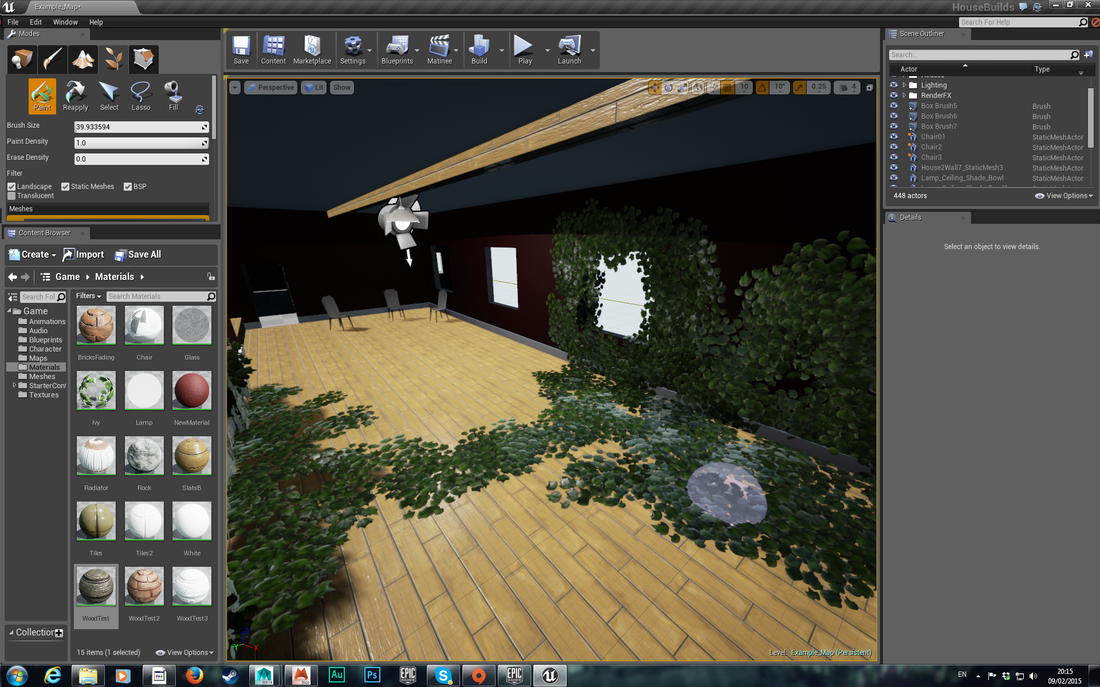
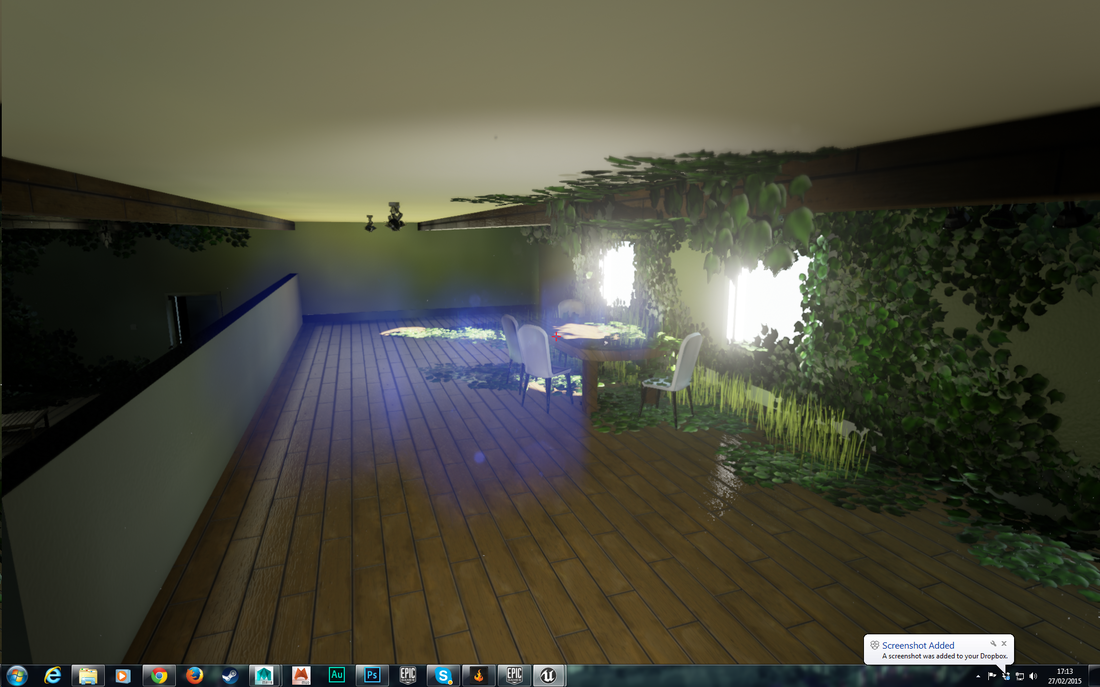
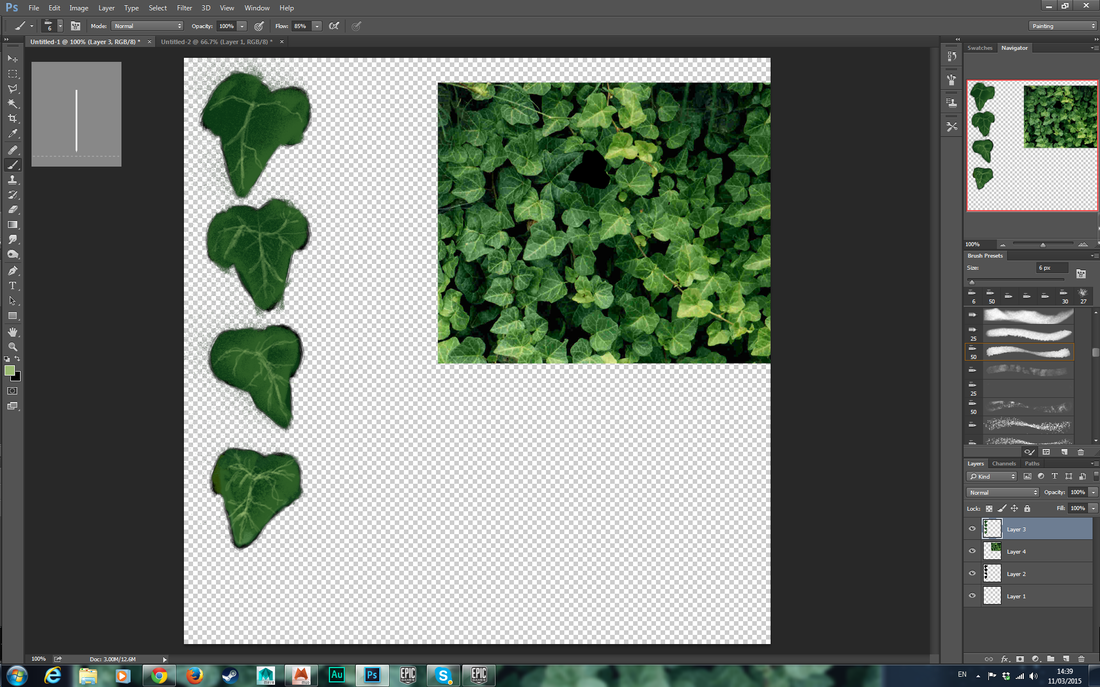
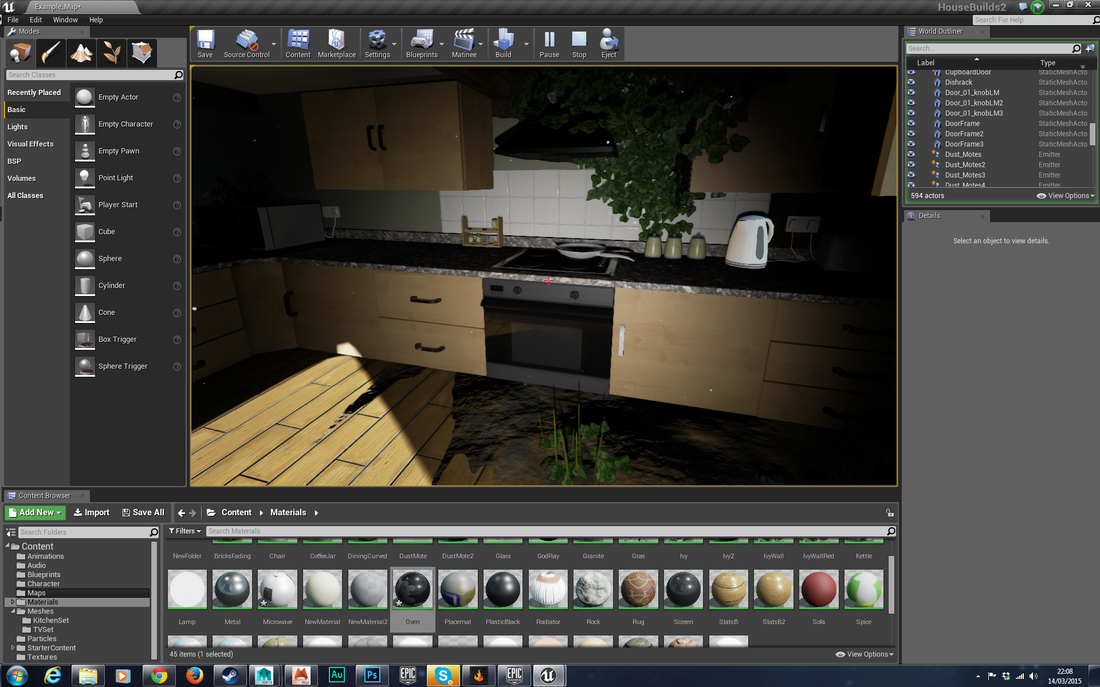
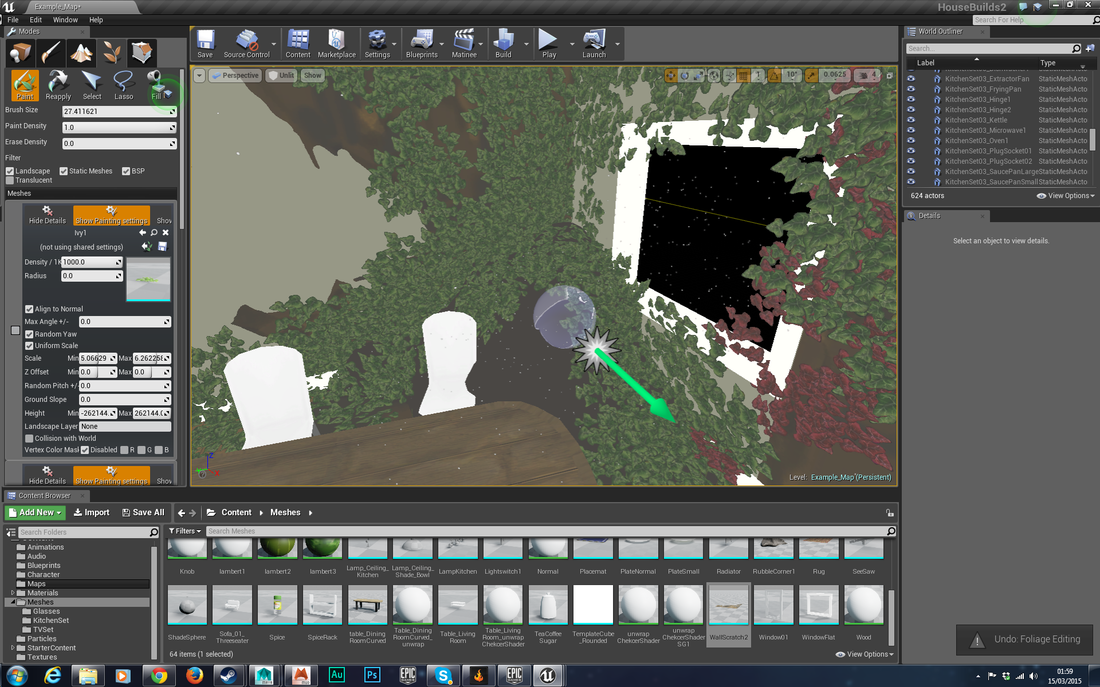
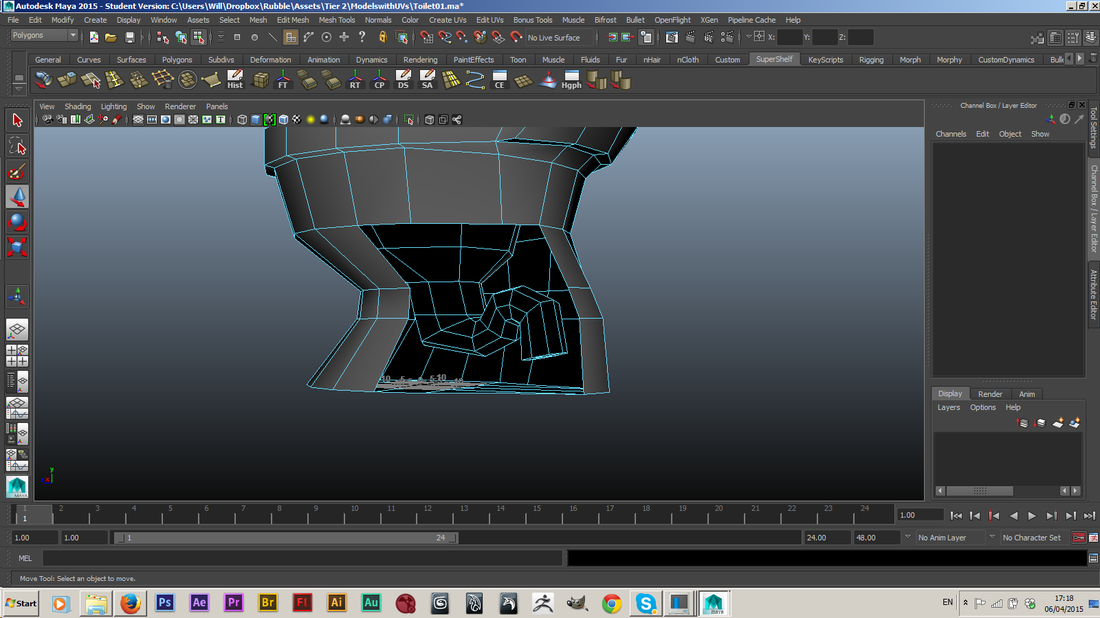
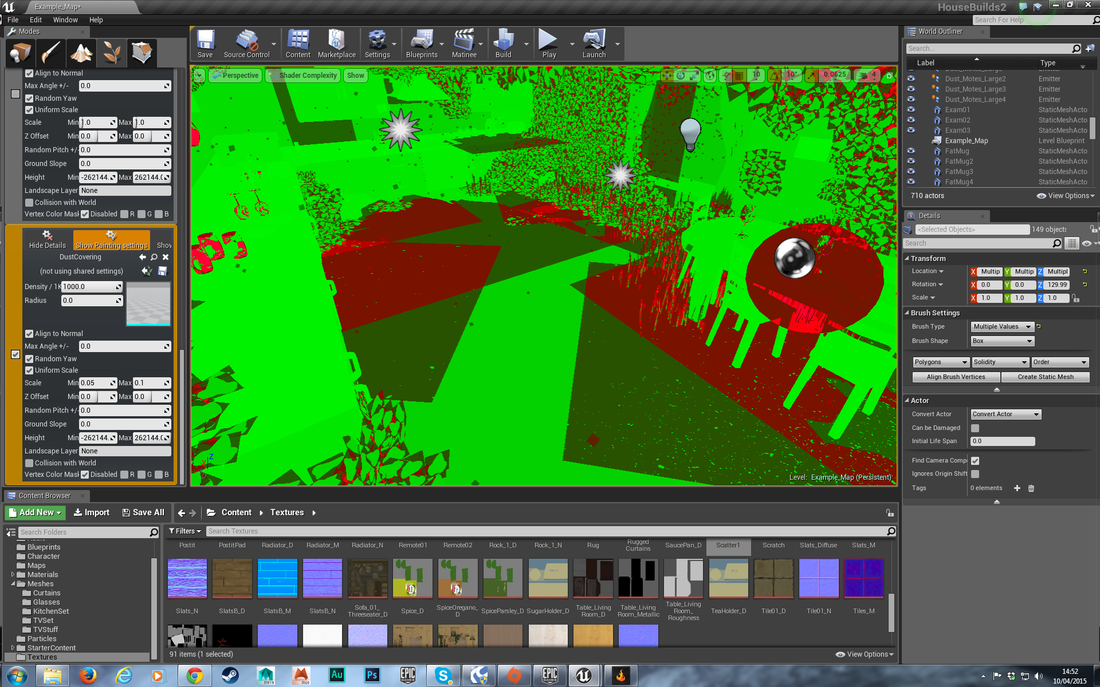
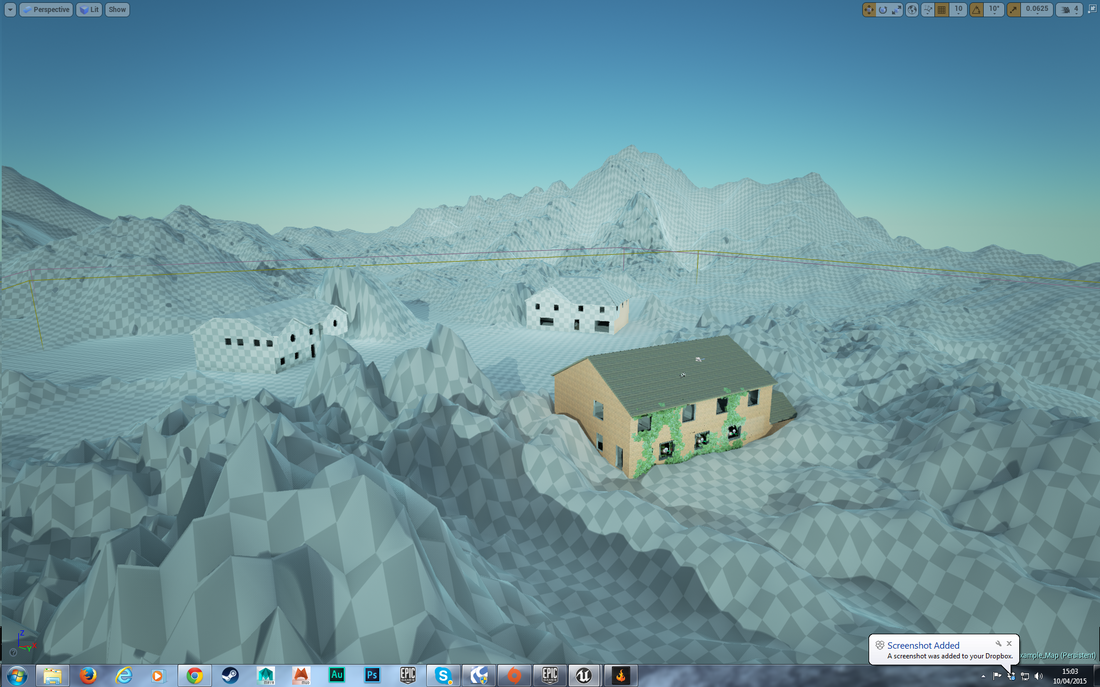
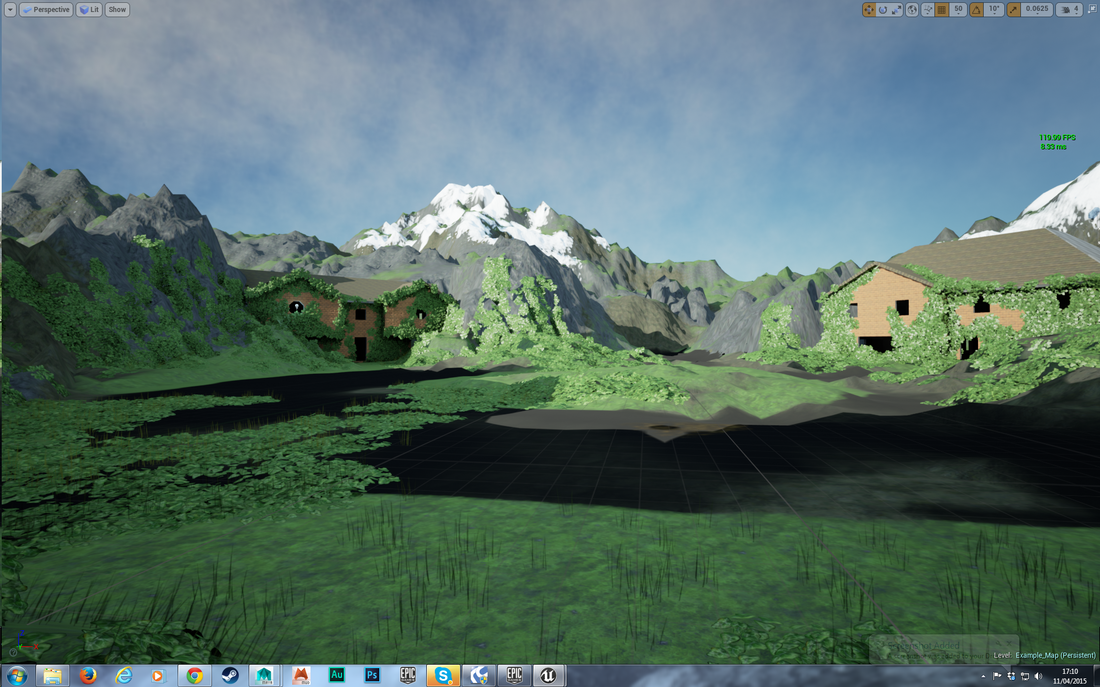
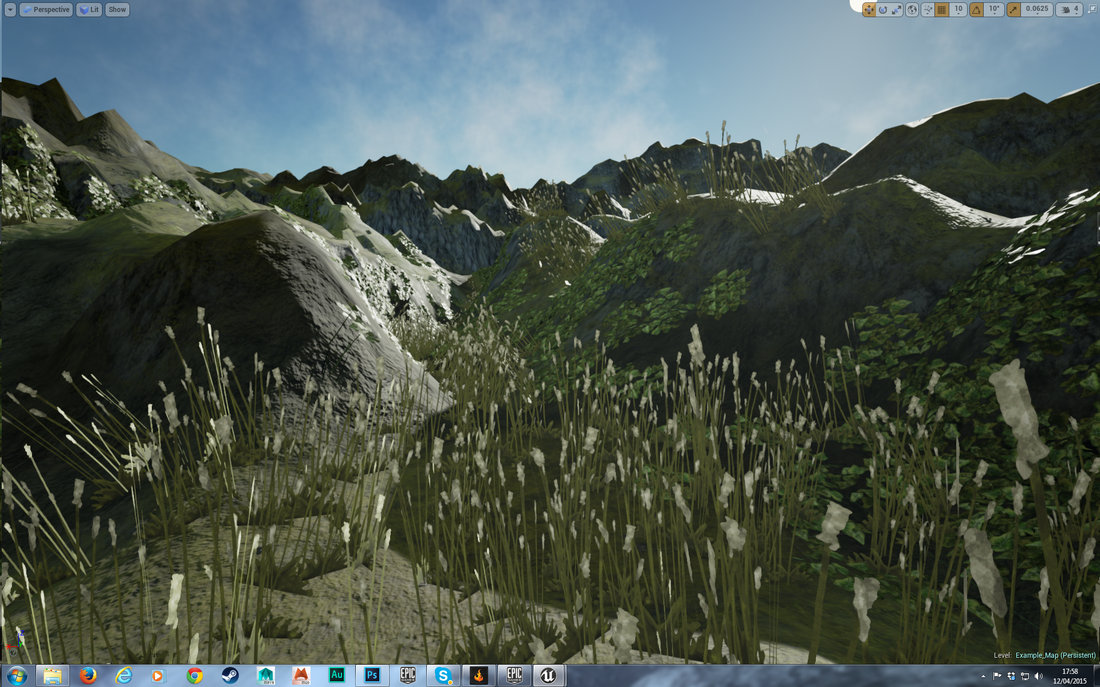
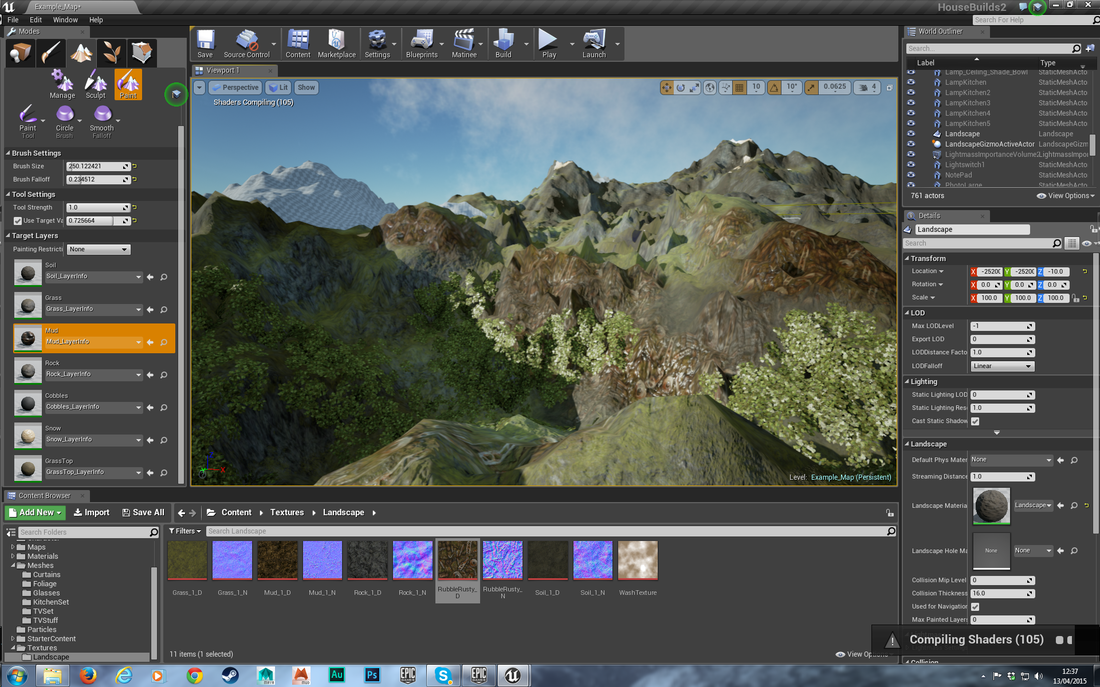
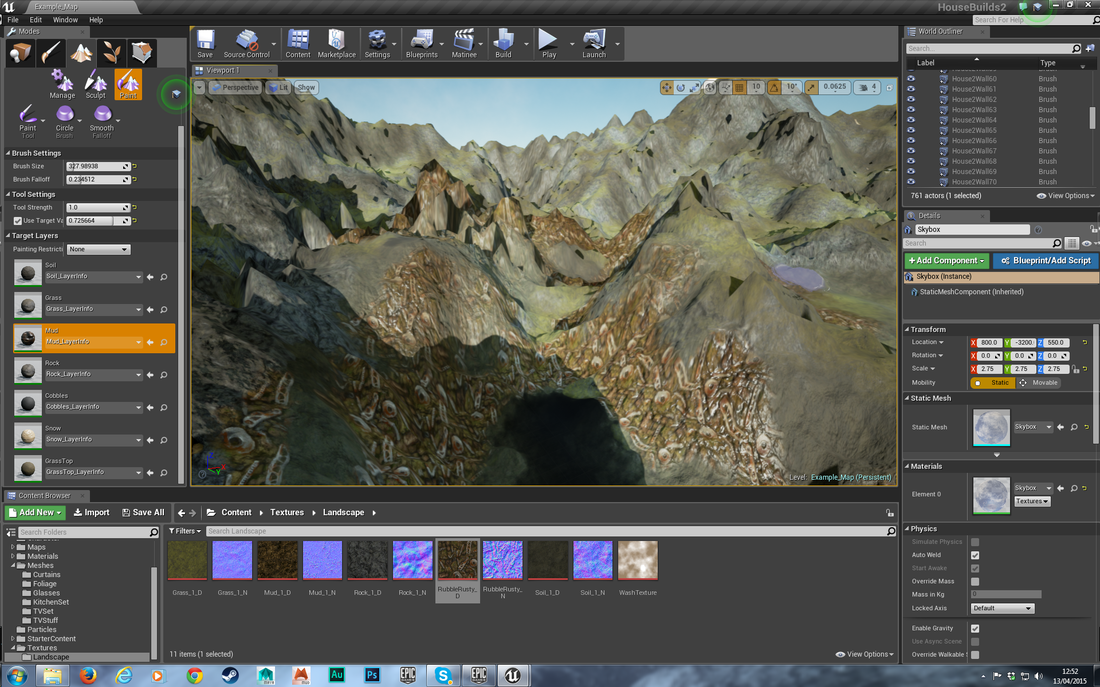
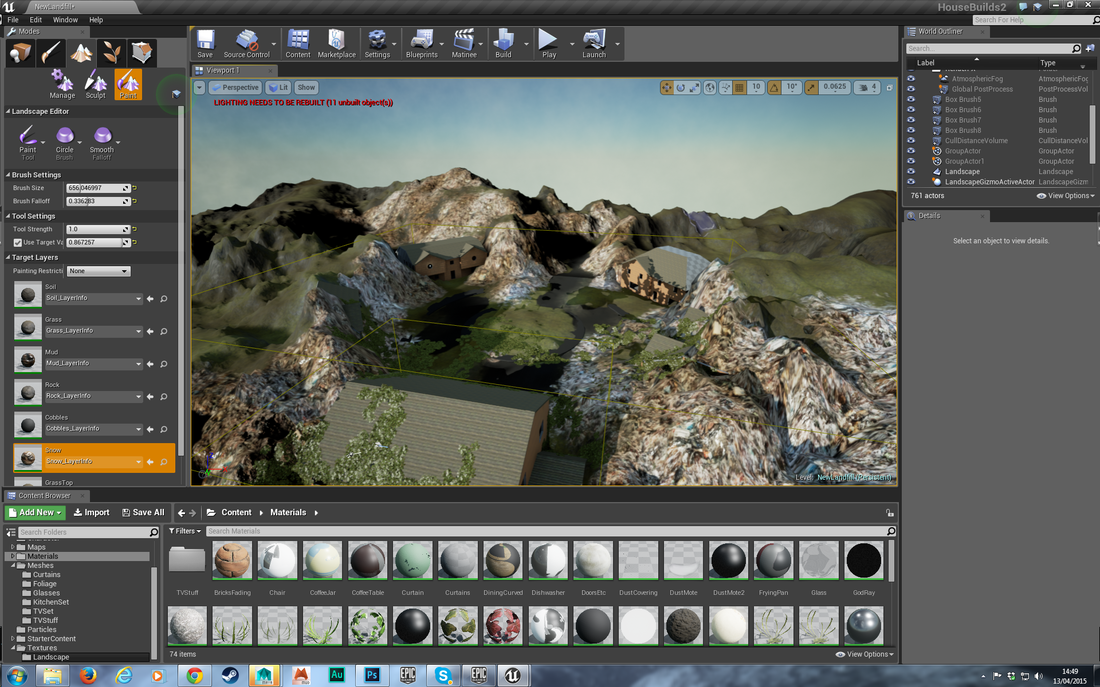
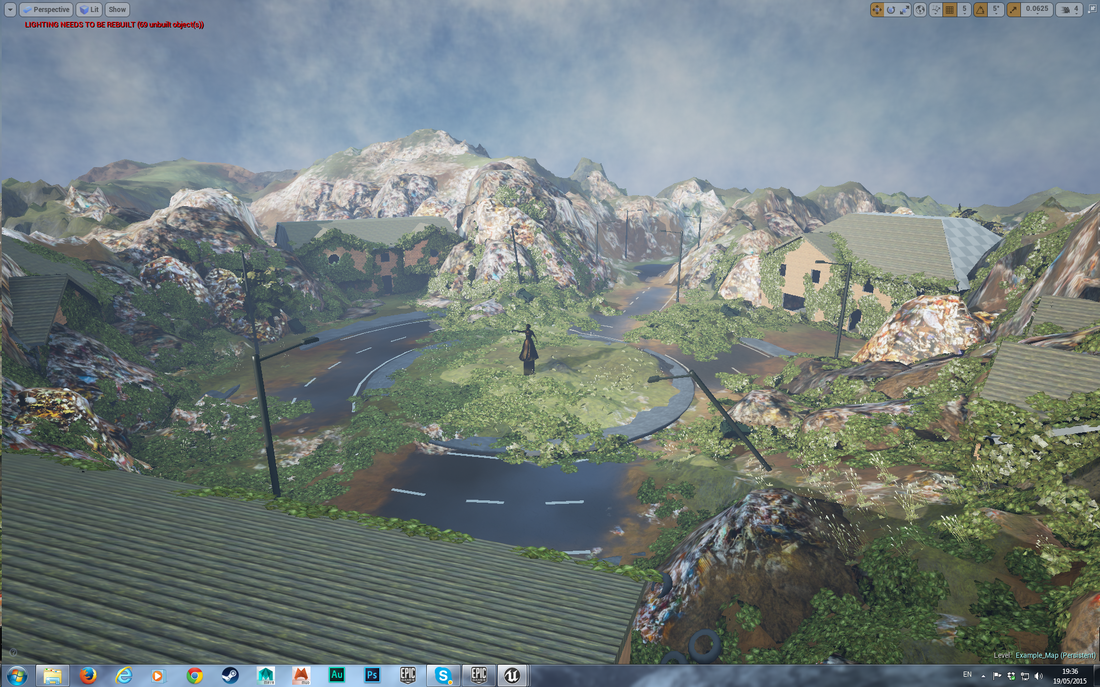
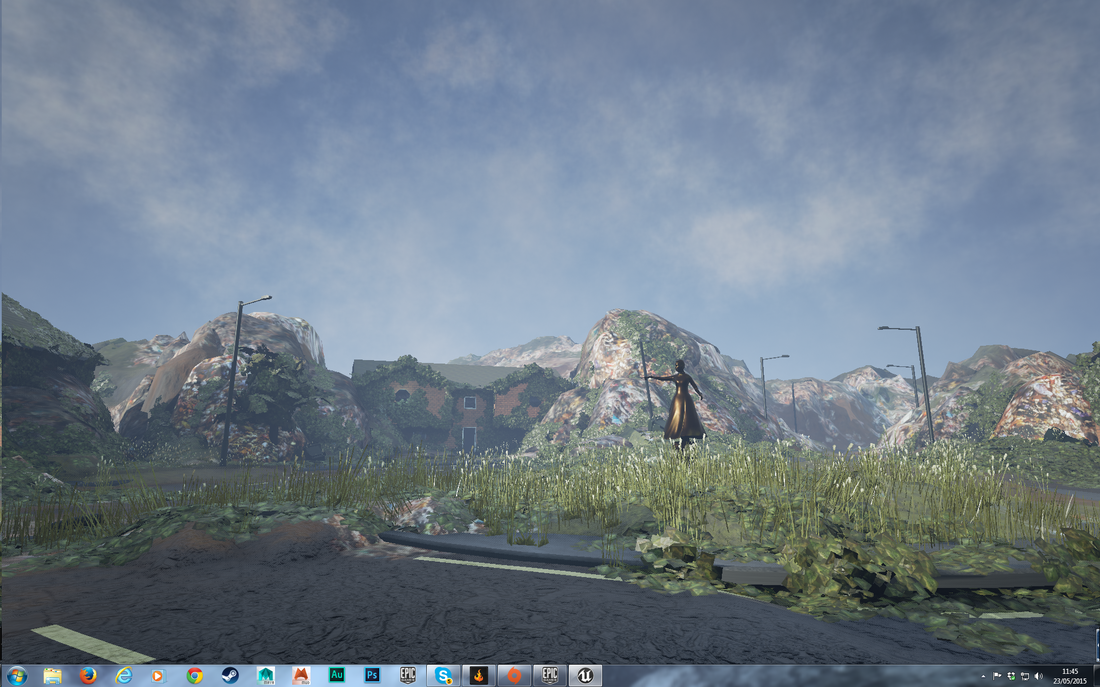
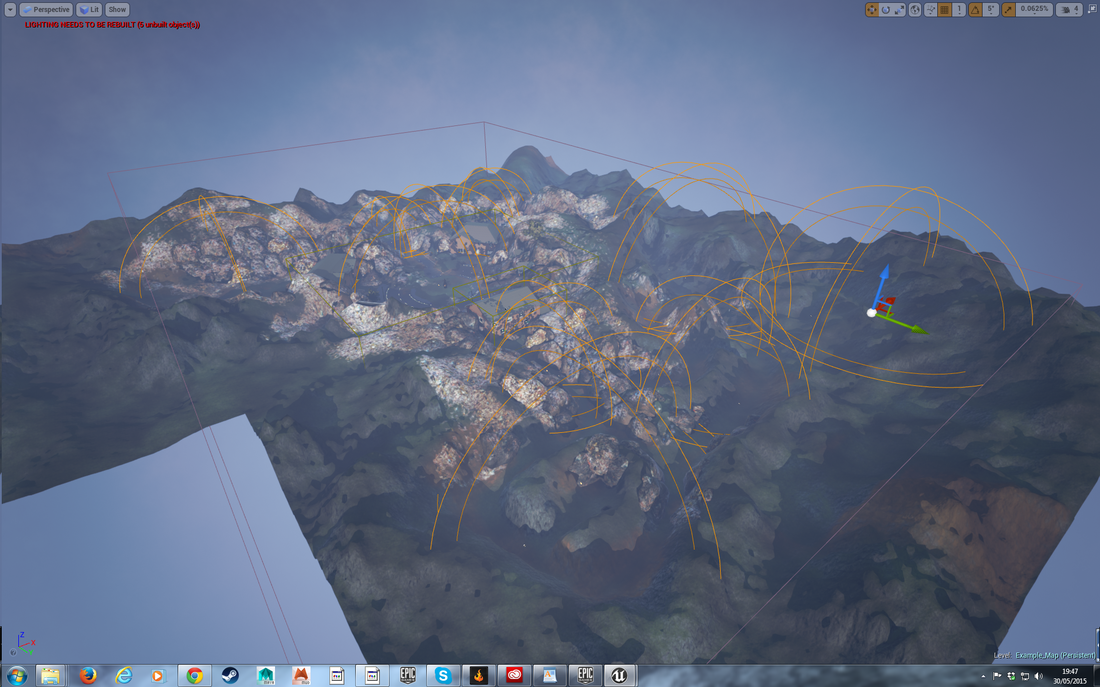
We started creating the demo level to show to the class this way. Above shows the bare bones of the level, sorting the textures etc.
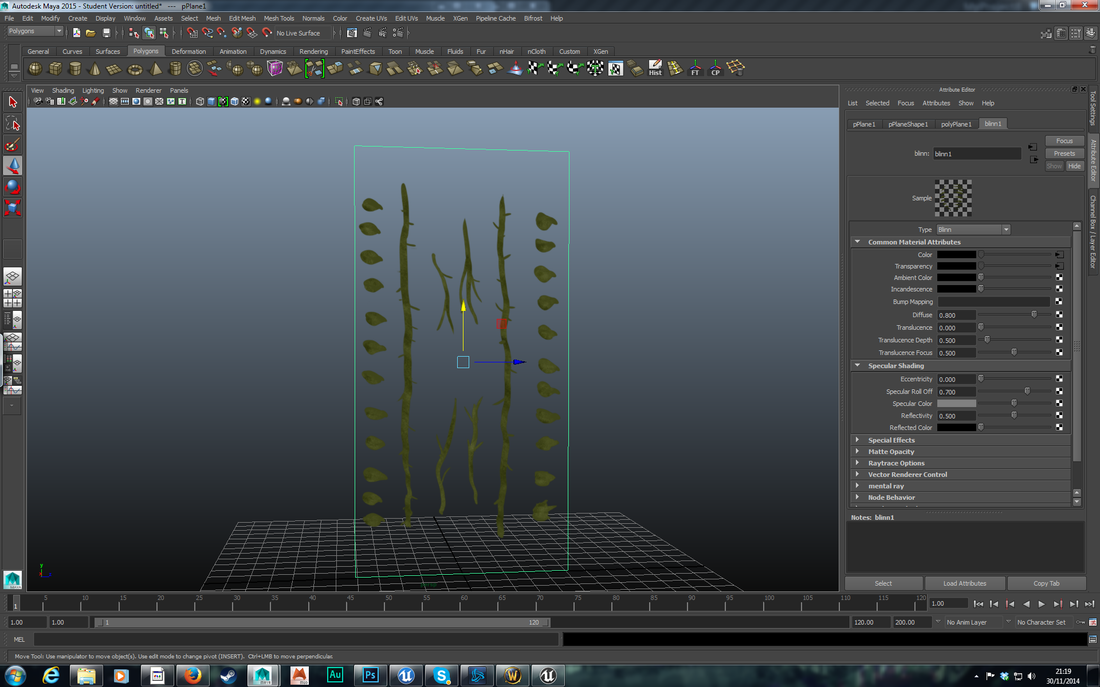
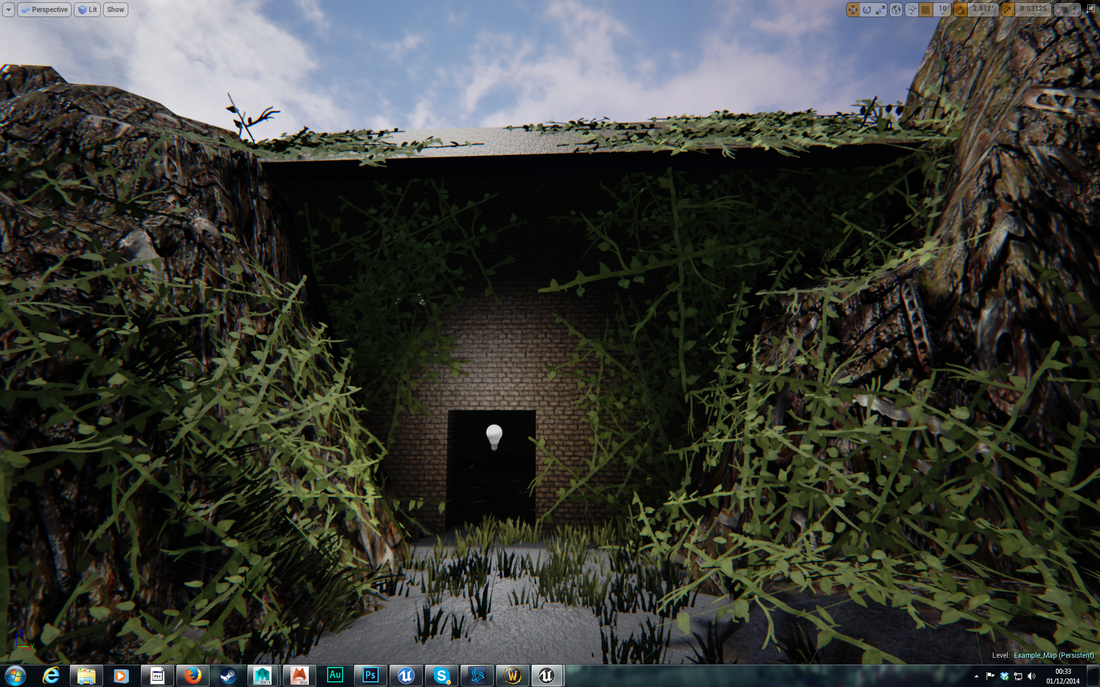
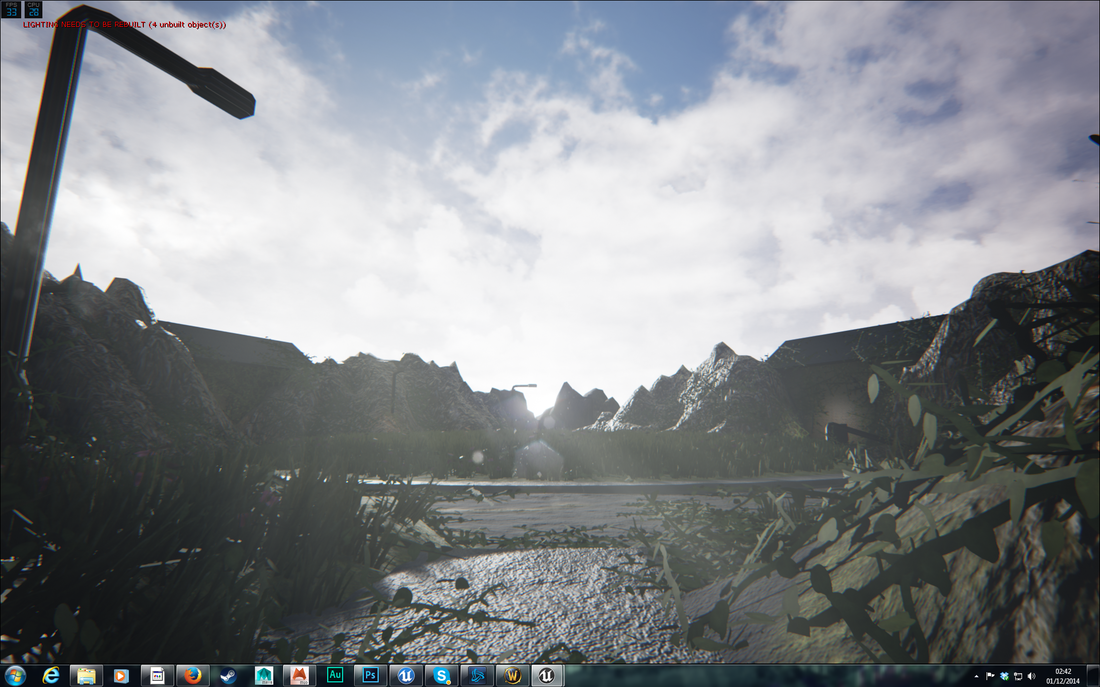
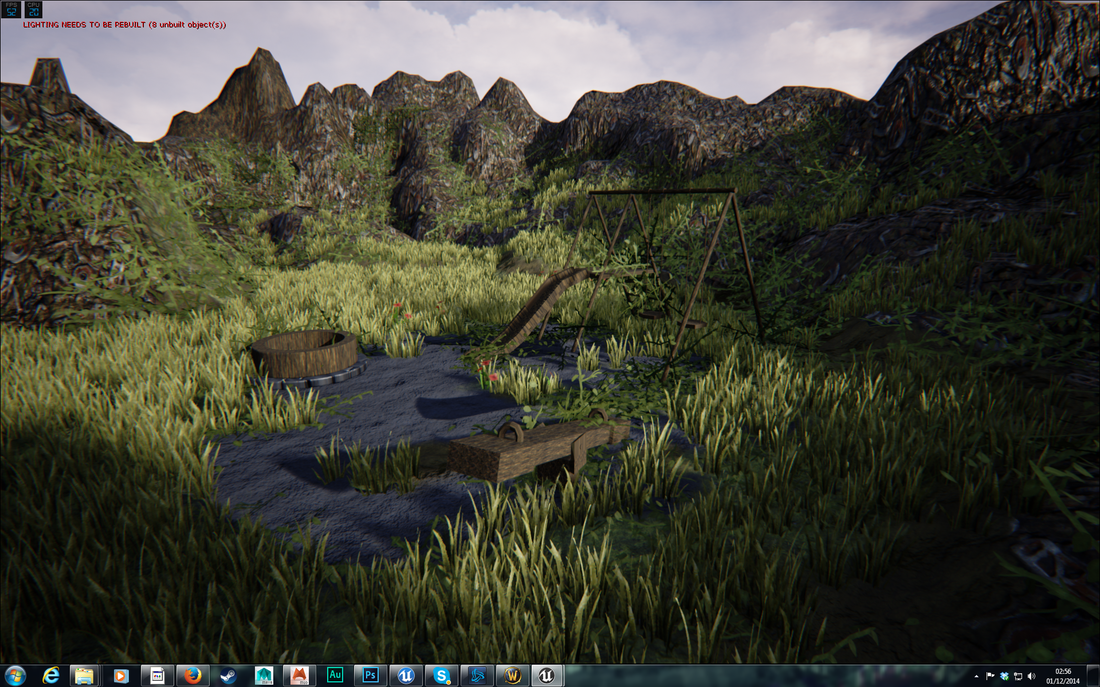
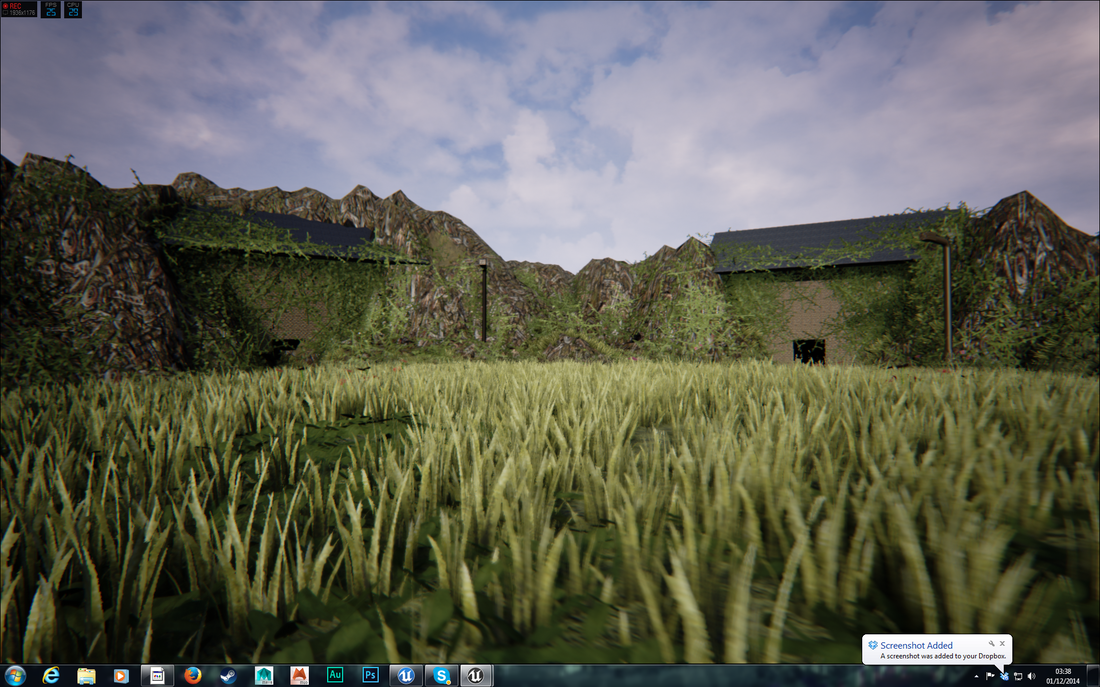
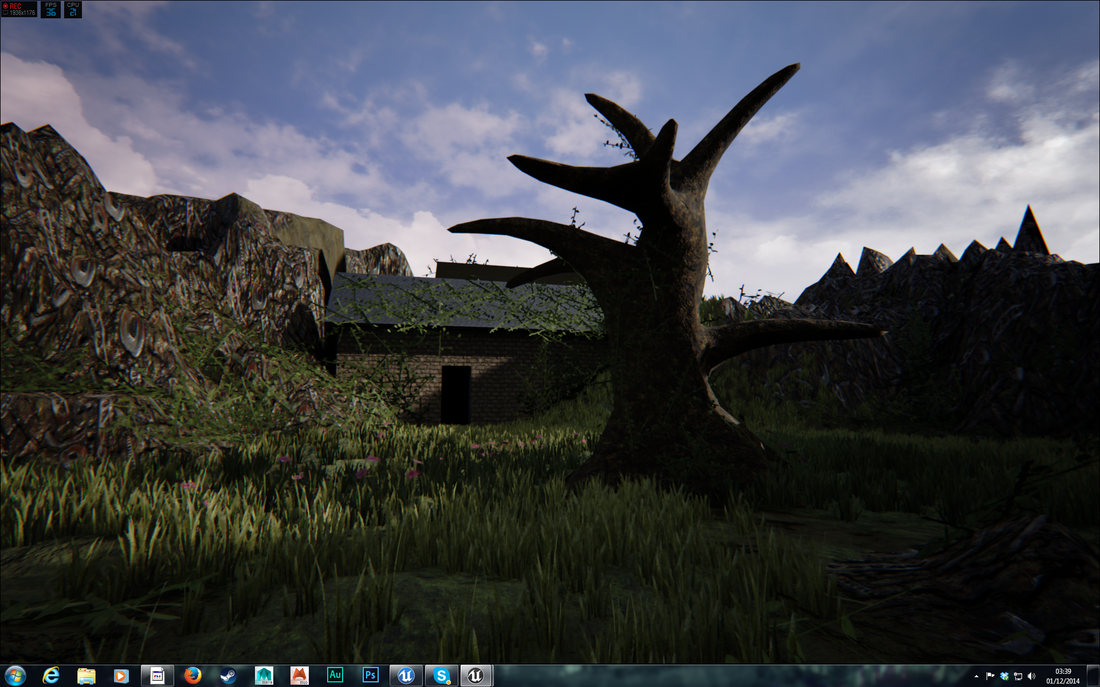
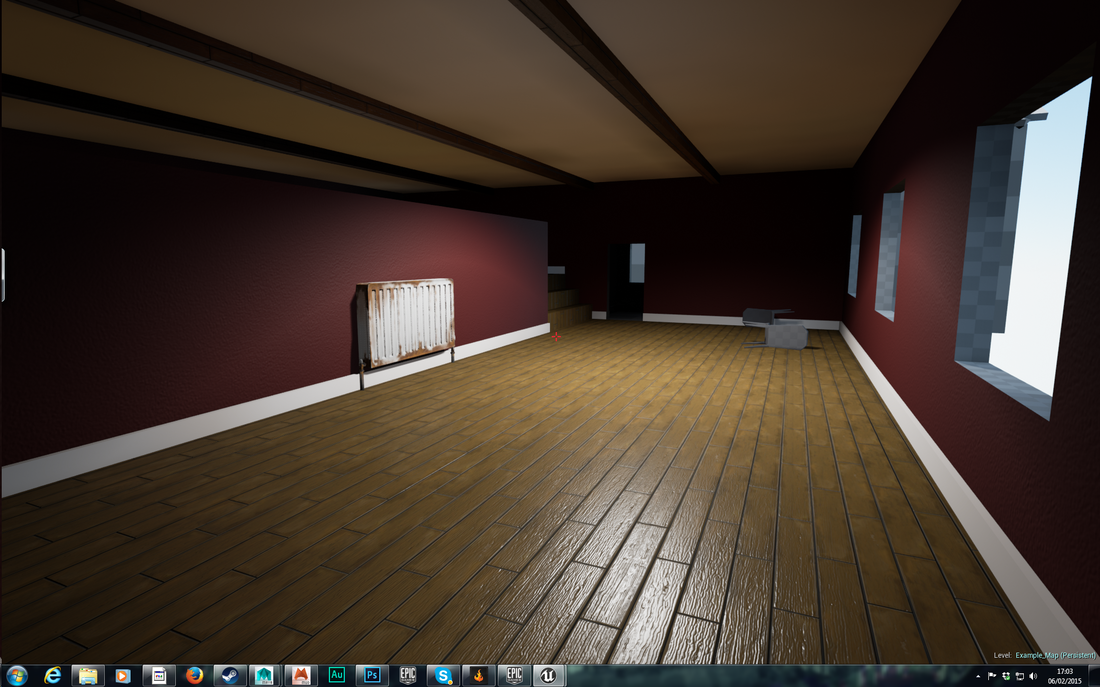
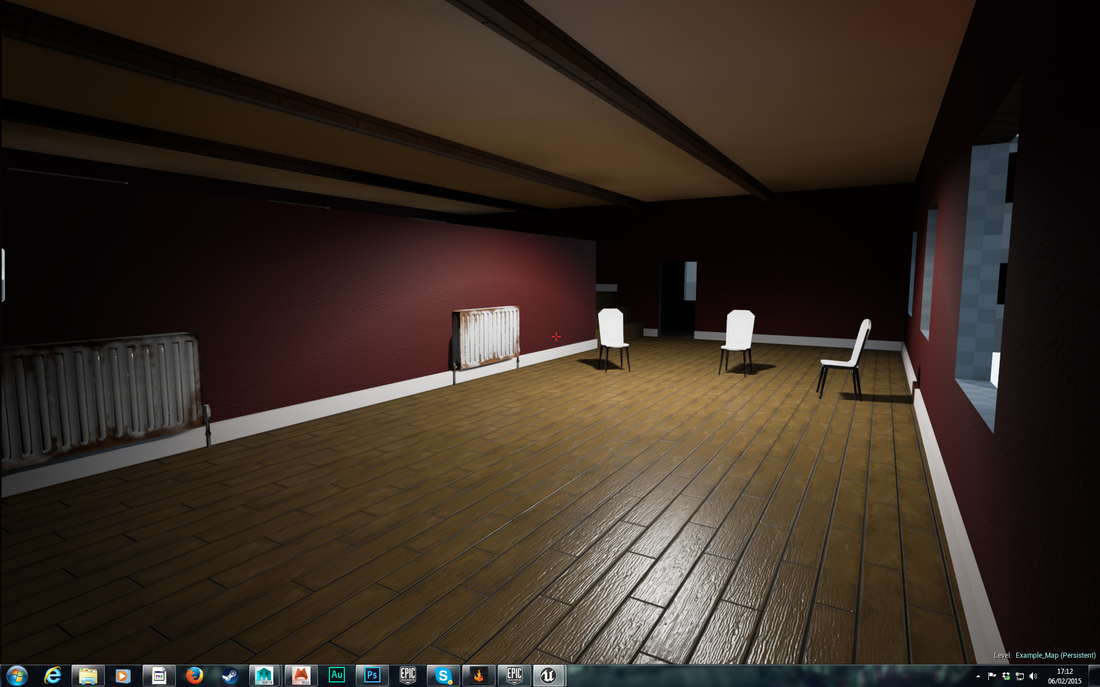
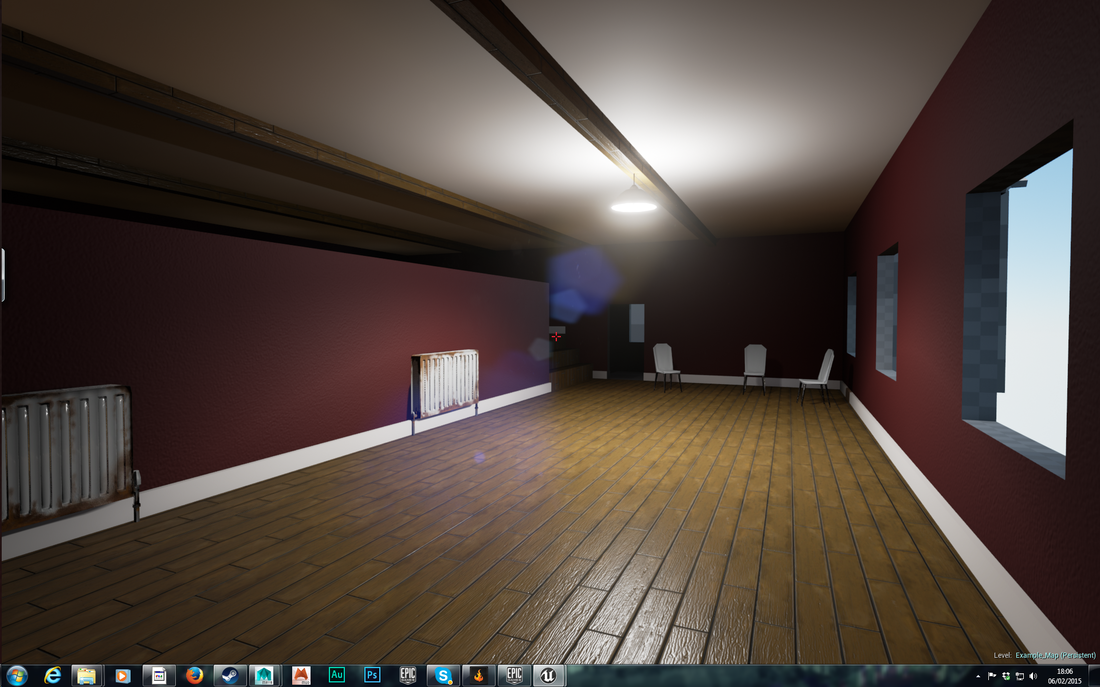
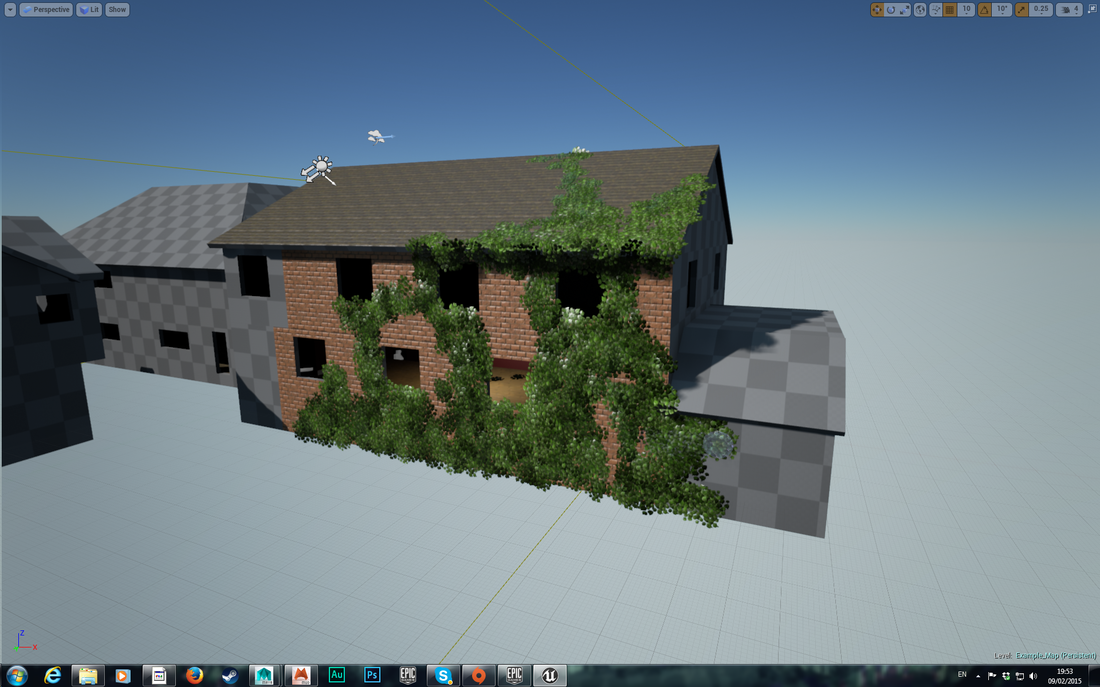
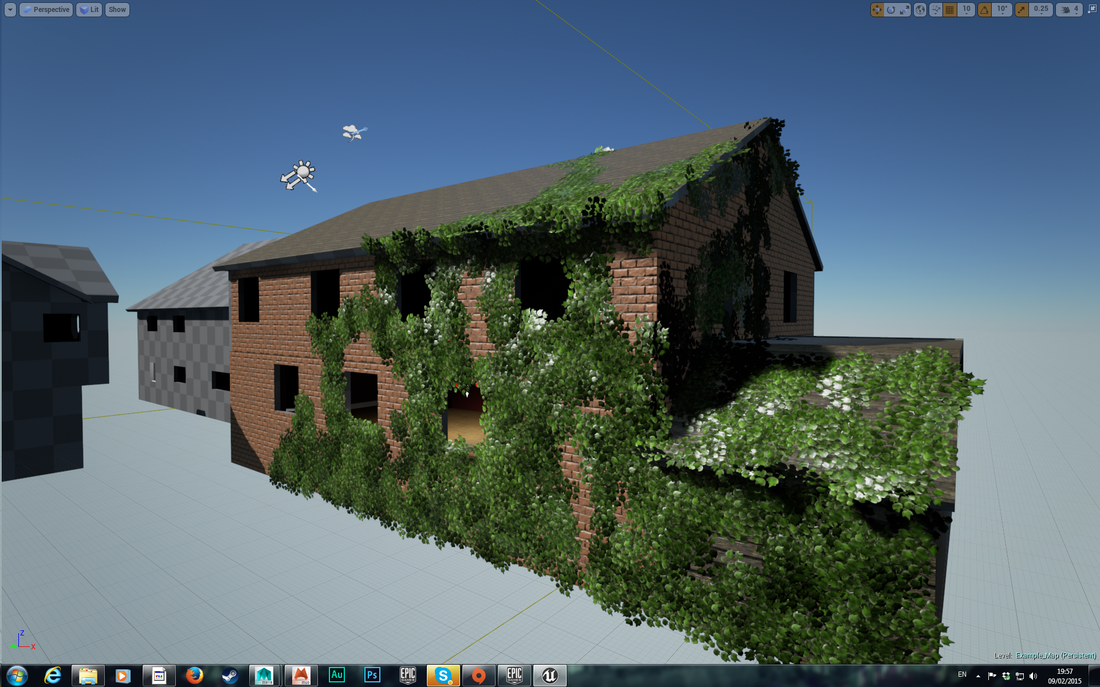
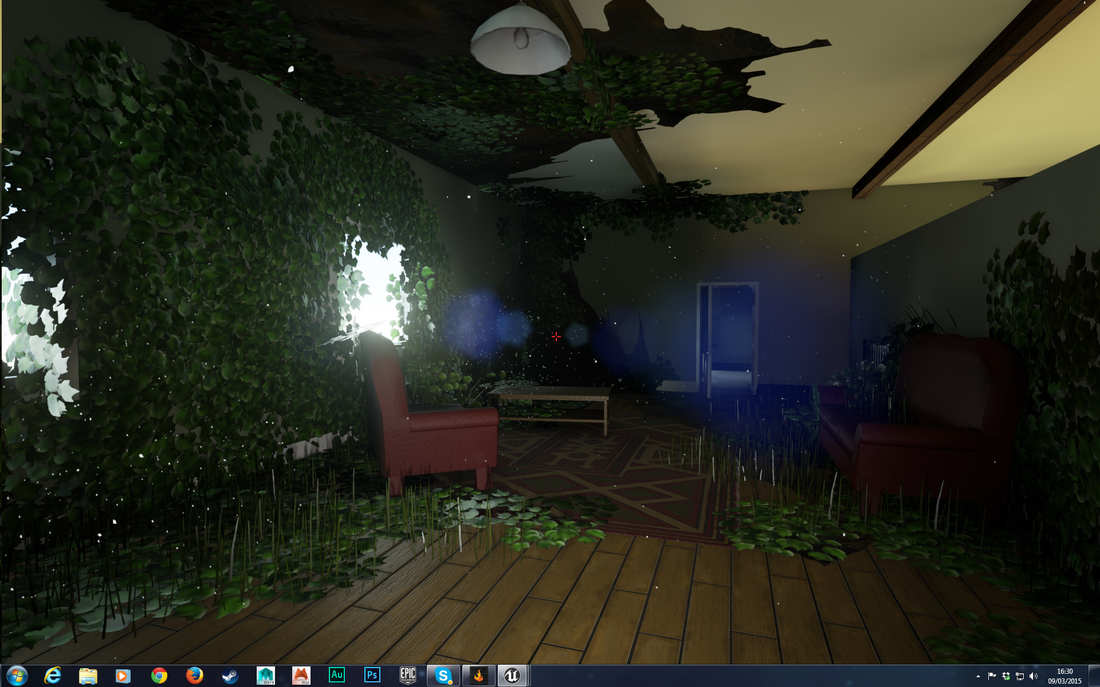
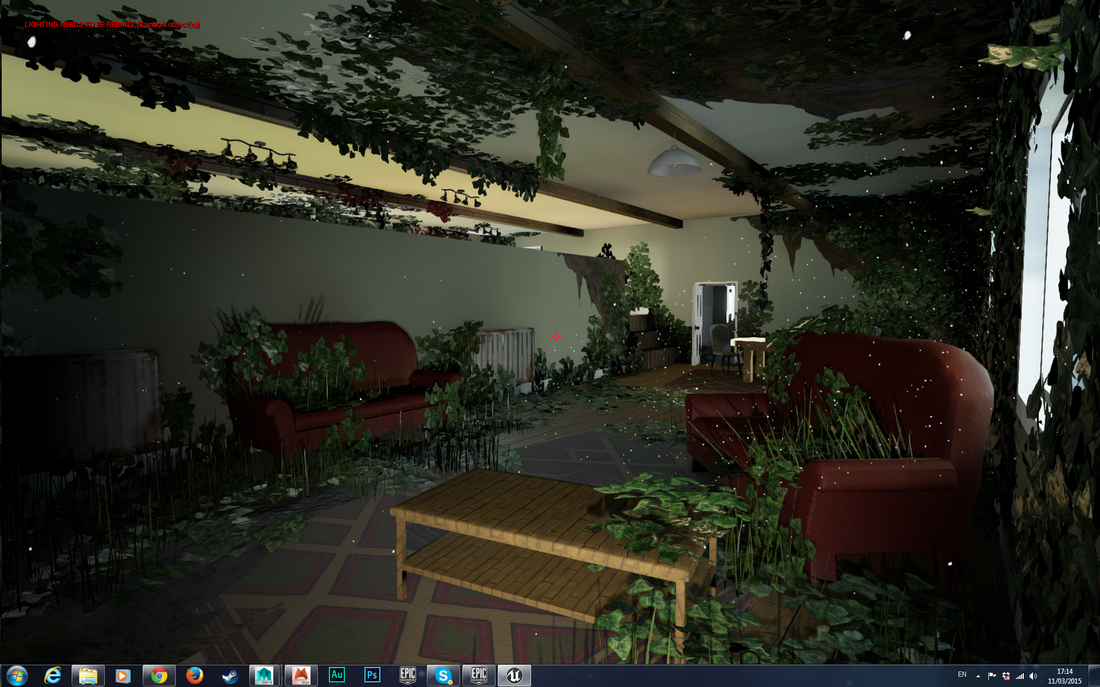
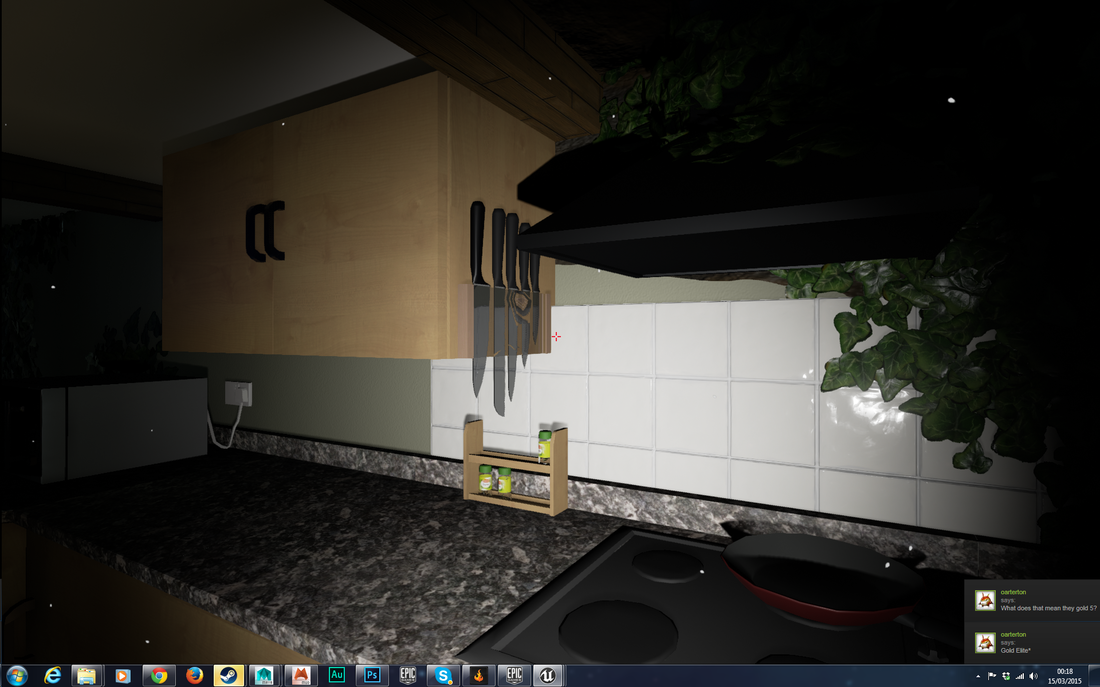
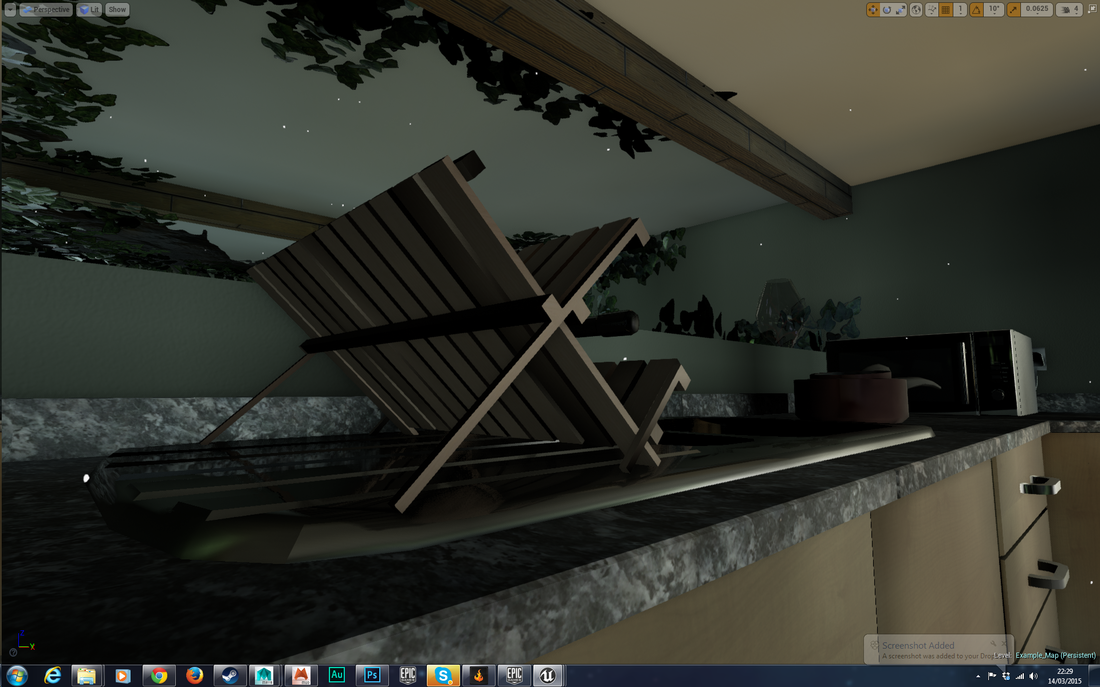
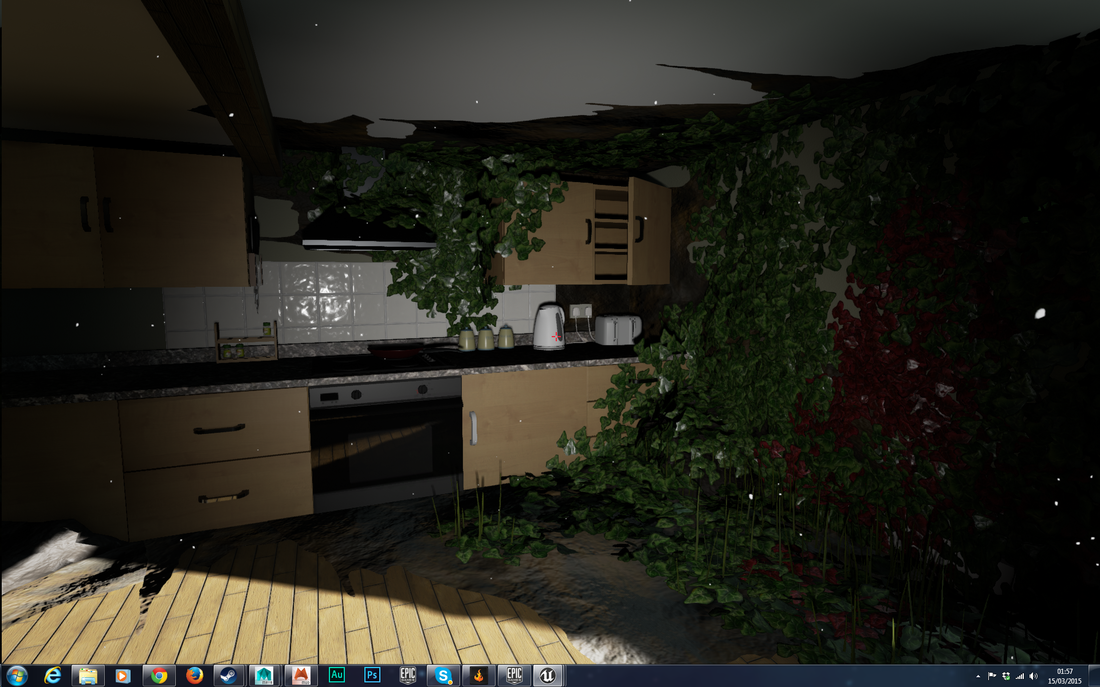
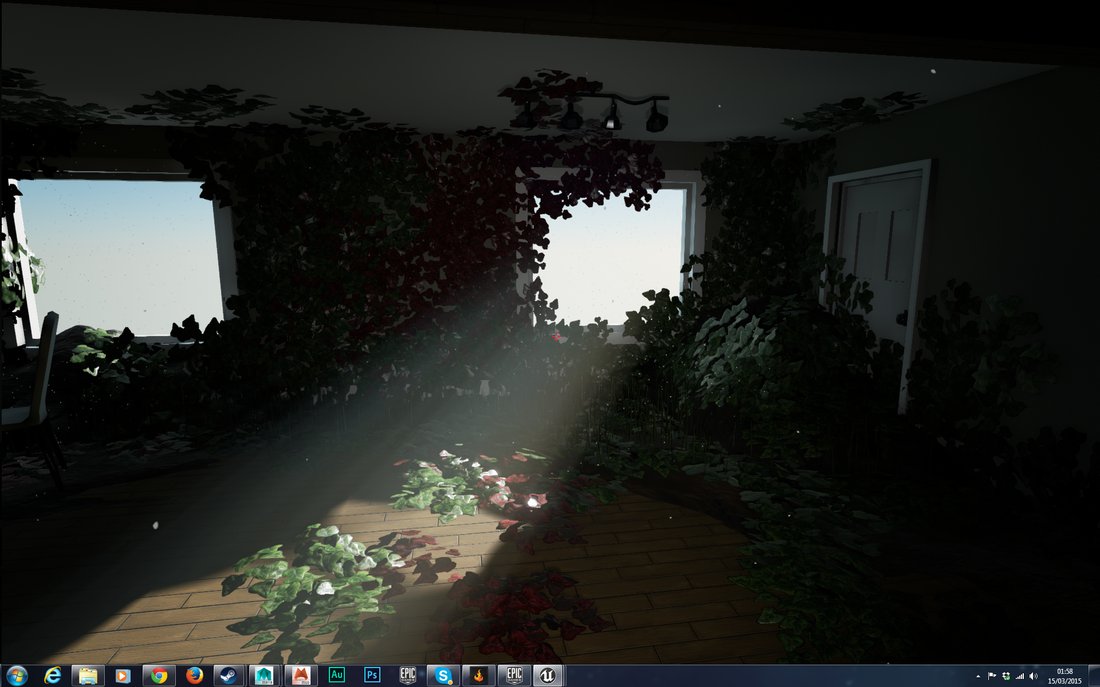
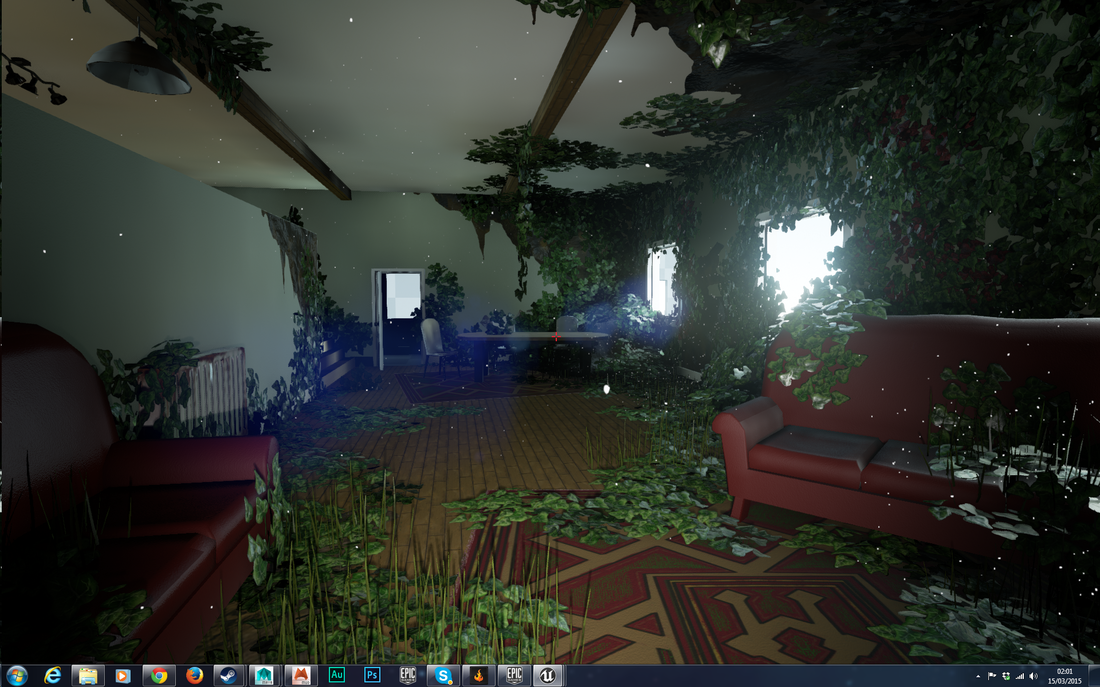
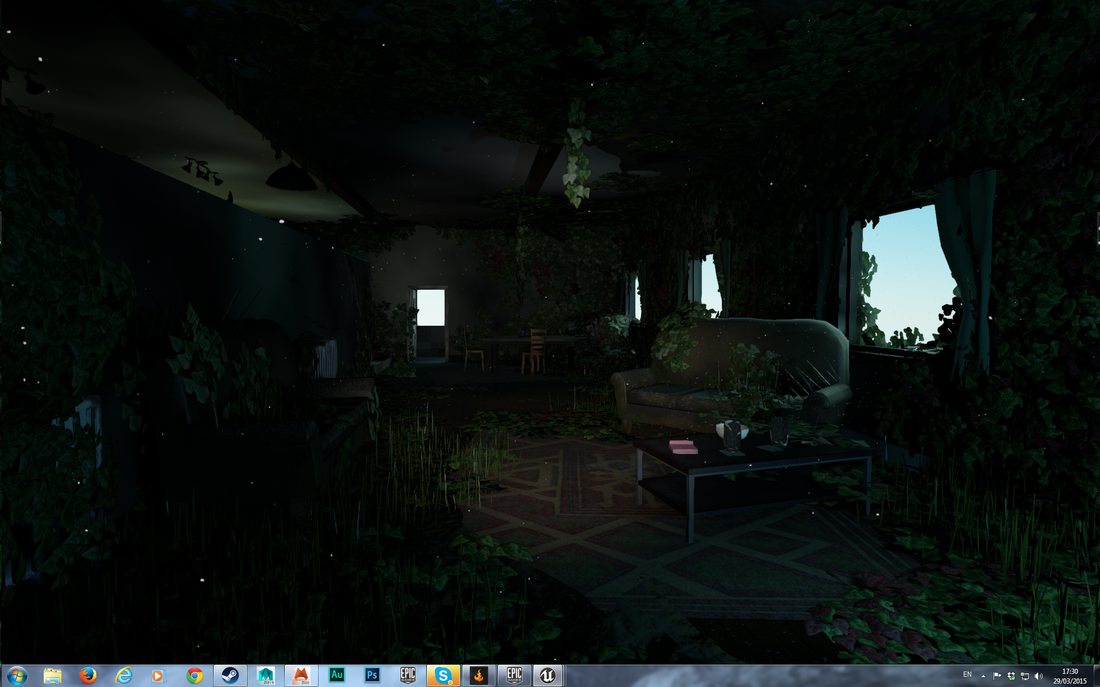
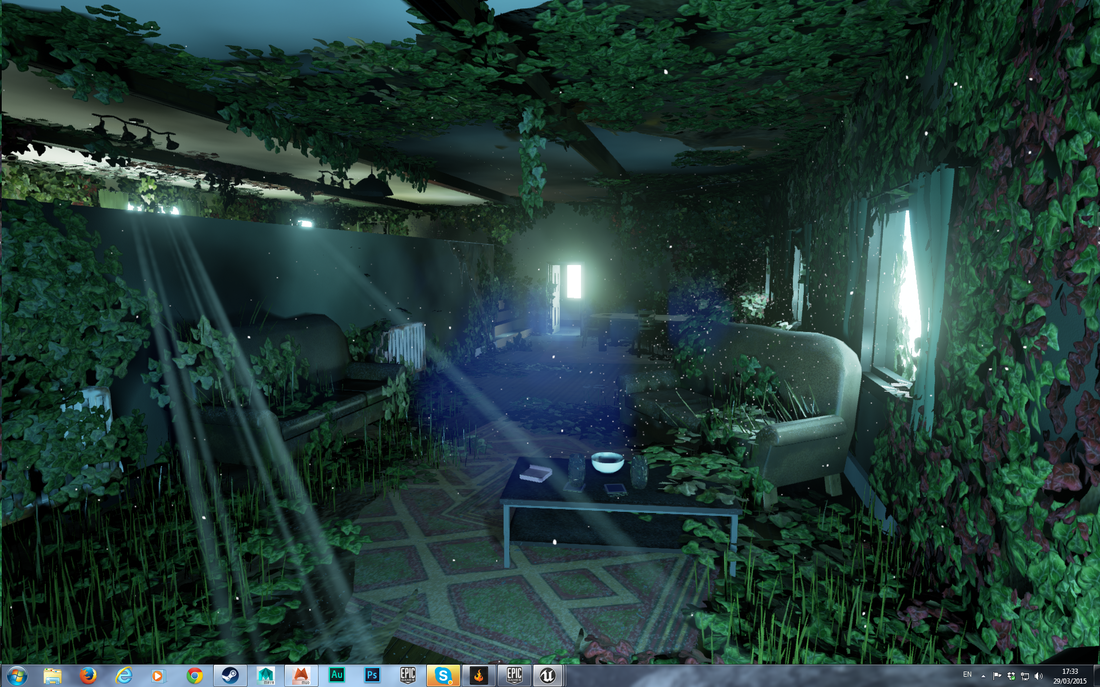
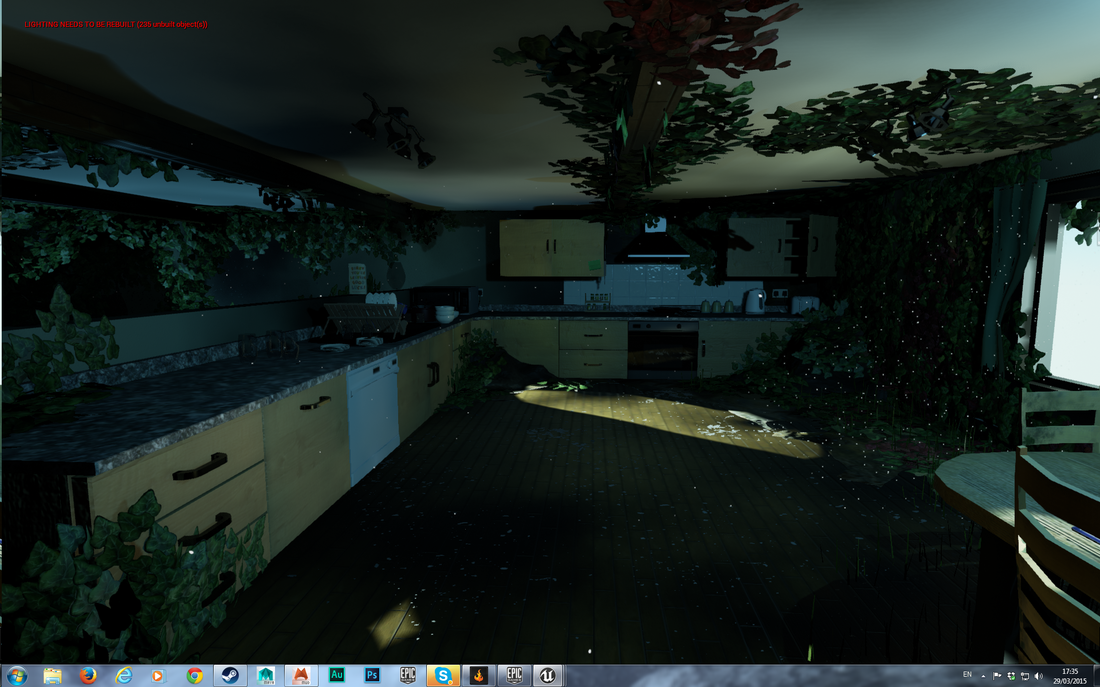
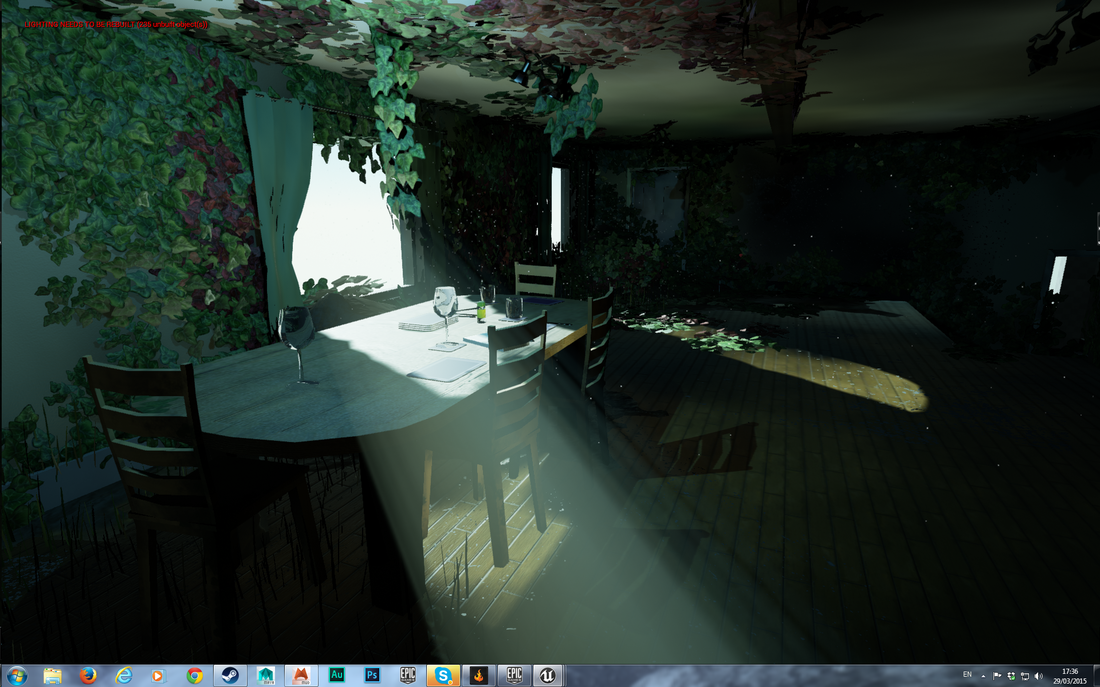
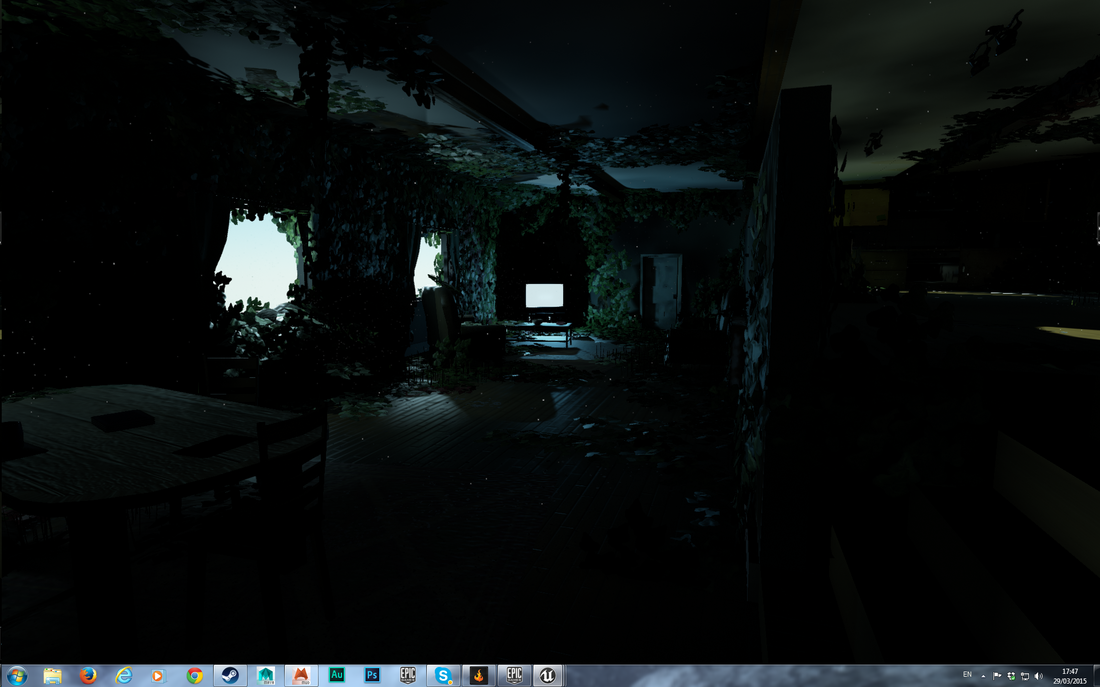
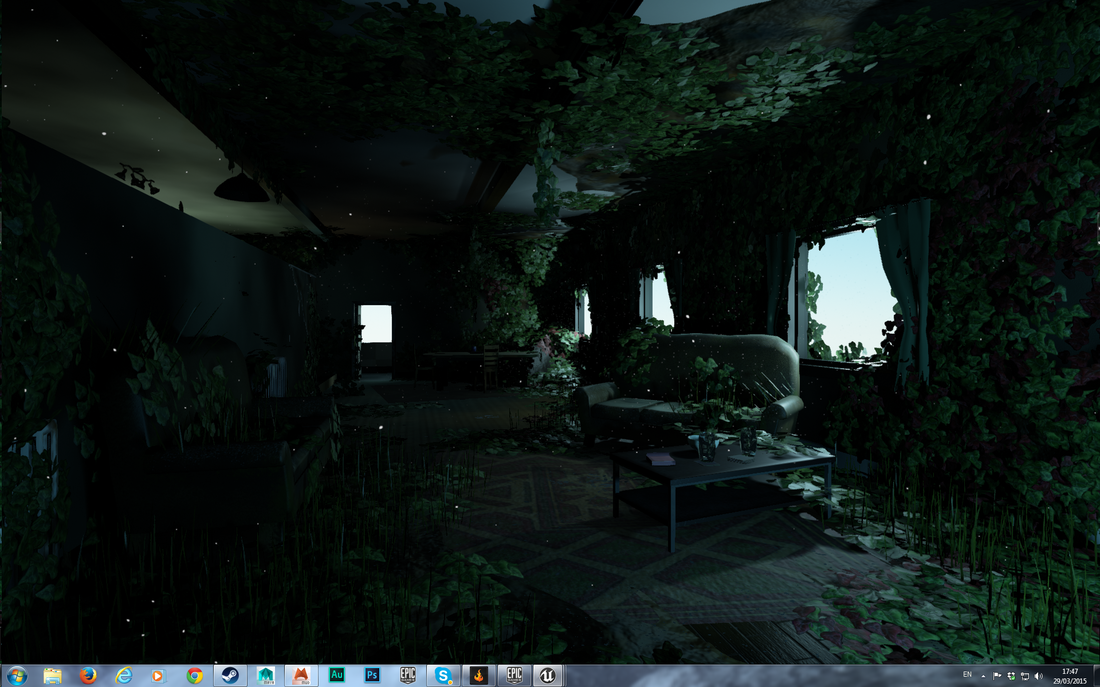
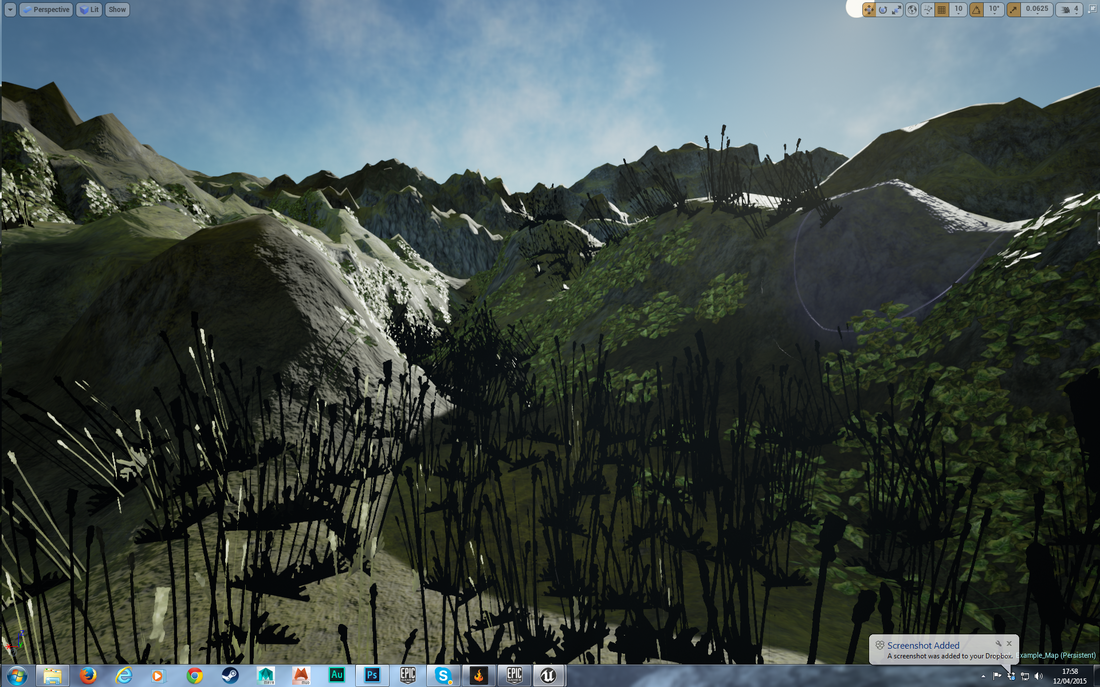
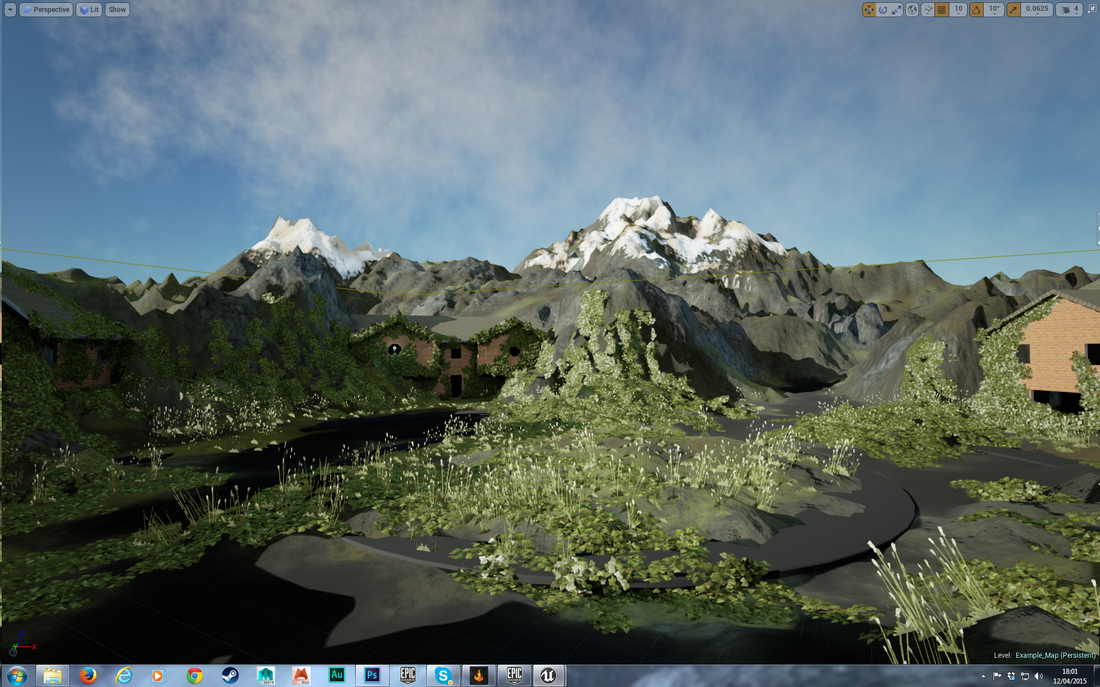
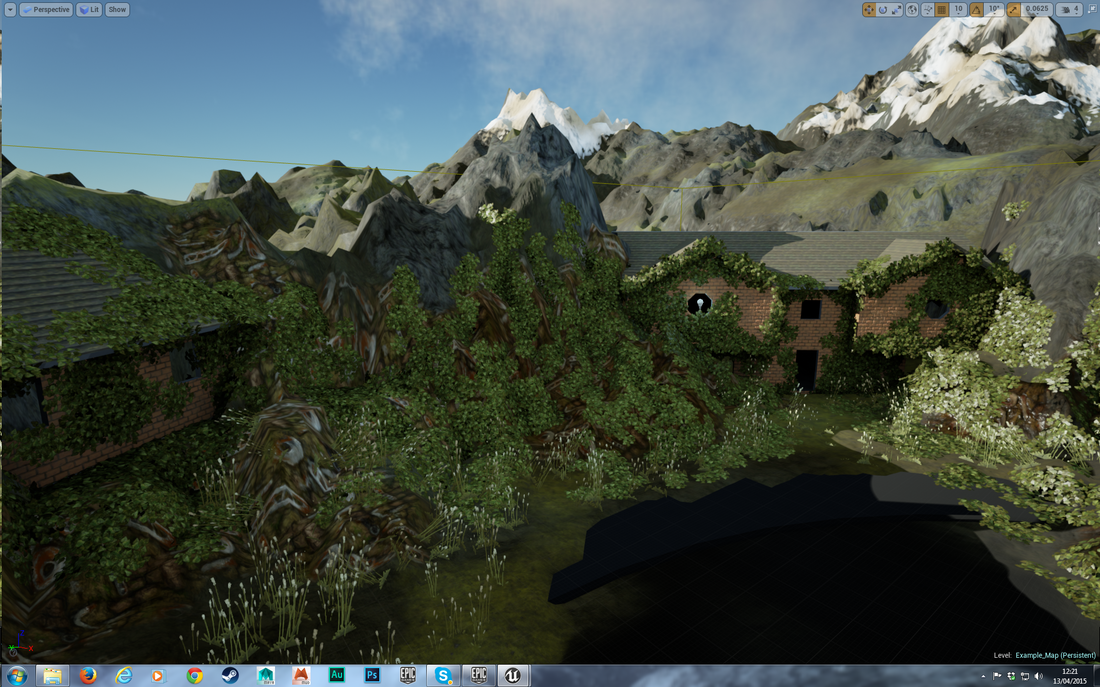
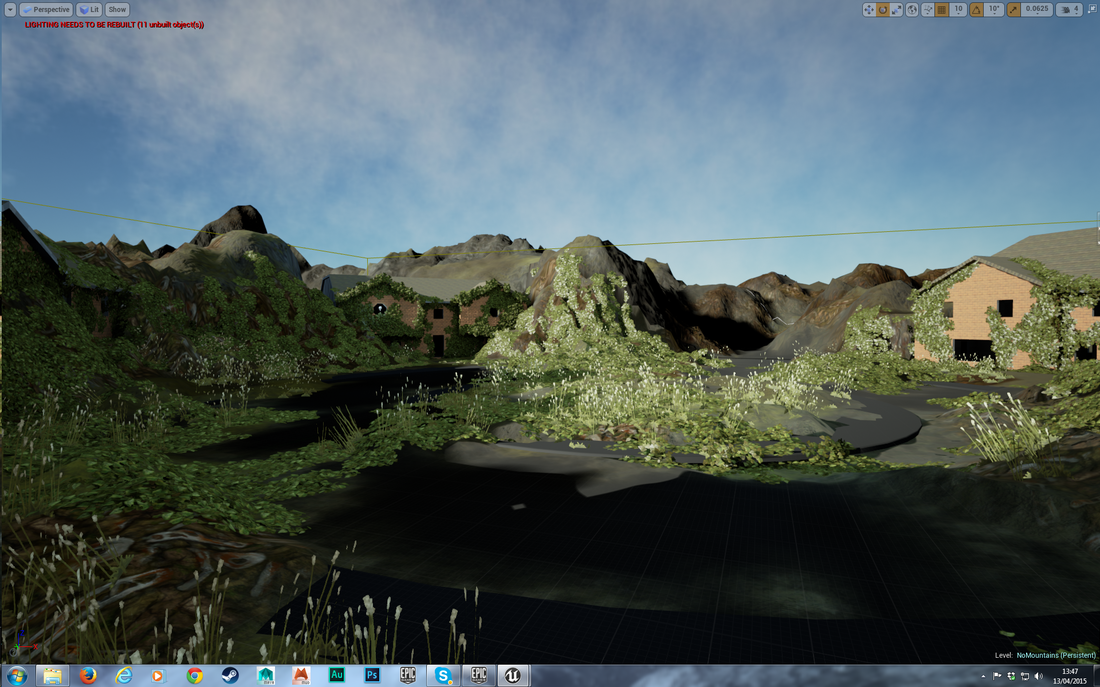
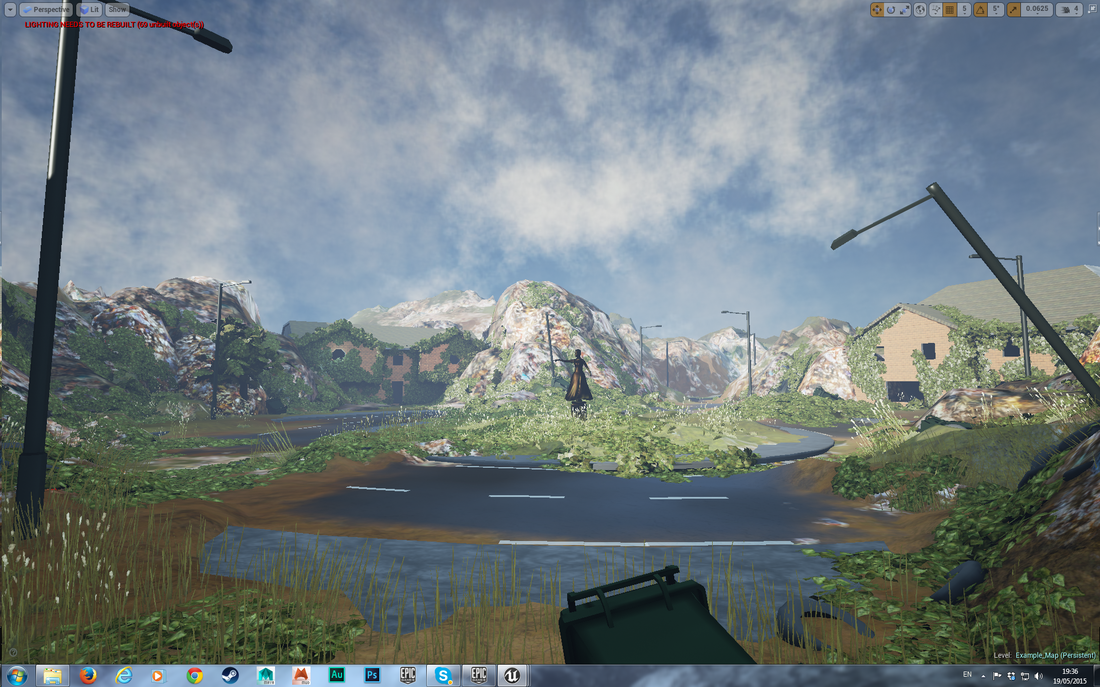
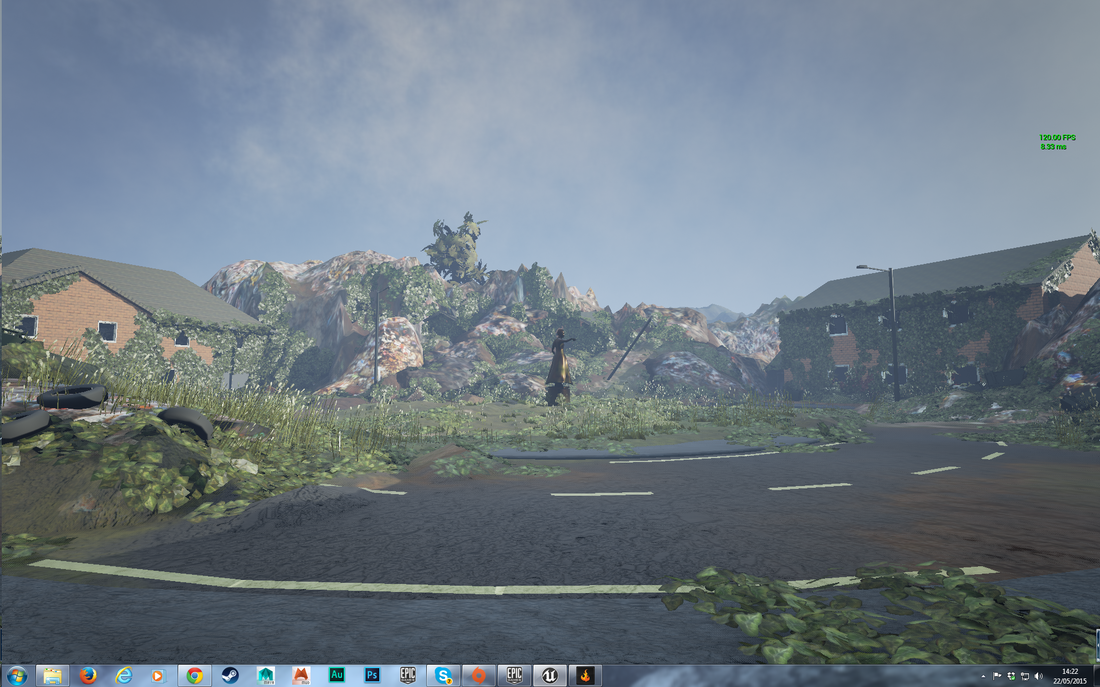
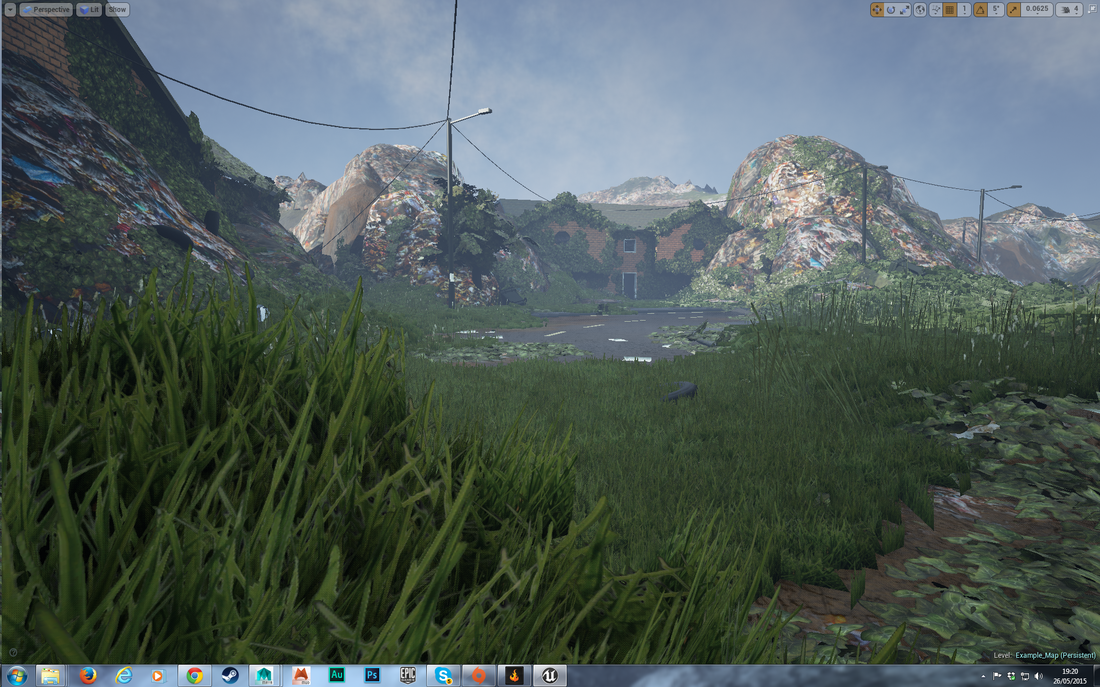
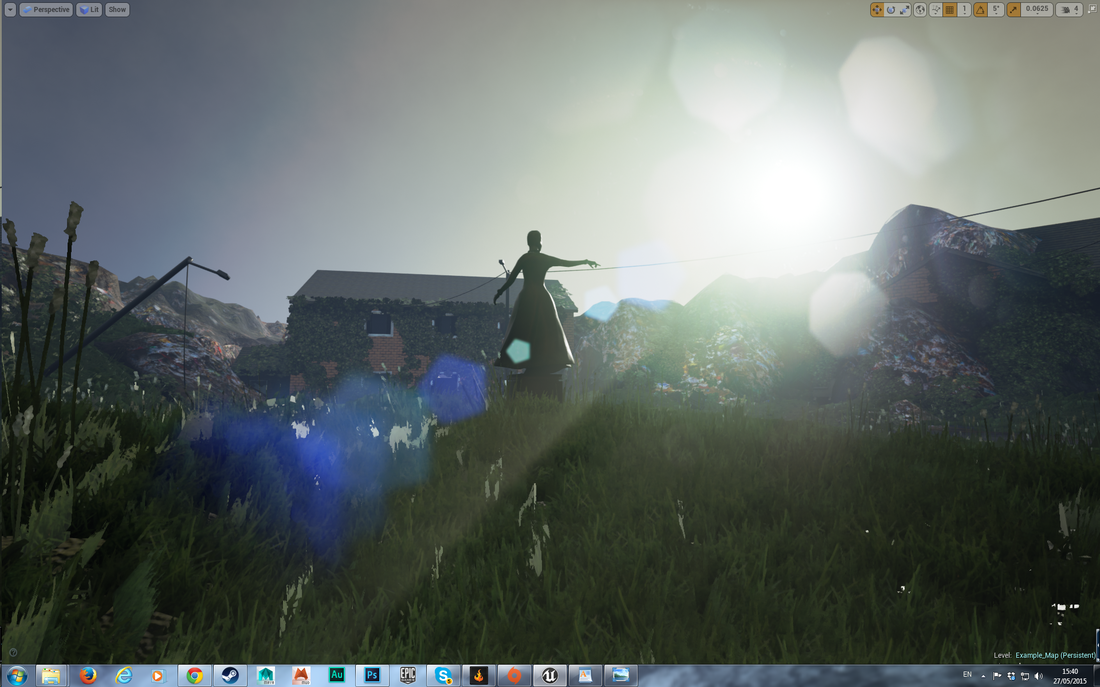
Below shows some vines that I created for the level and below that are screenshots of the demo level for the class!
Below shows some vines that I created for the level and below that are screenshots of the demo level for the class!


LOD - Level of Detail
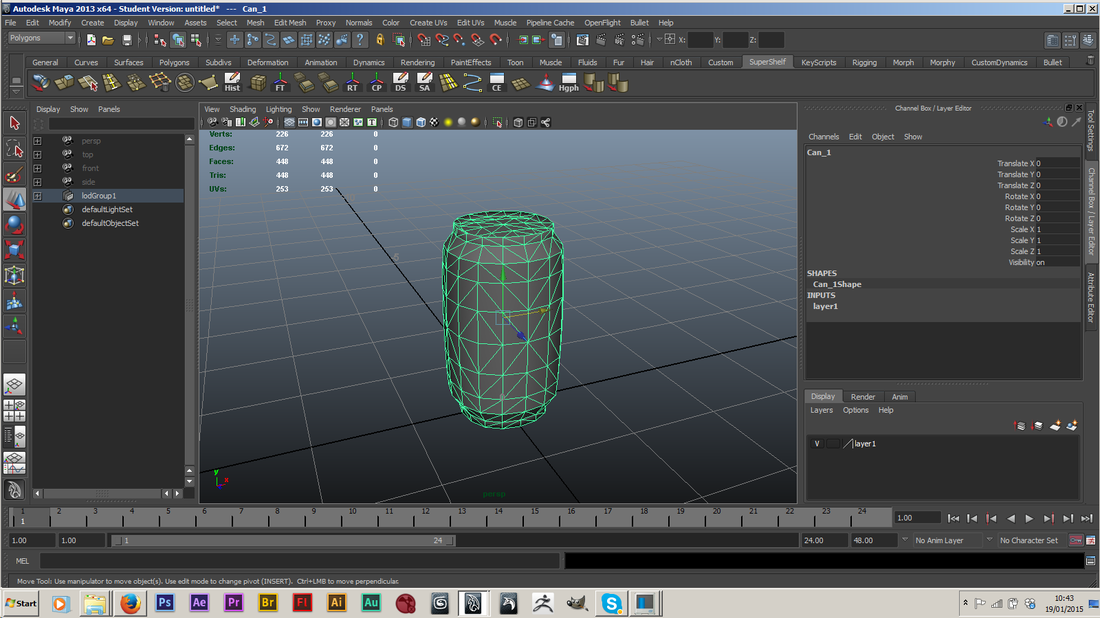
I wanted to learn how to use Level of Detail grouping in Maya as a way of optimising the game.
This allows you to create single assets with multiple levels of details, so that the closer you are to a model in the game, the higher poly count it will have.
I learned how to do all of the below from the Unreal Engine 4 documentation site: https://docs.unrealengine.com/latest/INT/Engine/Content/FBX/StaticMeshes/index.html#staticmeshlods
I created this Can below as a test. I created the highest polygon count model that I needed as the detailed model 'can_01'. Then I duplicated it and deleted edge loops, saving a middle detail model and then duplicating it again and deleting edges to as low a polygon count as possible.
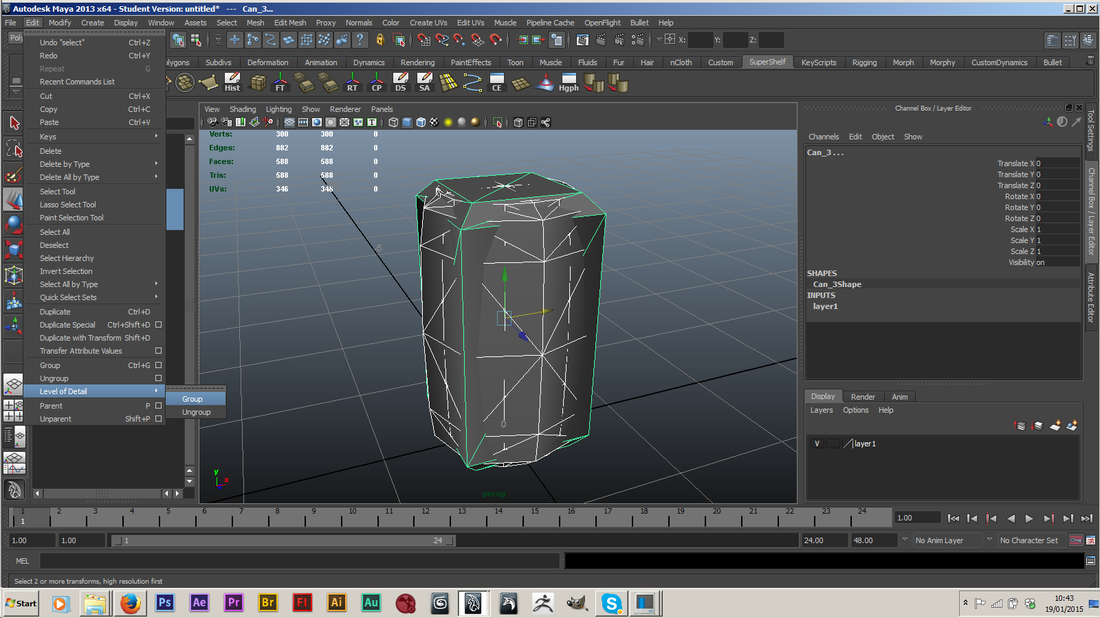
The three images below show how the different models load in as you get closer to the model. You can also see how the polygon count increases in the top left of the screen.


Below is a chair that I made for the game, with the high poly model on the left. Only 2 separate LODs were needed. Although I could continue to work on the high poly chair and create a more detailed level for it.

Using LODs effectively should help us keep the game running smoothly. It will allow us to have lots of models visible in the screen space, but with LODs they will put far less stress on how the well the game runs.
I hope to learn a lot more about optimising assets for games, as this is one of the key parts in any video game developer's modeling pipeline.
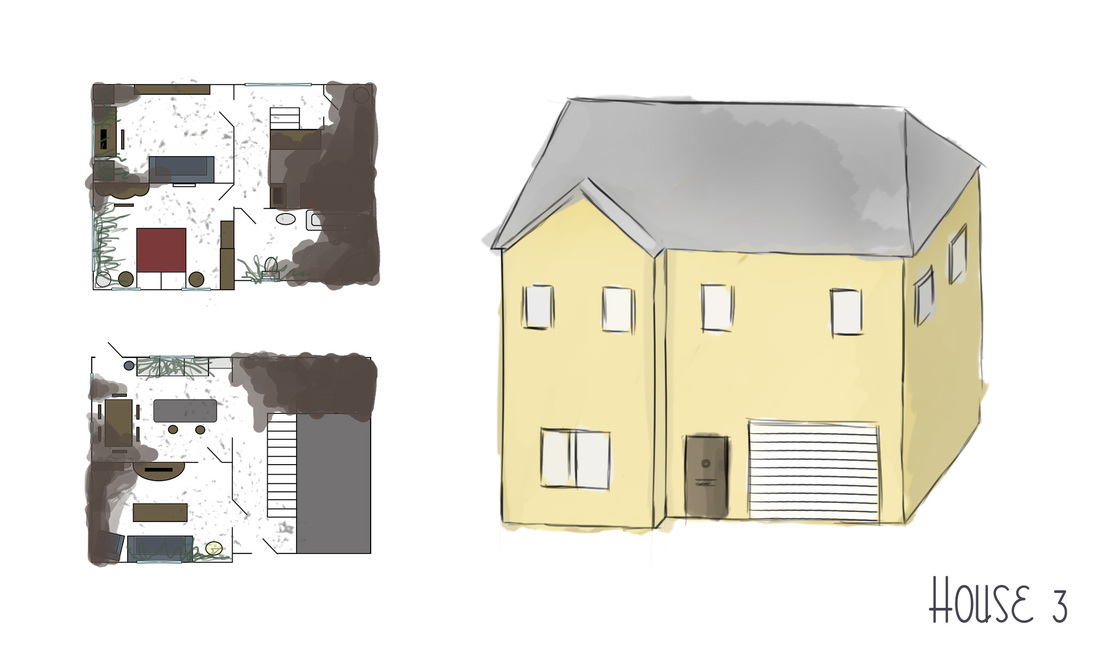
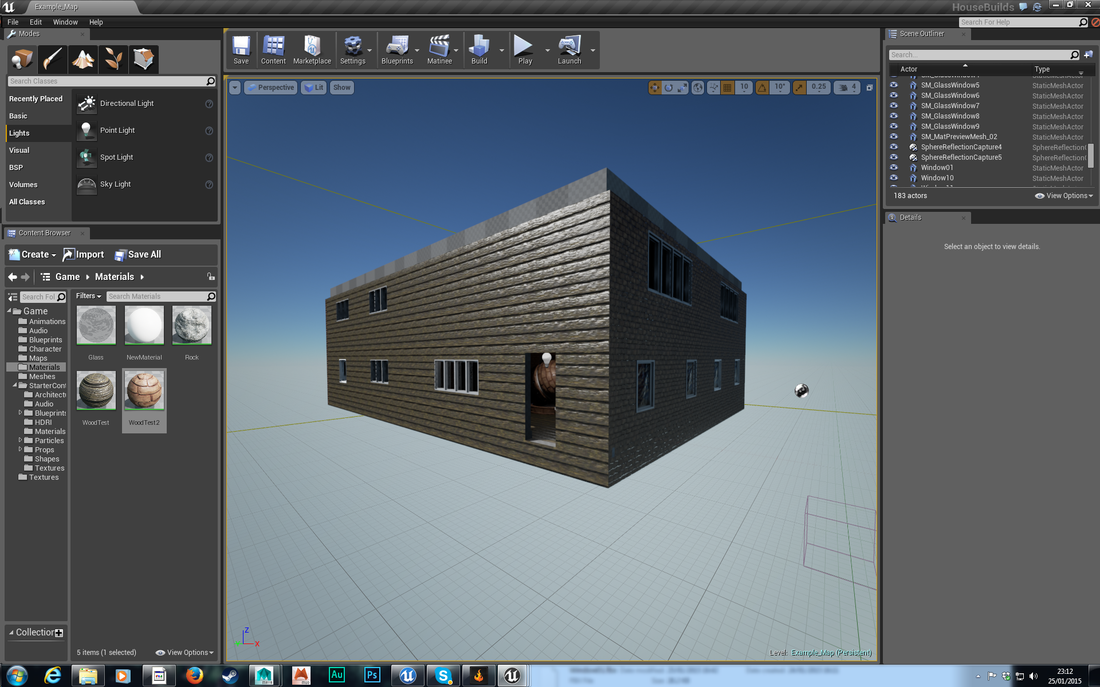
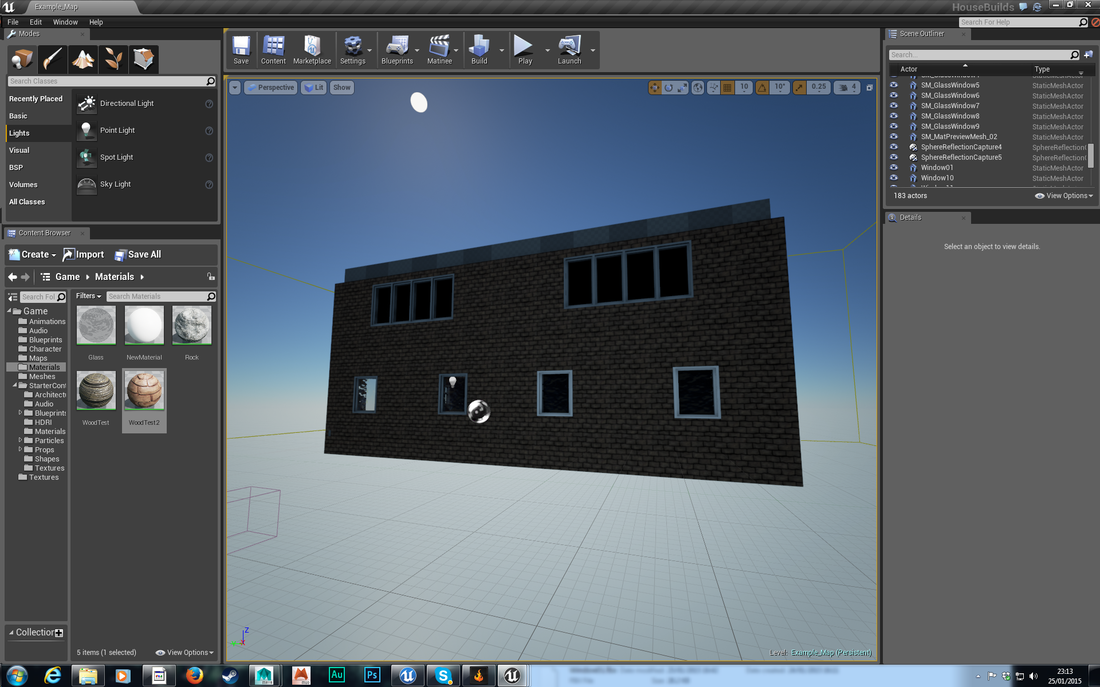
Blocking out the houses.
Elly referred me to the Unreal Starter tutorials: https://www.youtube.com/playlist?list=PLZlv_N0_O1gak1_FoAJVrEGiLIploeF3F
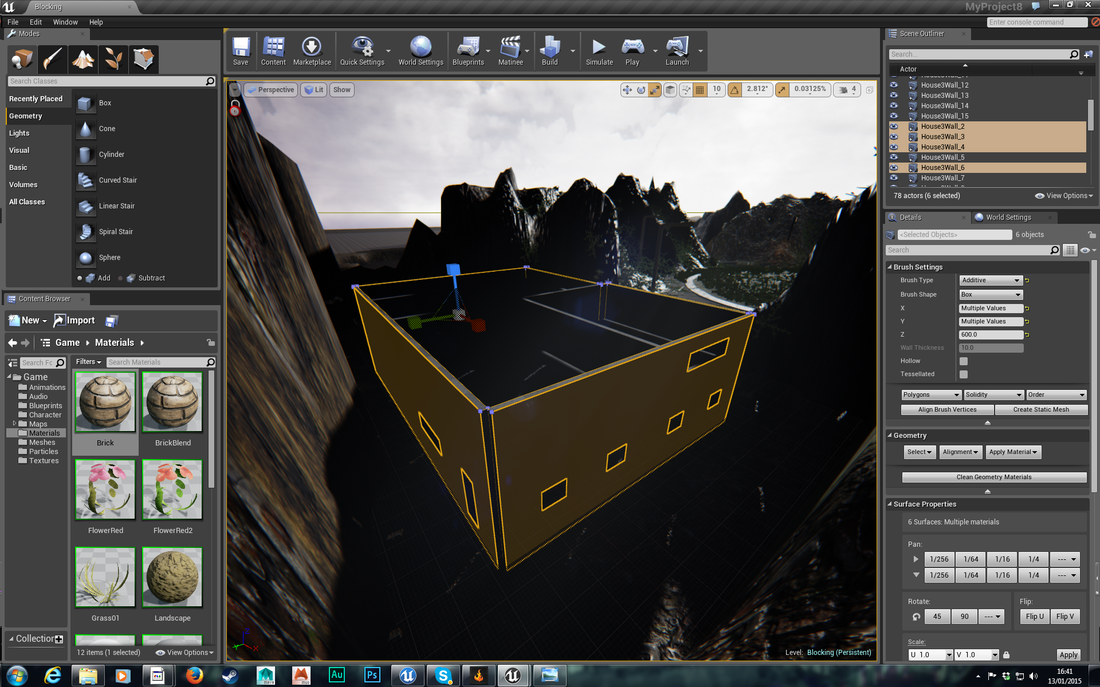
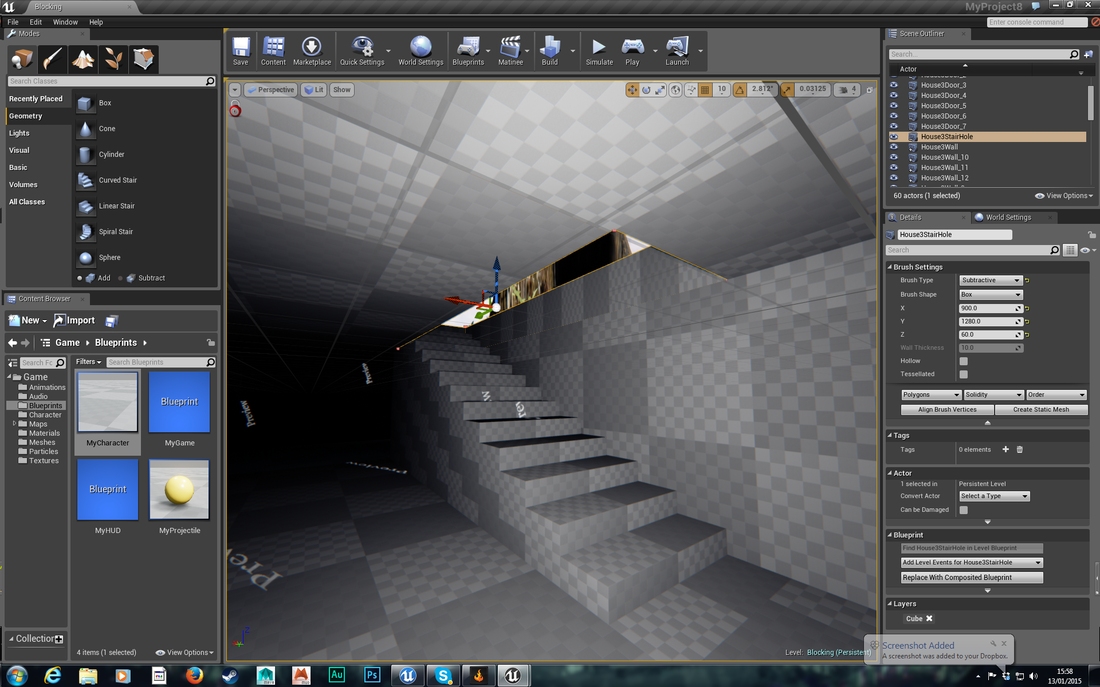
These show how to create static meshes within the Unreal Engine using geometry brushes.
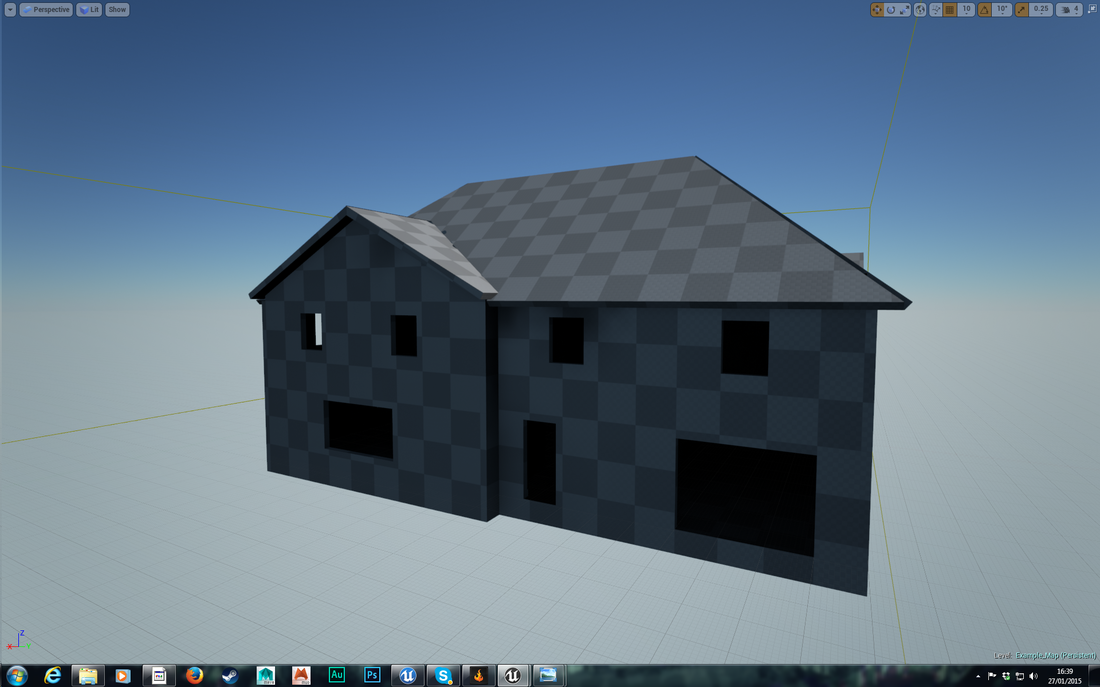
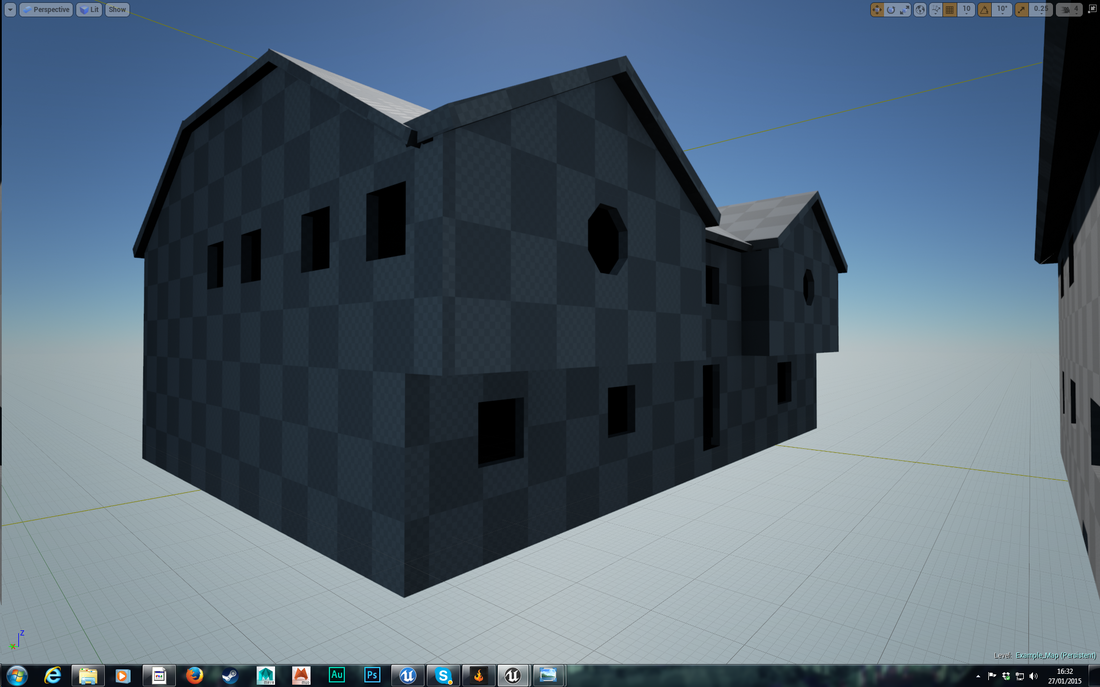
I used this knowledge to start creating the skeletons of the houses within Unreal. So I worked out how long the walls of each room should be from Elly's floor plans, and then created walls in Unreal with the lengths I'd determined before.
All of the measurements in Unreal work in centimetres. So to create walls 9 metres long you simply enter 900 into the respective axis measurement for the geometry brush.
These show how to create static meshes within the Unreal Engine using geometry brushes.
I used this knowledge to start creating the skeletons of the houses within Unreal. So I worked out how long the walls of each room should be from Elly's floor plans, and then created walls in Unreal with the lengths I'd determined before.
All of the measurements in Unreal work in centimetres. So to create walls 9 metres long you simply enter 900 into the respective axis measurement for the geometry brush.
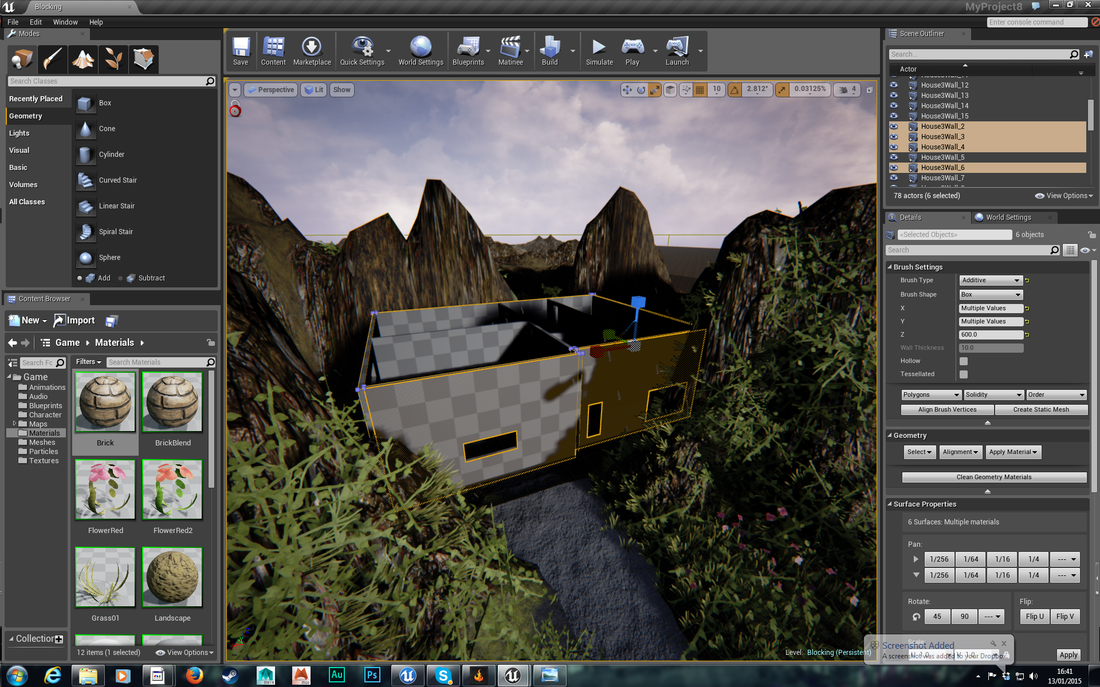
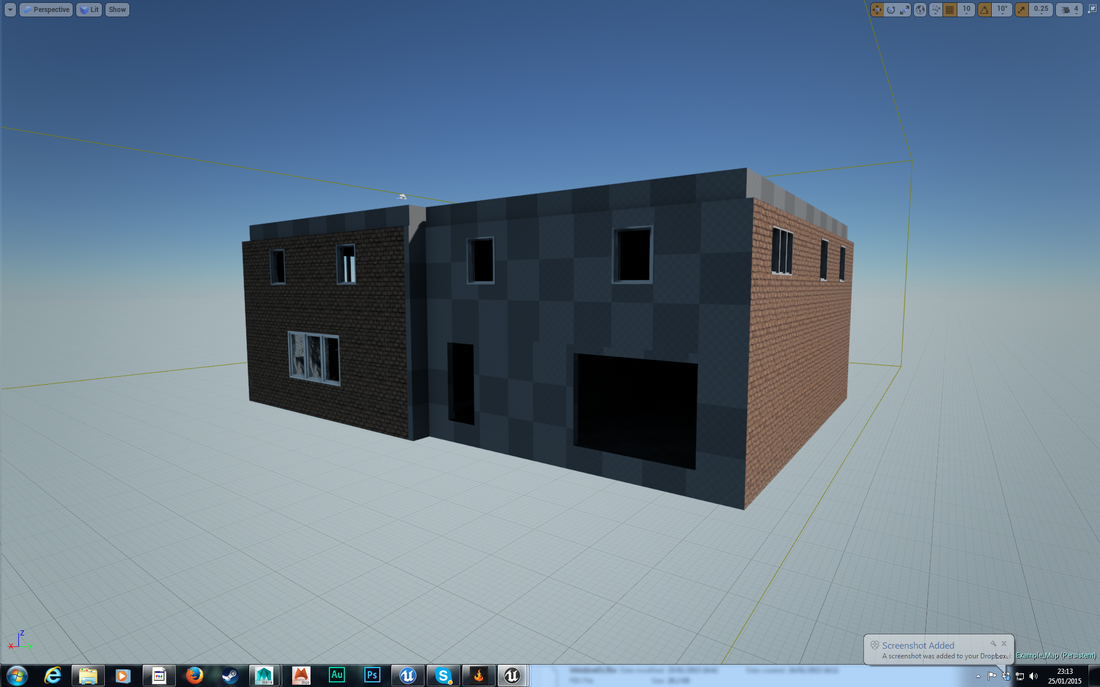
When applying materials to geometry brushes, the material applies to one face. This is how I came to realise that I'd made quite a big mistake when making the house.
Basically, every interior wall in the house needs a separate face so it can have different textures in each room. I had extended some of the geometry brushes to act as a single wall that covered two or more rooms. This would have resulted in being unable to give different rooms different wallpapers.
So I have to go back and split up all the walls, so that they allow the rooms to each have unique textures.
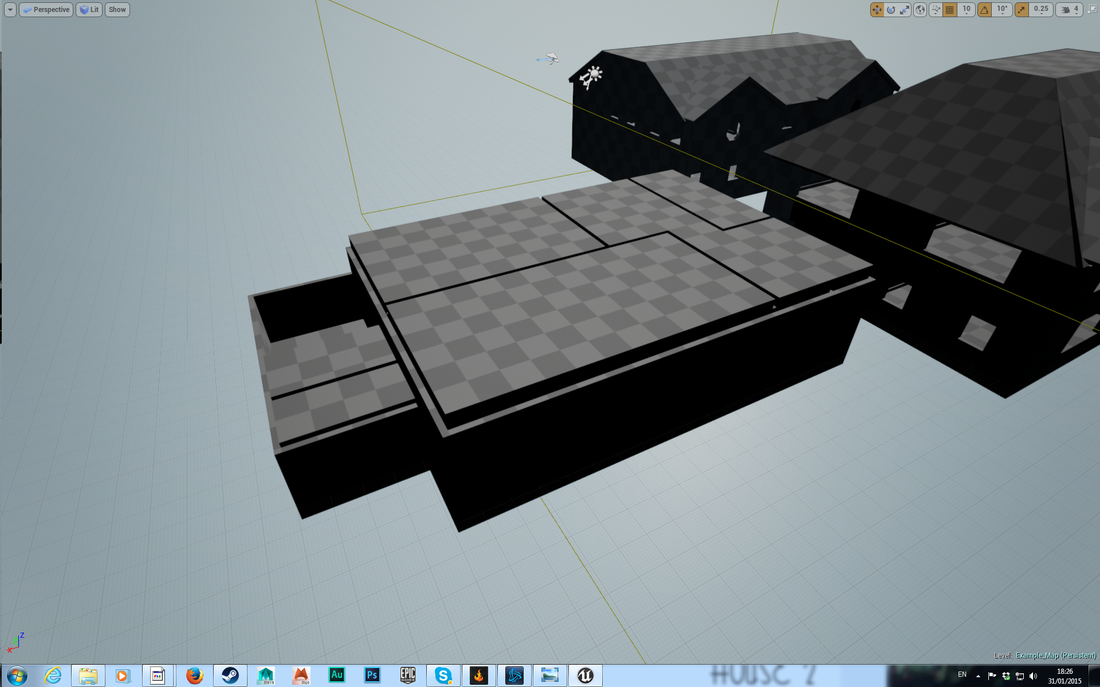
When it comes to the ceilings / floors I opted to use one geometry brush to cover all the rooms. This means that all the carpets and ceilings will look the same for now, but I don't see that as a problem, compared to walls looking the same.
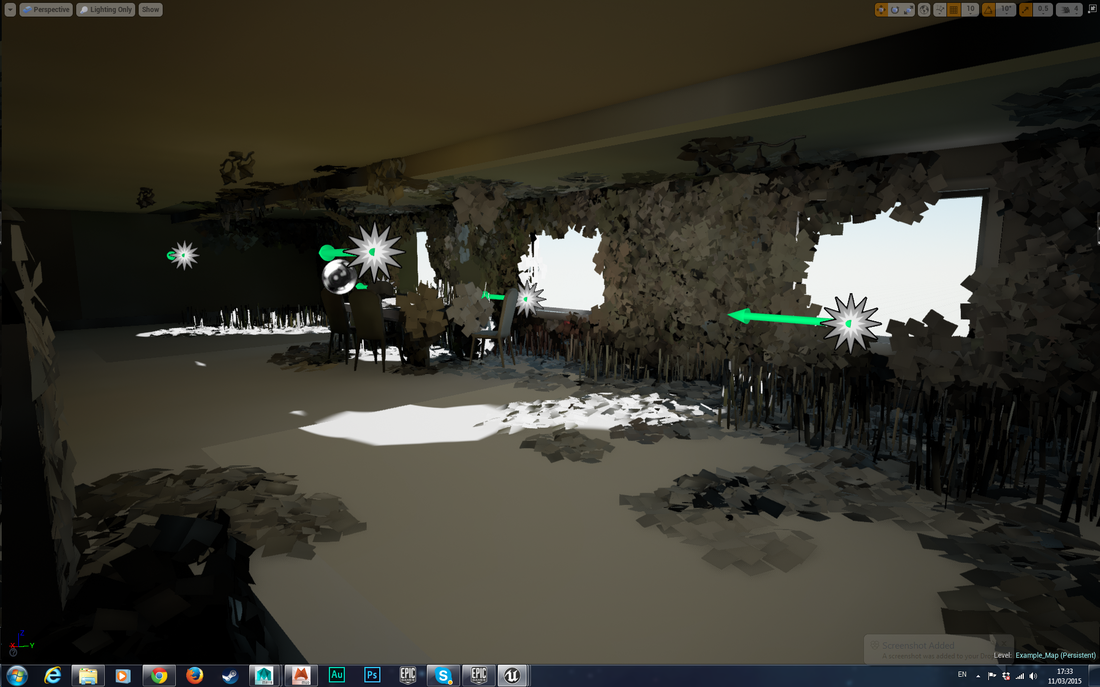
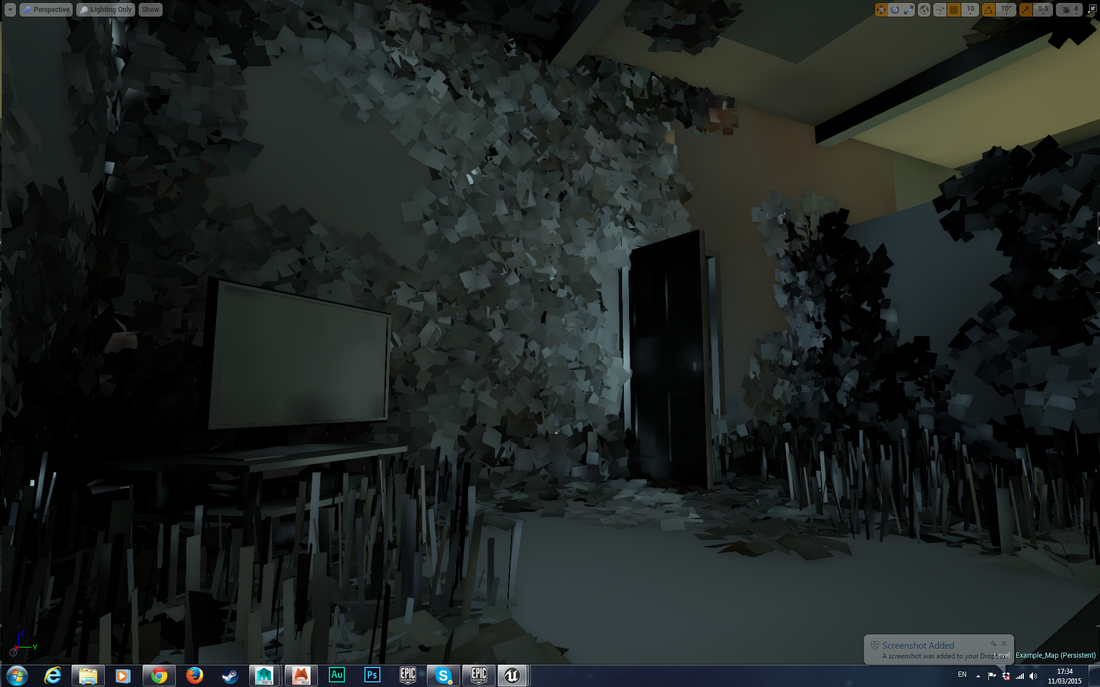
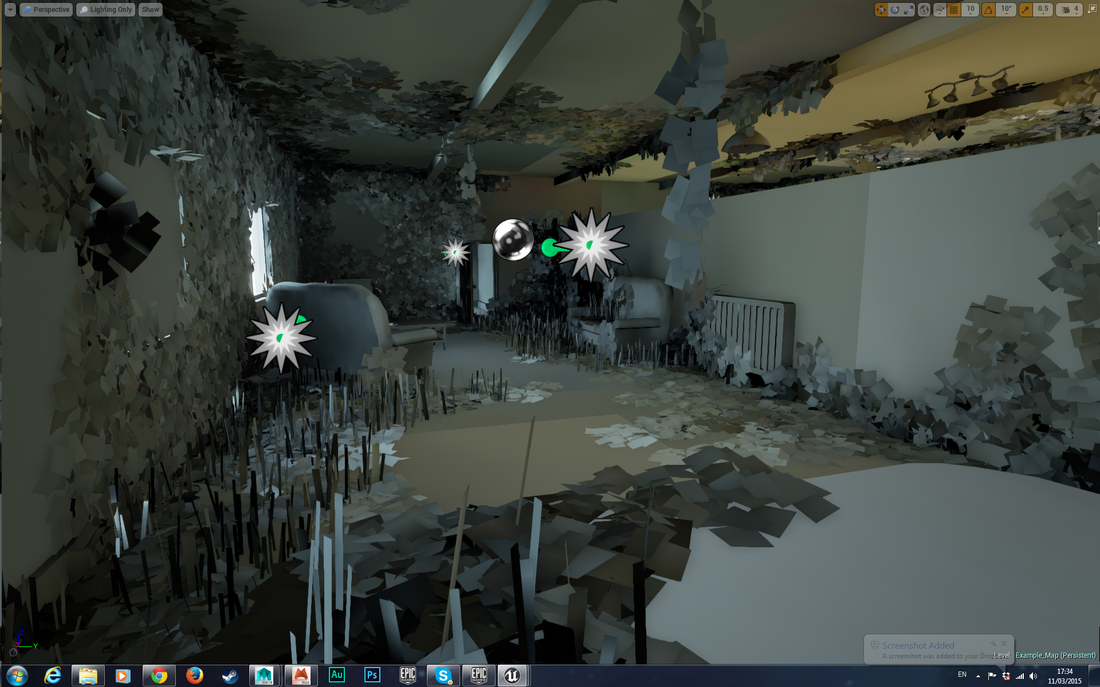
Affixing a light to the Character.
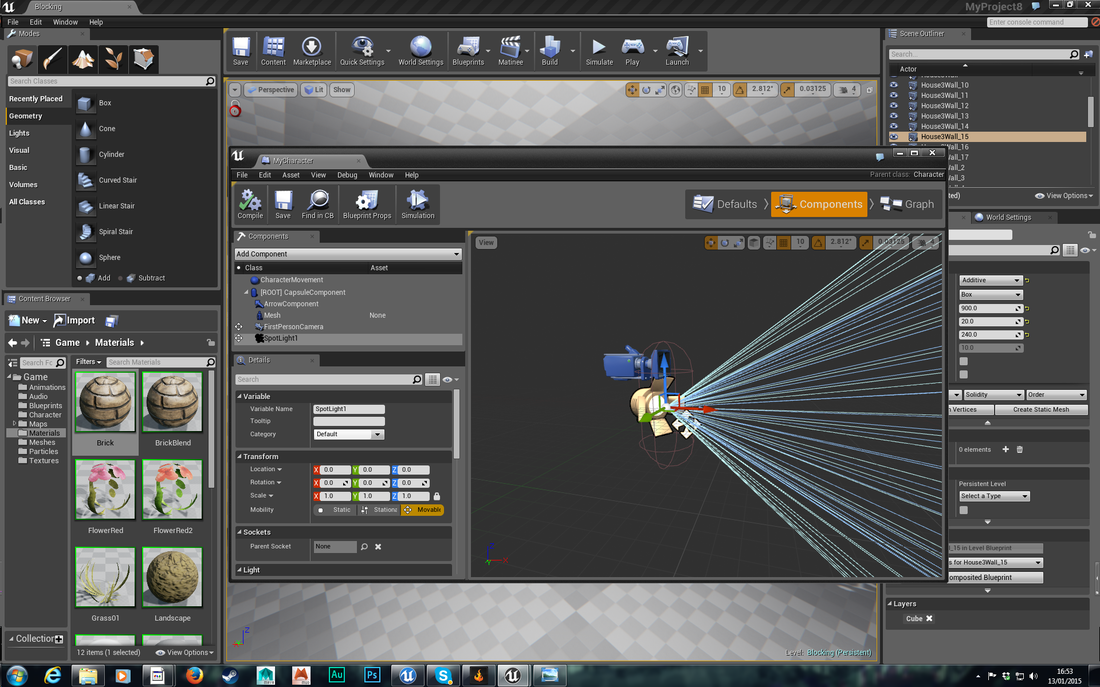
For the purposes of exploring the level as it was being built I wanted to give the character a torch so that I could see how the game looks from the character's perspective.
It turned out to be quite a simple thing to do. I'd learned how the 'components' section of the blueprint menu worked when I had to delete Unreal's gun shape.
Essentially all you have to do is click 'Add Component' and select a spot light. This adds a fixed spot light to the character's shape.
Further research will be needed to make the spot light follow the character's view as you change where she looks, as at the moment the light stays fixed in the position below, regardless of where you point the character.
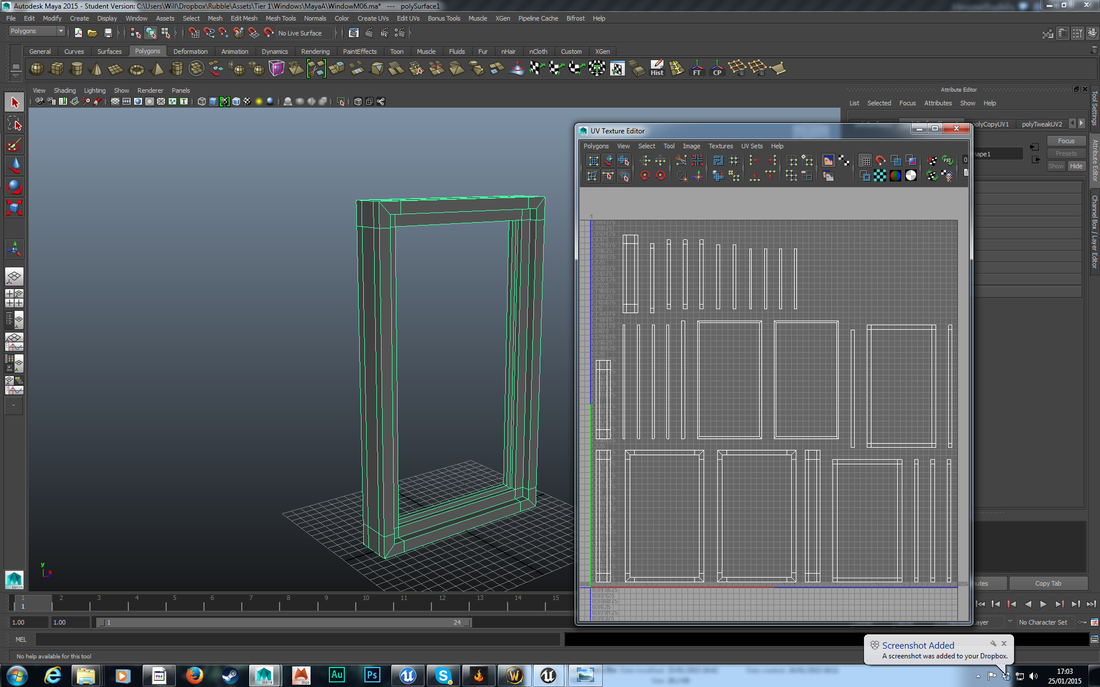
WinDOW LODs and Lightmaps


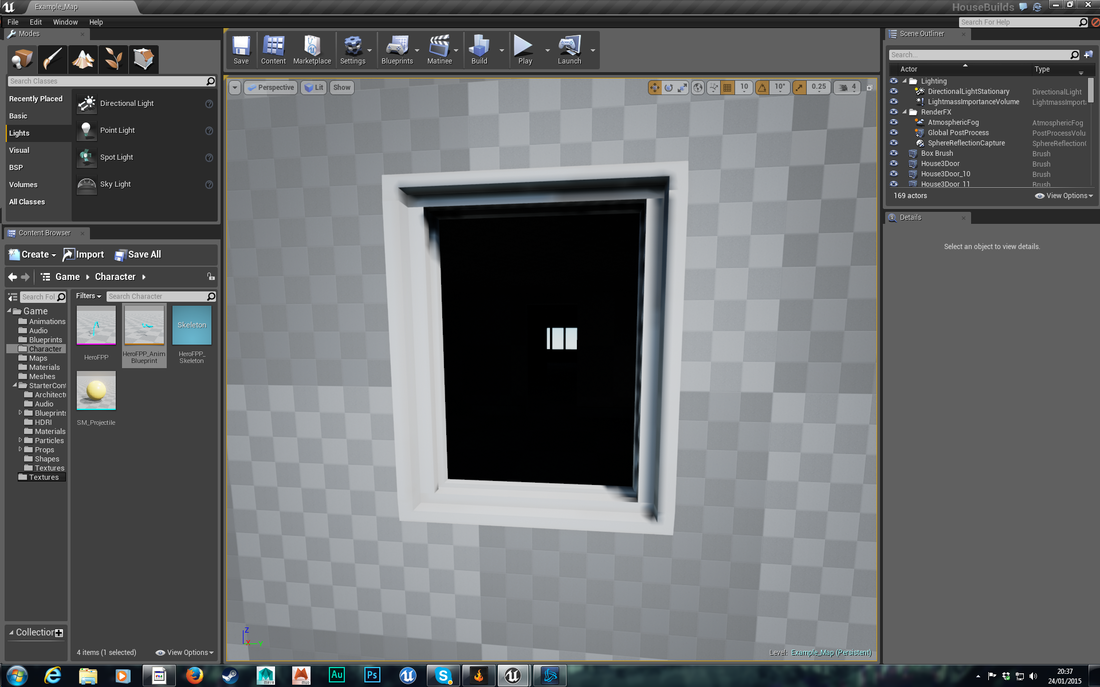
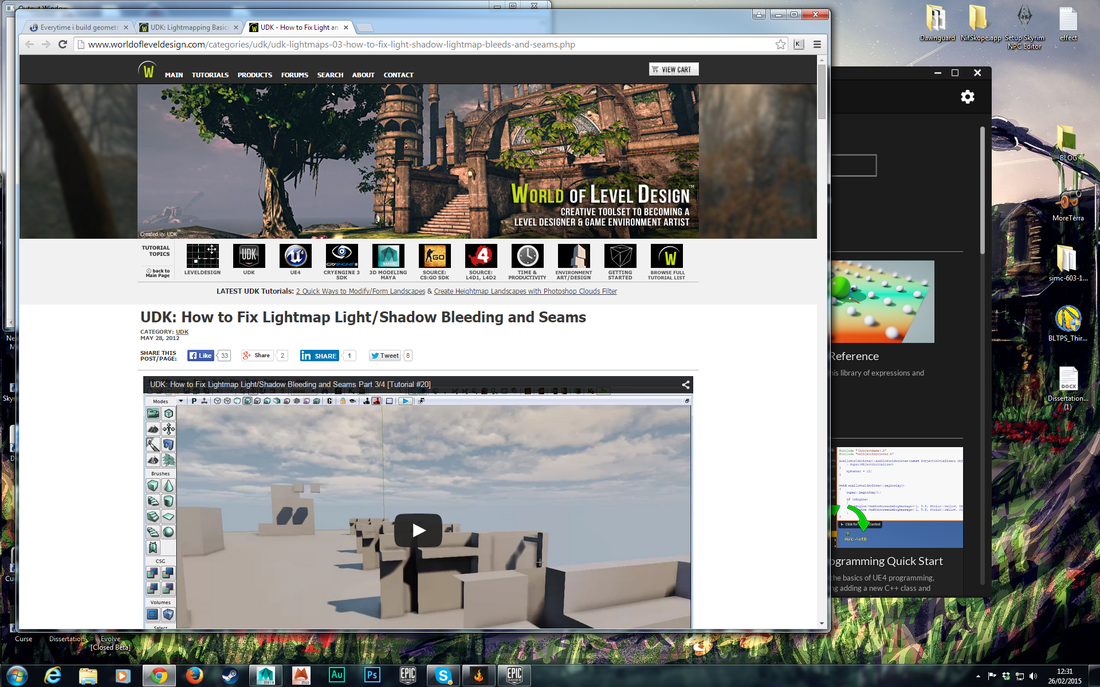
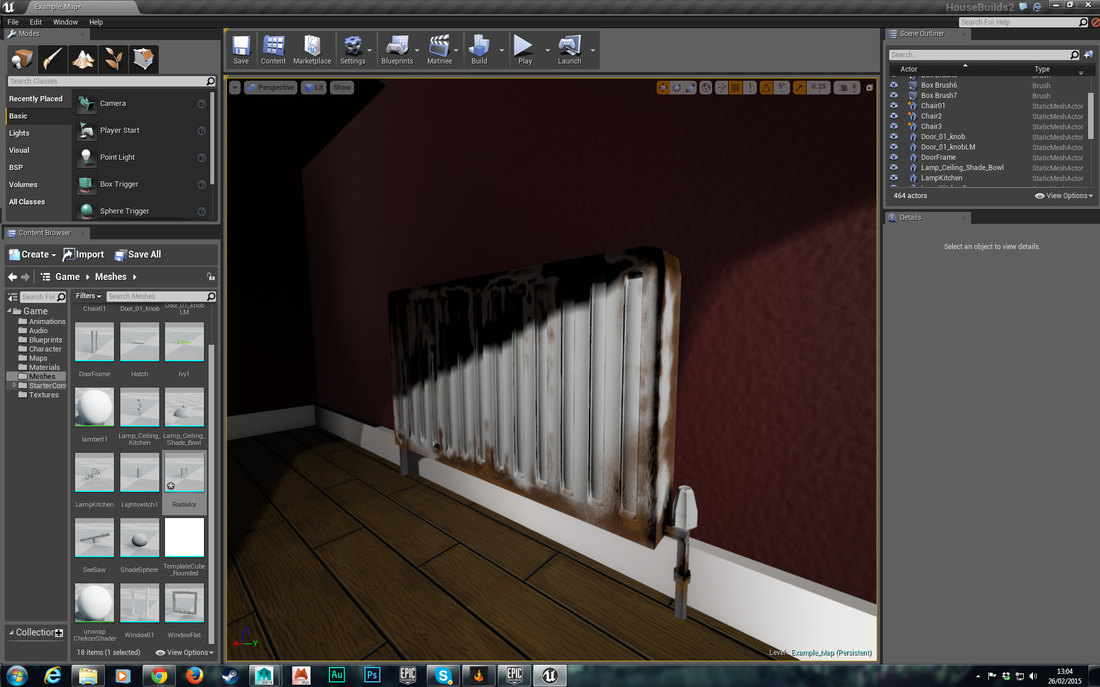
Above shows lightmaps bleeding and below is the lightmap UVs after they have been created. This will stop the shadows bleeding like in the picture above.
Building the Houses In a separate level
Building the houses separately was a great idea suggested by Elly. It sped up the building process because there was nothing else in the level to slow down the engine!


Building the Showcase House


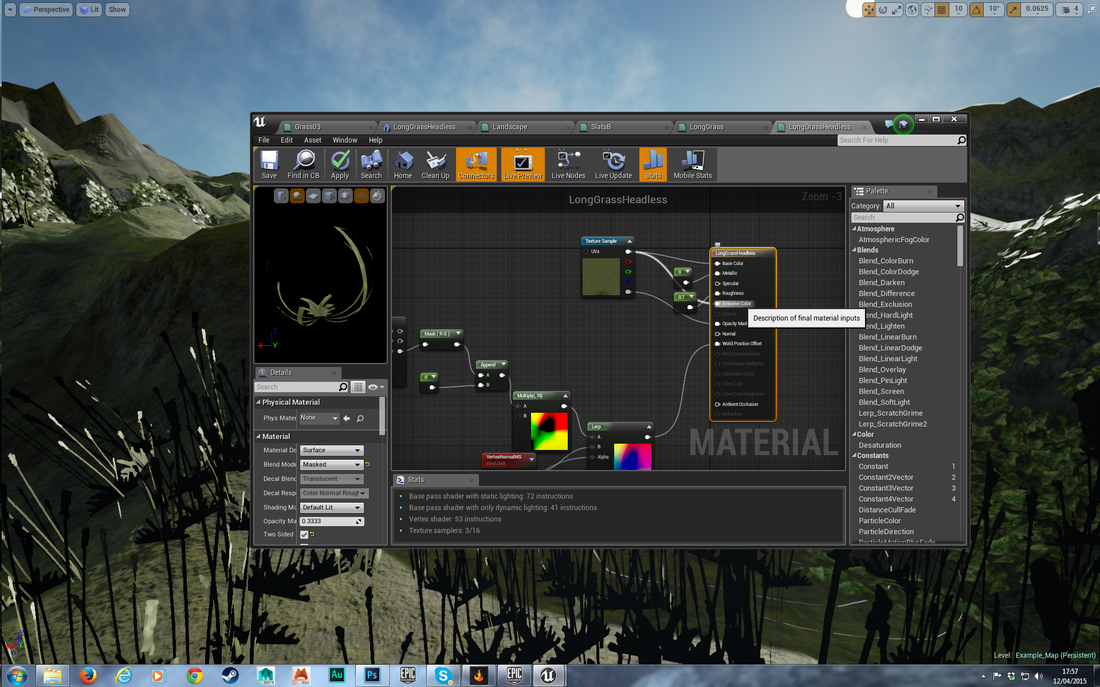
Getting into shaders
Bump Offset nodes
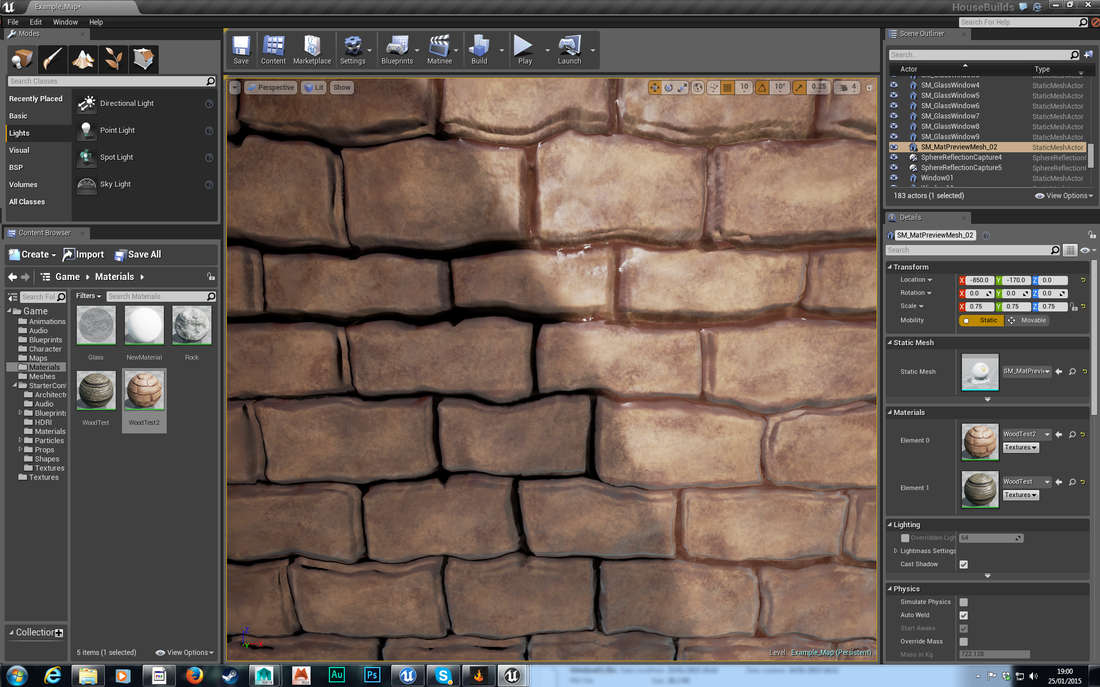
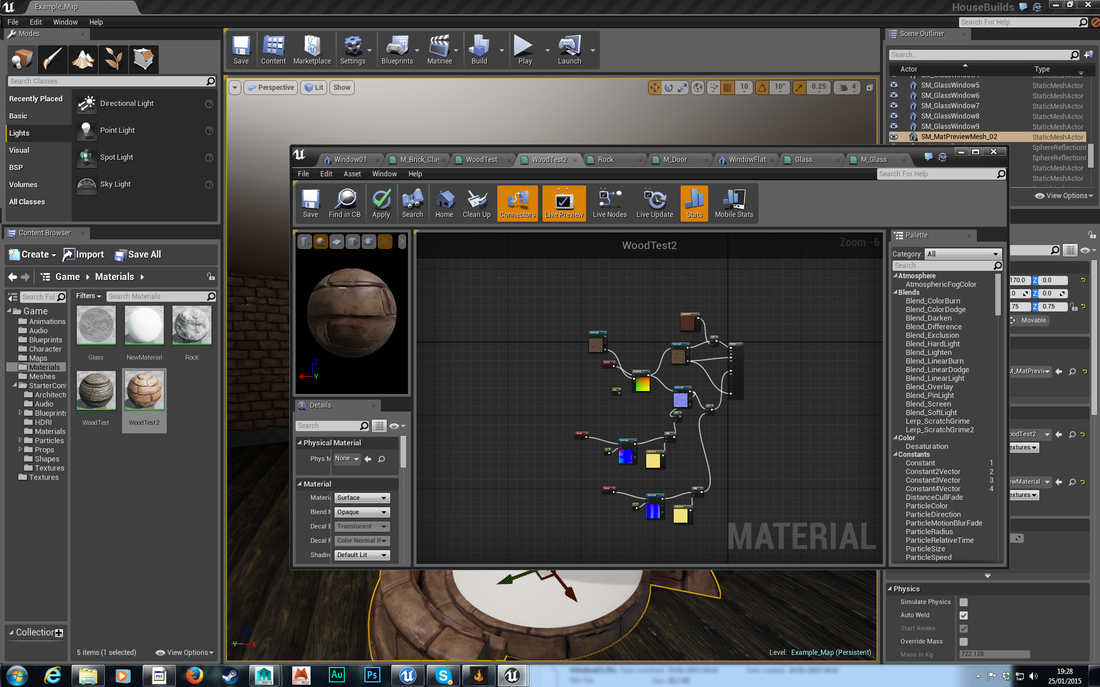
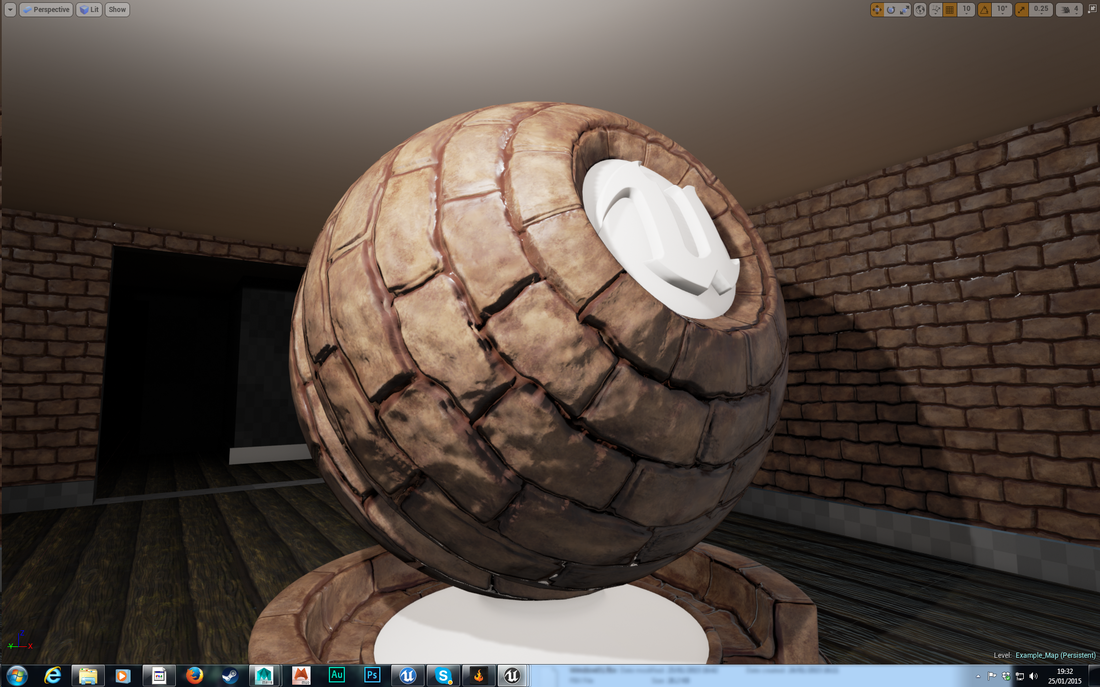
Bump offset nodes allowed me to create materials that appeared 3D. They create a parallax effect so in the case below, the bricks appear to be 3D when in reality they are on a 2D surface.
This is done by plugging the heightmap for the material into the bump offset node, telling the material to display higher and lower parts of the texture on separate planes of vision.
This is done by plugging the heightmap for the material into the bump offset node, telling the material to display higher and lower parts of the texture on separate planes of vision.


More UV unwrapping

Creating the Formative showcase room
We decided to prepare this room for the formative review as it contains both a living room and kitchen combined.


Foliage disappeared from BSP when lighting was baked.
Lightmap Tutorials


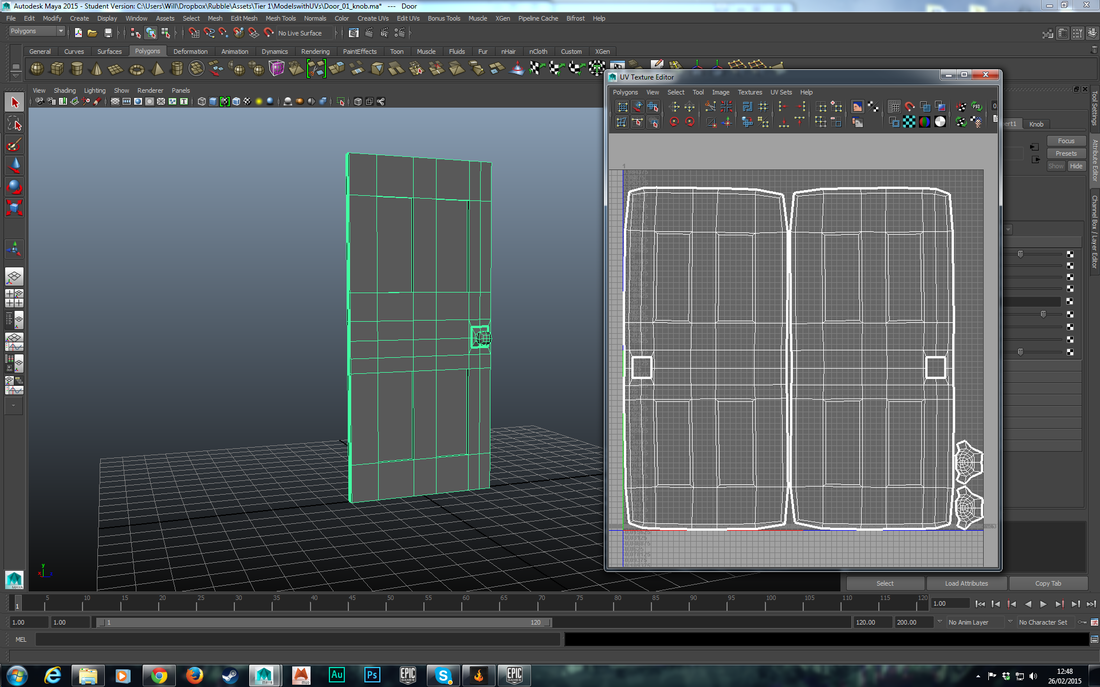

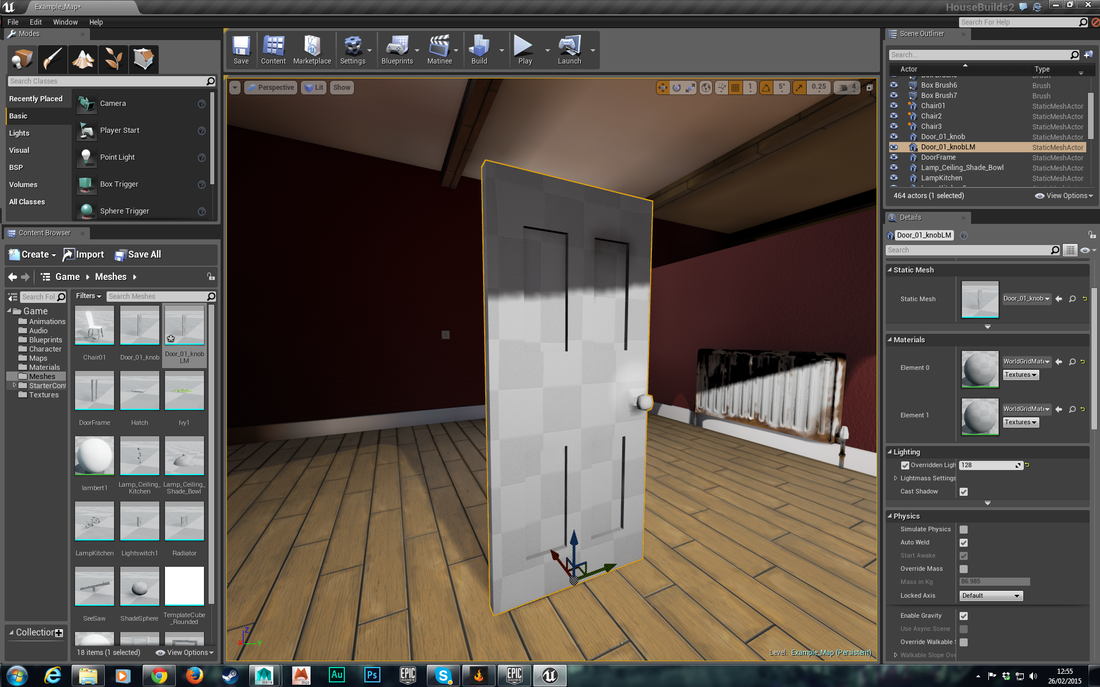
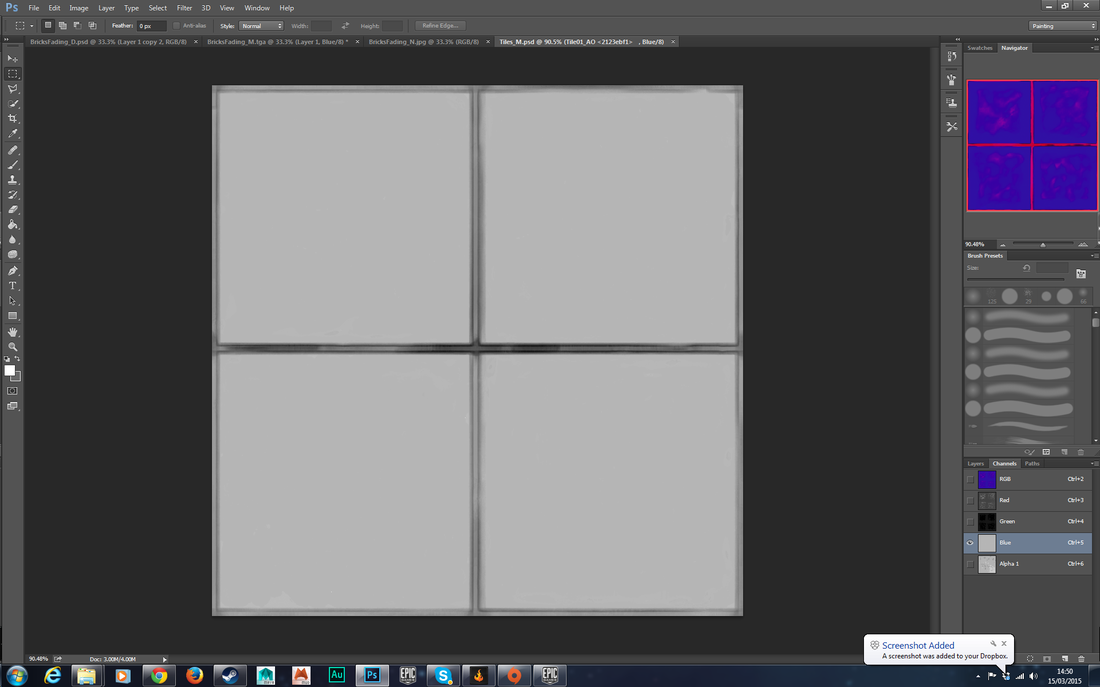
Top right is the texture UVs unwrapped perfectly for the door. Bottom left shows the second UV set, where every face has its own unique UV space. The UV space is padded for 64 bit lightmaps, 2 pixels have to be left between each shell to prevent the shadows from bleeding into other shells. Below you can see how the lightmap has worked successfully on the left compared to the older mesh with automatic lightmaps, where the shadows are bleeding into the front face.

Moving the Project from build 4.4 to 4.7
Finding out how to copy the Showcase project from the older build of Unreal really saved the scene.
After moving it into the newer version of unreal, the foliage was able to stay attached to the blocking meshes after the lighting had been built. This is perfect and solves so many problems Elly and I thought we would have to face.
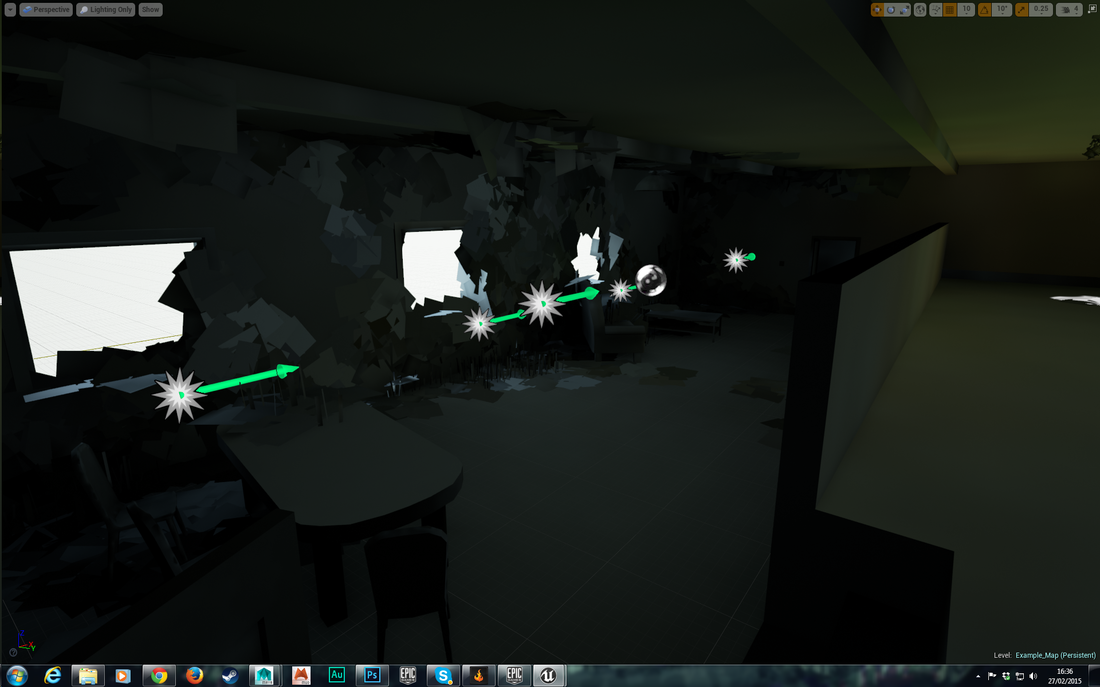
Experimenting: Particle Effects
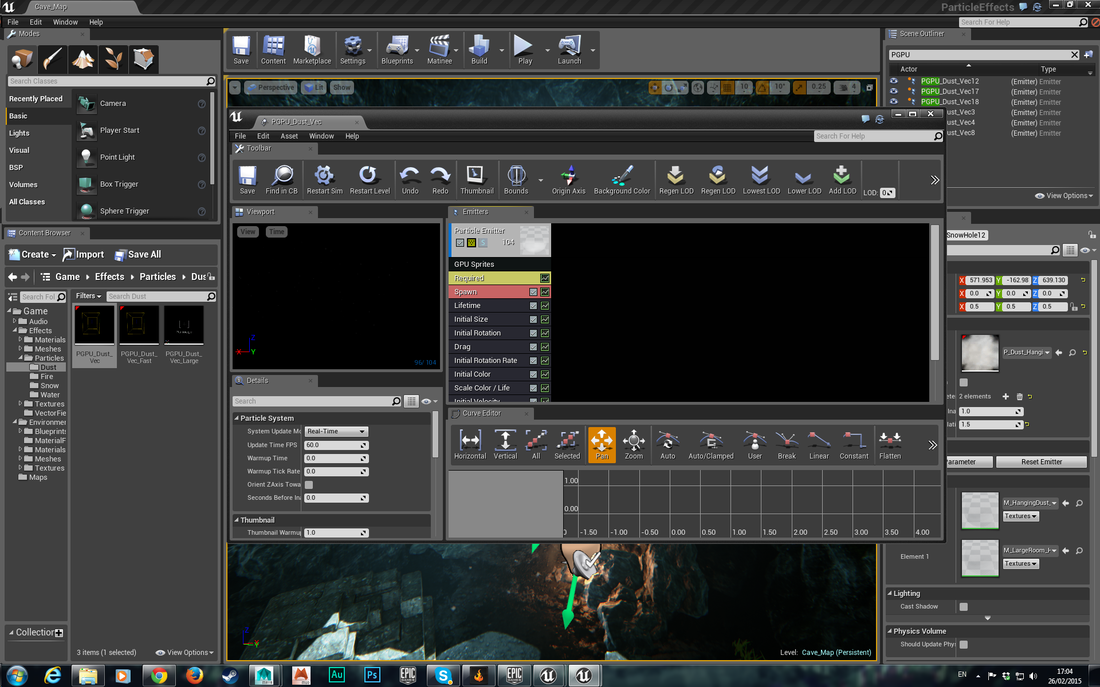
This is a screencap from Unreal's Effects demo project.
I looked at how they set up their particle effects for dust motes and then tried to create my own.
I ended up creating my own completely from scratch, the ones in the demo are GPU sprites which I couldn't quite wrap my head around. So I stuck to the basics, just adding a small dust material to the emitter and then adding various nodes that made the sprites float upwards and orbit slightly. Creating a pretty good effect.
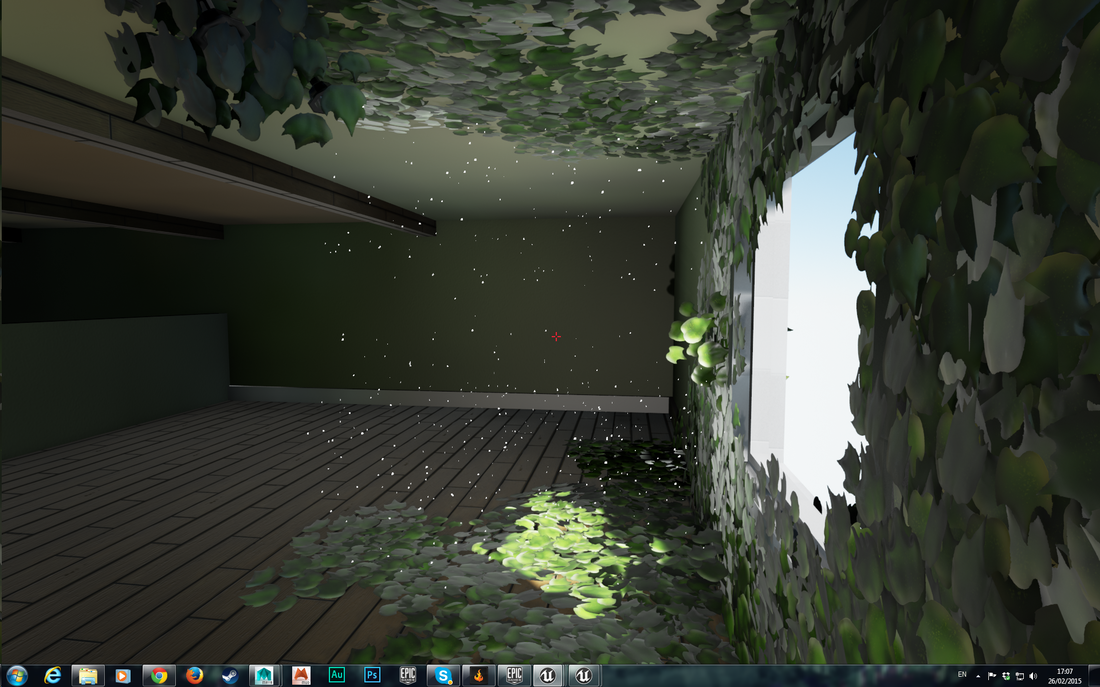
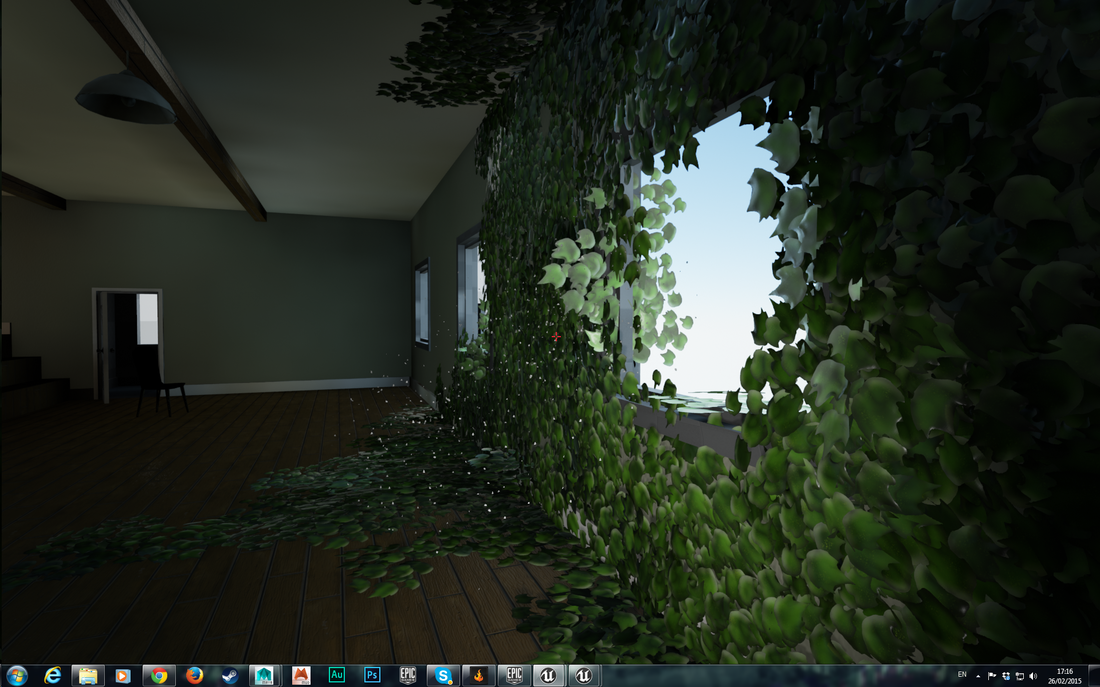
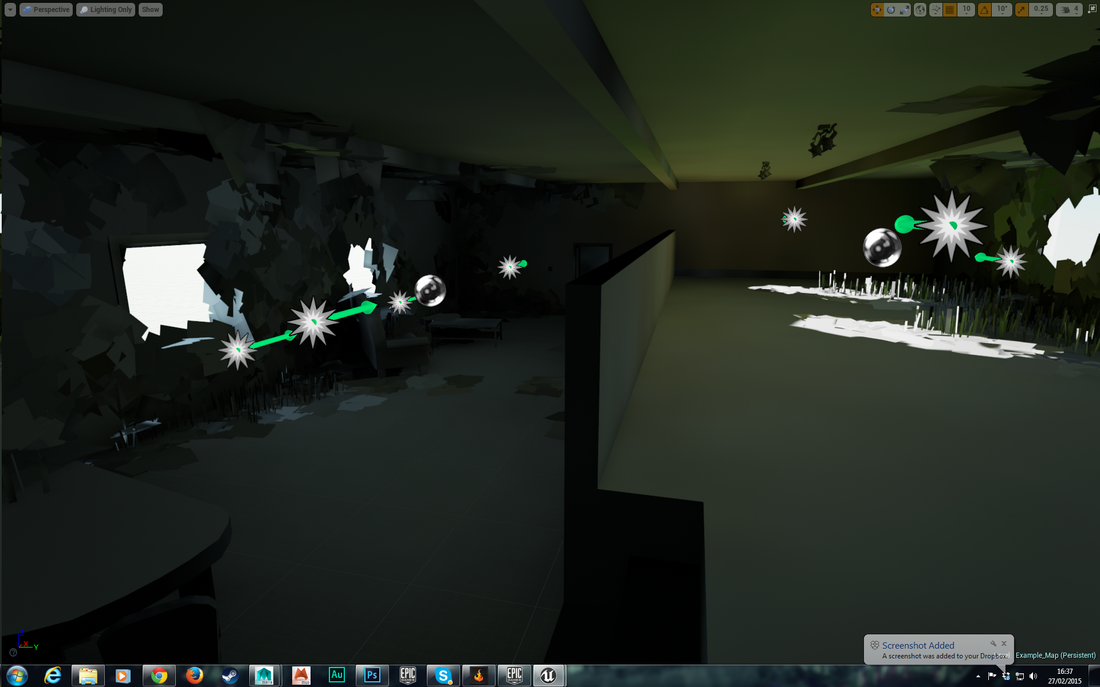
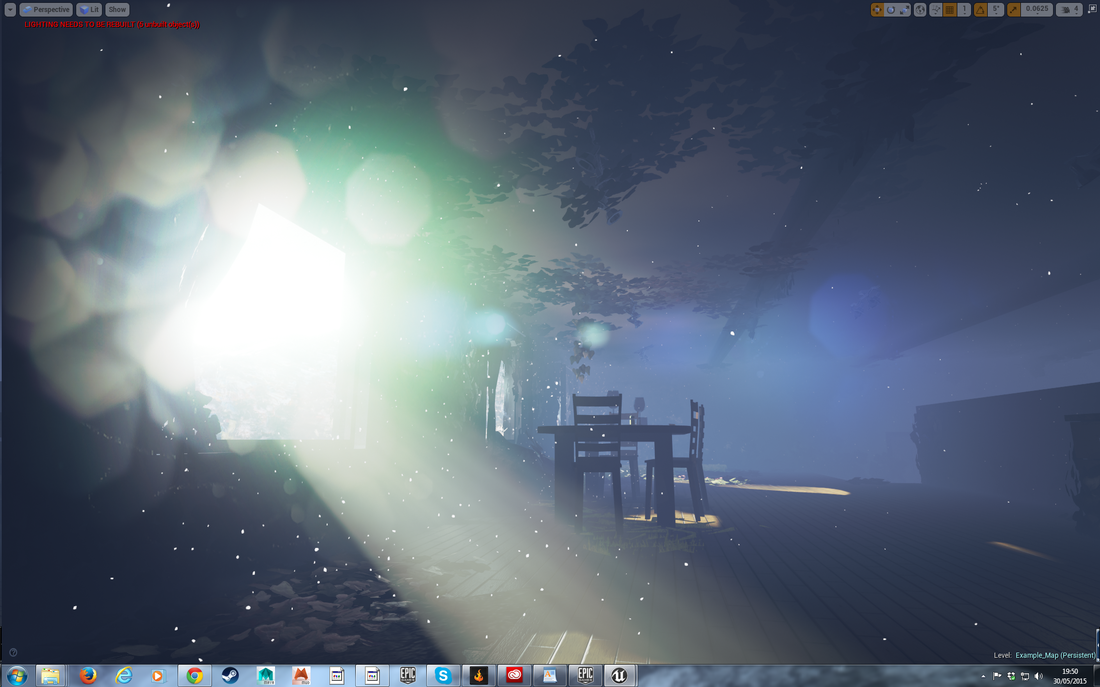
Below I rotated the dust effect, creating a really effective illusion that the light is catching the dust as it comes through the windows!
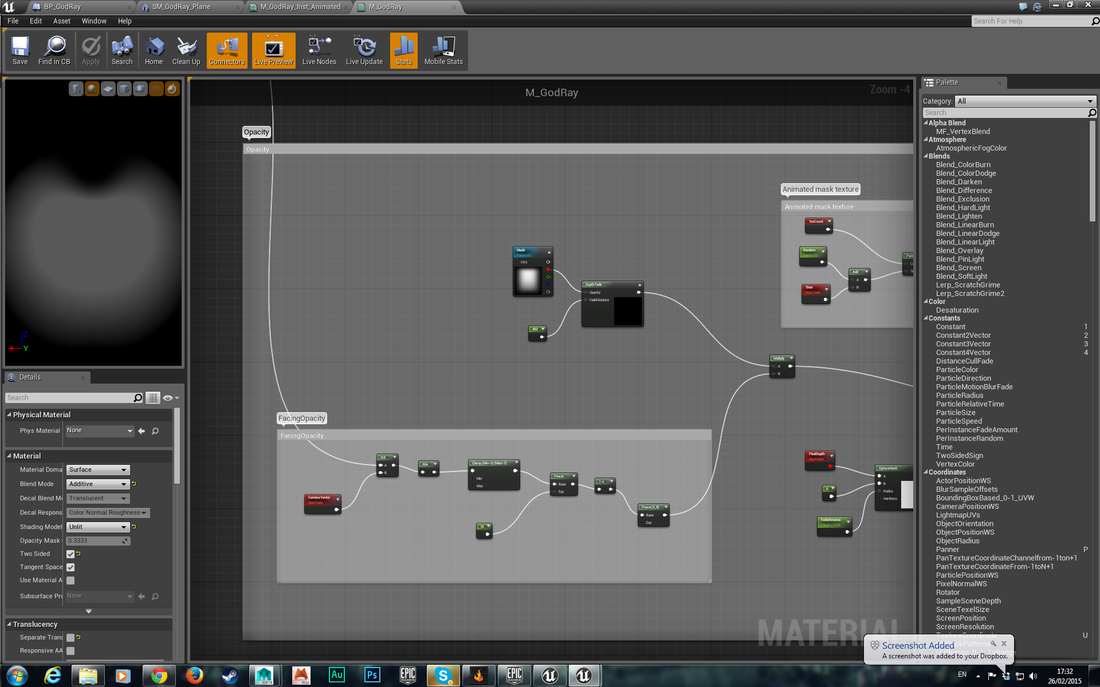
Experimenting: Light Shafts
From the effects demo again I wanted to see if I could learn from their lightshafts.
However, I found that the method was far too complicated for me at the moment. It consisted of a lengthy blueprint script so that the light matched the angle of the sun. Even then, the material itself was incredibly complicated. So I've decided that light shaft assets will be part of the final touches for the game, if they are needed at all.
Below are a few shots of Unreal's setup for light shafts. I did not create these.


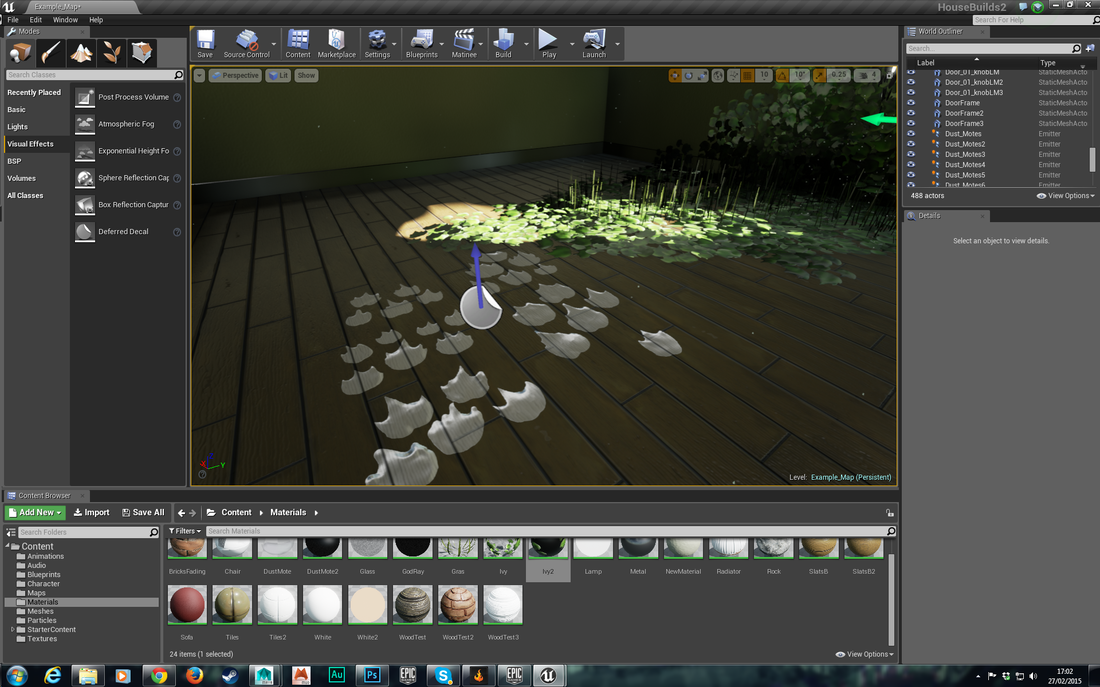
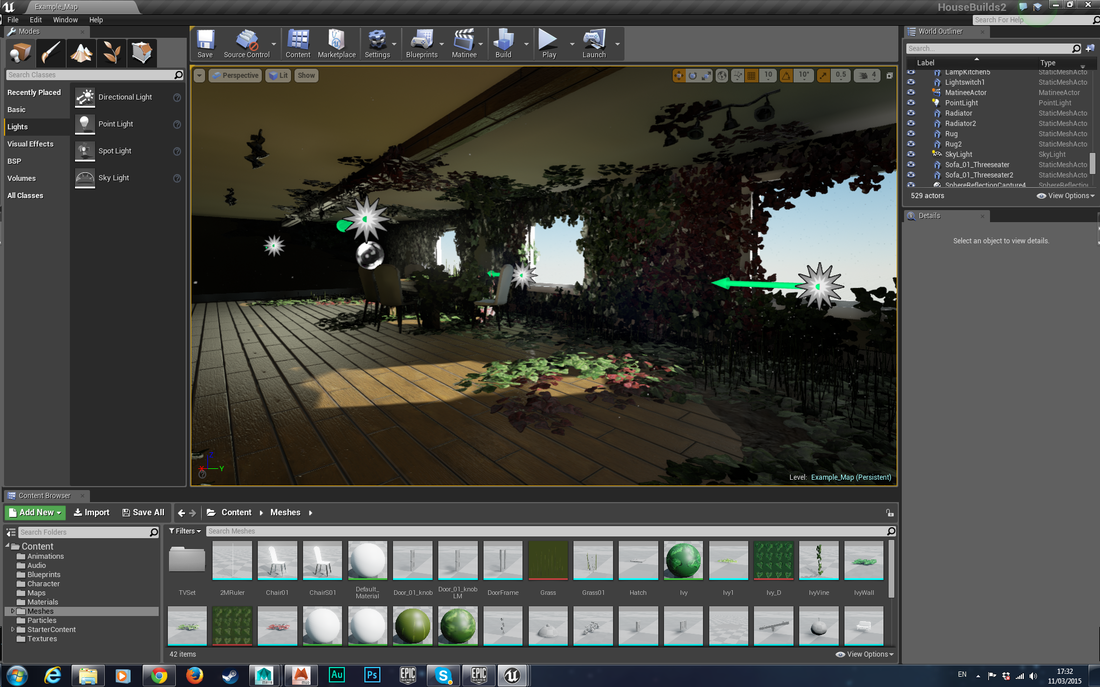
Filling out the Showcase Room and sorting lighting
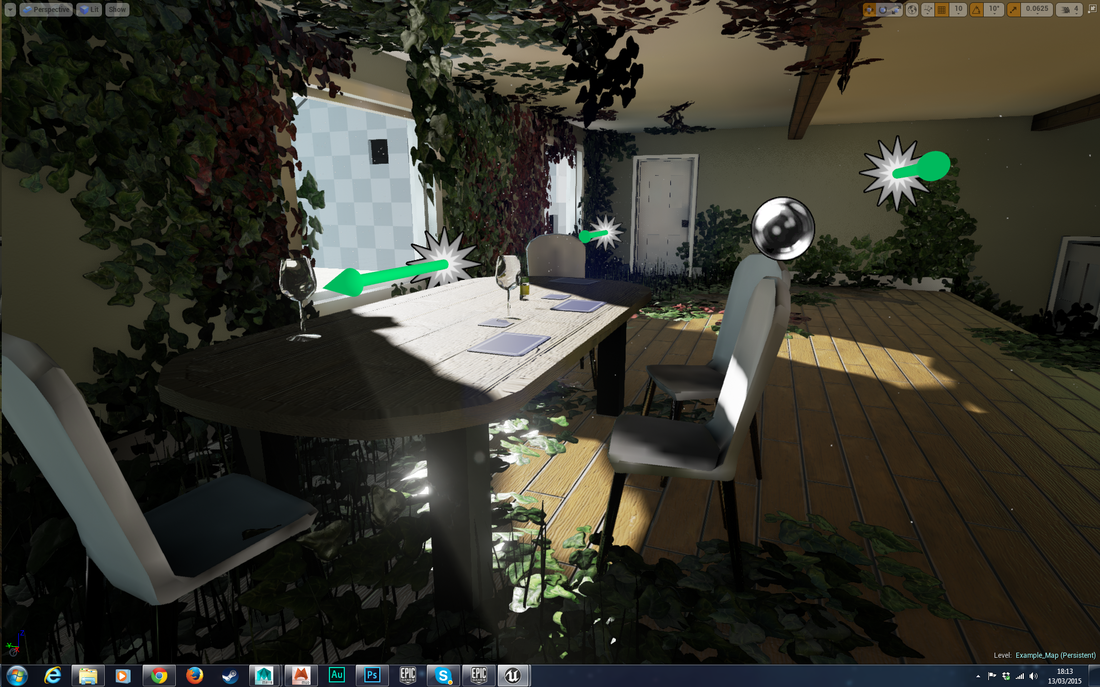
I began adding Elly's assets as she finished them to the living room area of the showcase. This involved the tables and sofas. I applied placeholder materials on these assets, the sofa receiving a modified wall material, and the tables getting the wooden floor material.
I also experimented, spreading more Ivy on the scene to achieve the verdant ruin look.


Below shows Elly's kitchen lights fitted to the ceiling with a chrome material applied. I also added a new grass asset to the scene and placed it so that it appears to be growing from under the ivy.
This is where I began testing lighting setups. Seeing as there won't be any permanent light sources within the room itself, we have to rely on the sun's directional light. To enhance its effect on the room I boosted its indirect illumination factor by 20.
Combined with the foliage on the floor, this gave the room a really striking green tint.


Below I have turned the view to show lighting only. This allowed me to get a good sense of what colours were caused by the light and refractions.

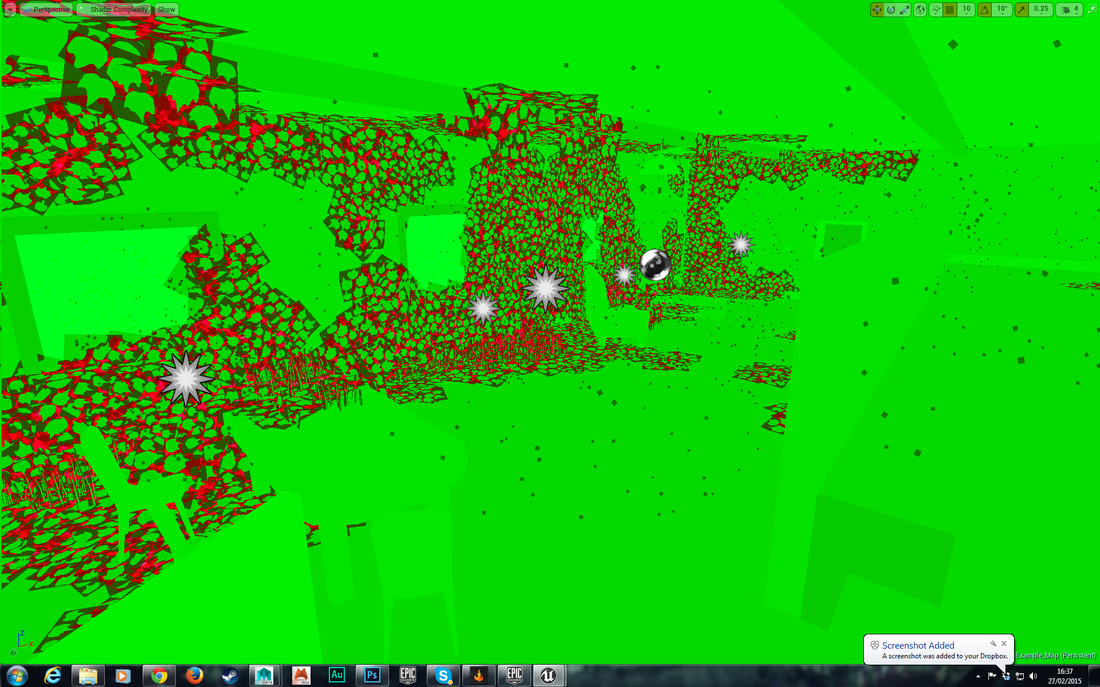
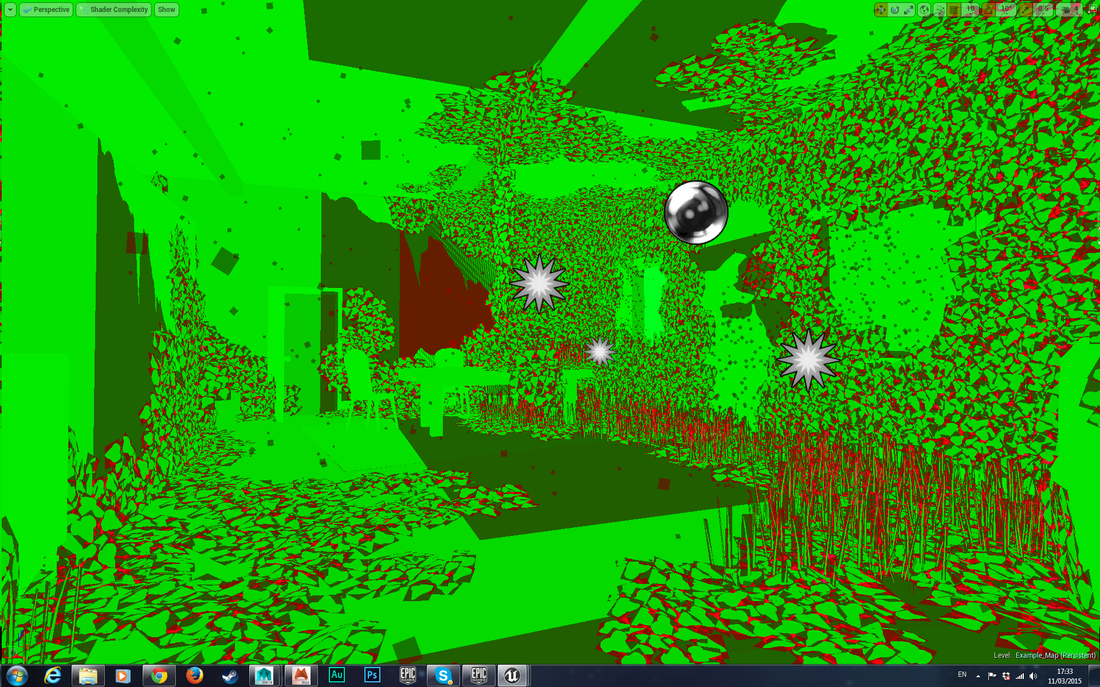
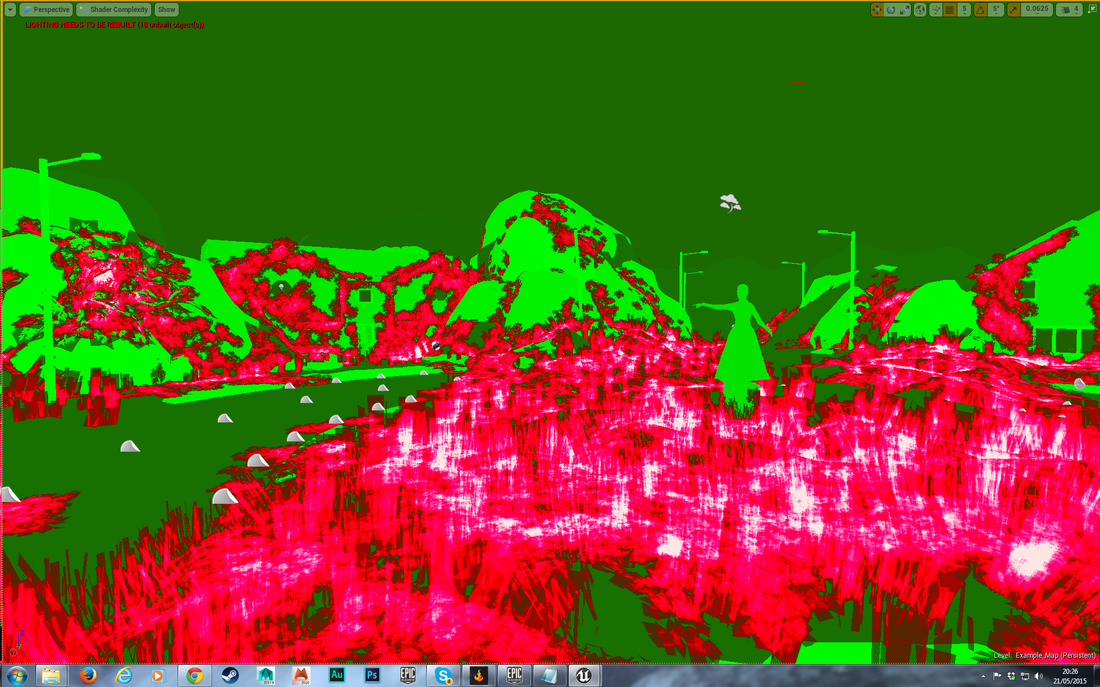
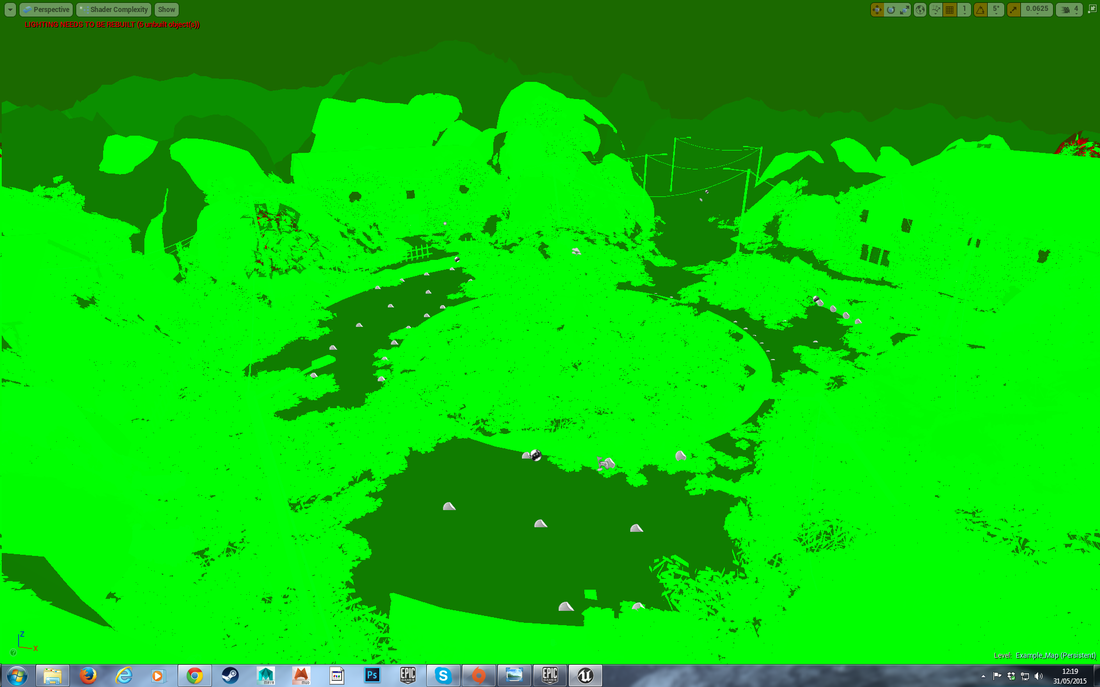
Shader Complexity
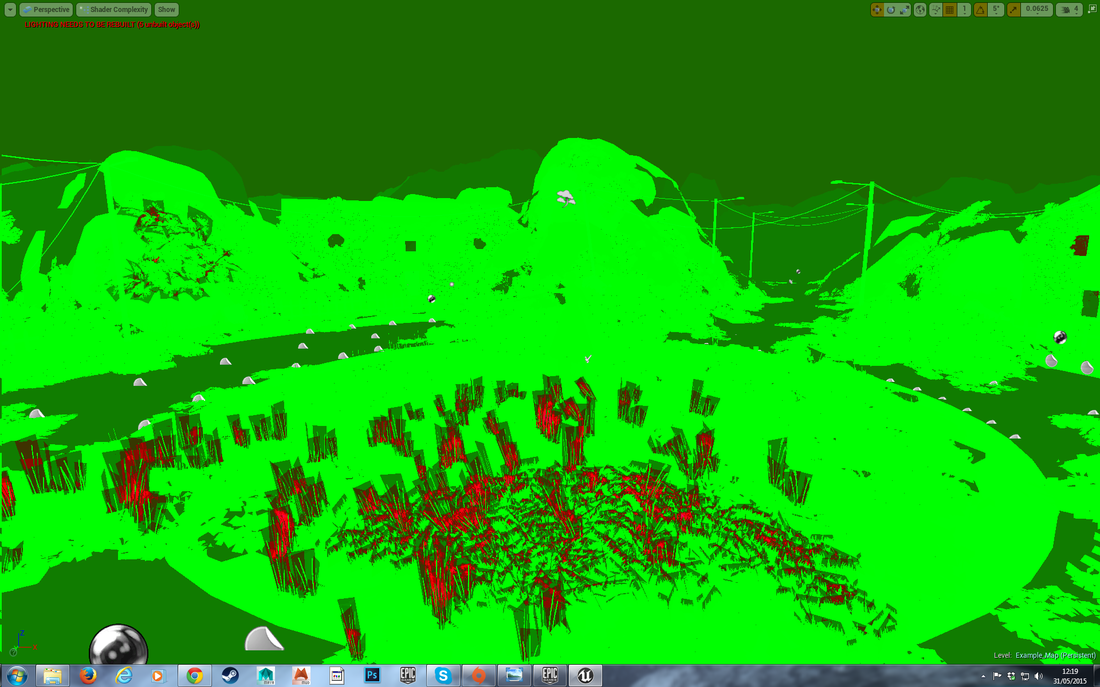
The different view port options are incredibly useful. The shader complexity view below is vital in a sense.
Transparency on textures and materials is very heavy on performance, especially when the transparent object overlaps with another transparent material. The shader complexity view highlights the biggest performance loss in red. This tells me that the ivy is poorly optimized.
So essentially I will have to completely redesign the ivy at some point.
Another note is that after this, I changed the grass from a transparent material to a masked material. Cutting down the amount of transparency involved in the grass.

Lightmap Density
Continuing to look at optimizing the scene, I checked out the density of all the lightmaps.
I tried to keep all the lightmaps in the blue, which to be honest is very low. I did this to offset the performance hit that the foliage is creating.
Also, lightmaps are only used for static meshes affected by static lights. The fact that the character is holding a torch in this build means that dynamic lighting is what you see close up when playing the game. Therefore the lightmaps can be very low resolution.
For example, the lightmap UVs for the foliage is set to 8x8 as a texture size, which is minute. Most of the larger objects, I've set to 32x32.
Larger objects and objects that will be inspected close up may require 64x64 maps, but I don't intend on going any higher than this. I would only set the lightmaps to higher resolutions if Elly and I decide to cut out the handheld torch, which would improve performance, and therefore allow for high res lightmaps.


Experimenting: Deffered Decals
Testing deferred decals ultimately ended in failure. I wanted to use them as a way to project dirt and cracks onto the currently clean walls. However, they did not work under the low light settings.
Some tests only showed normal maps, while sometimes the diffuse texture would suddenly load in when you were miles away from the decal.
I couldn't seem to find any help online either, I think I found one article where people were having the same problem of nothing showing in low light scenes, but not much help for the issue.
I also had another look at transparent grass. Elly pointed out that it didn't quite fit with the scene, so I switched it back to opaque.
Using planes instead of Decals.
I resorted to using simple planes with masked textures applied to replicate the effect the decals would have achieved.
This works perfectly. You can see the rot on the ceiling which uses these planes. The rug on the floor also uses the same plane, which lets us keep the asset menu less cluttered.
This works perfectly. You can see the rot on the ceiling which uses these planes. The rug on the floor also uses the same plane, which lets us keep the asset menu less cluttered.
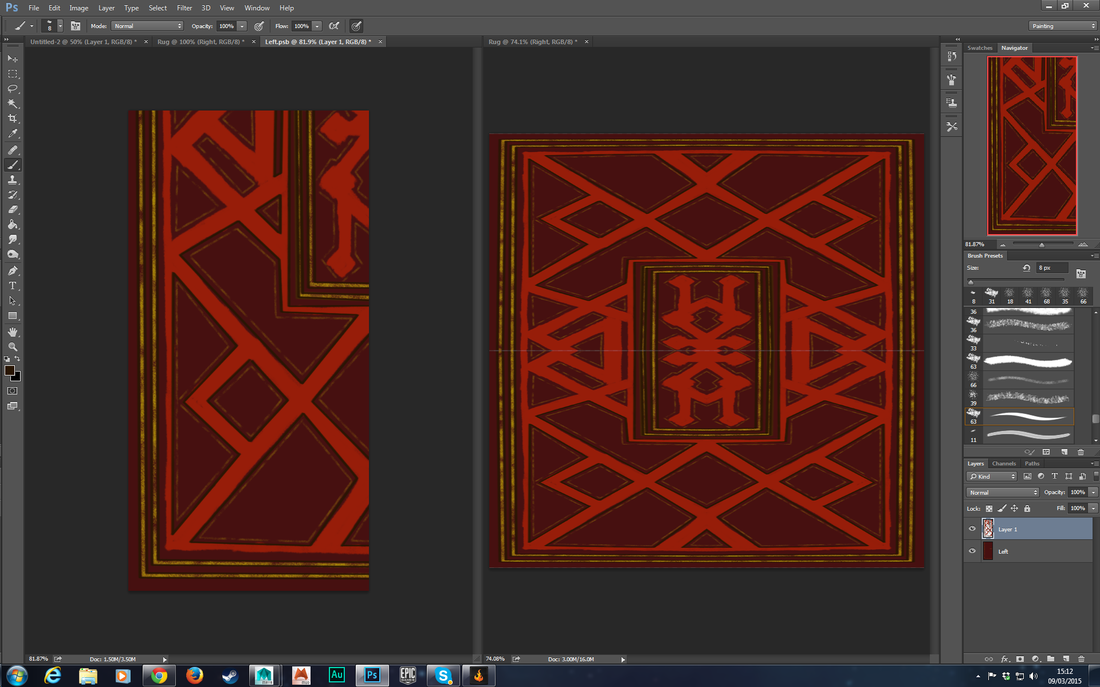
I created the rug in Photoshop by creating a symmetry system using smart objects, inspired by a youtube tutorial that I found:
https://www.youtube.com/watch?v=y0dc16EUHAQ
His tutorial only shows how to create one mirror of symmetry, but I needed two. So I just took his idea one step further, creating 3 smart objects and flipping them so that they copied the base layer but flipped.
https://www.youtube.com/watch?v=y0dc16EUHAQ
His tutorial only shows how to create one mirror of symmetry, but I needed two. So I just took his idea one step further, creating 3 smart objects and flipping them so that they copied the base layer but flipped.
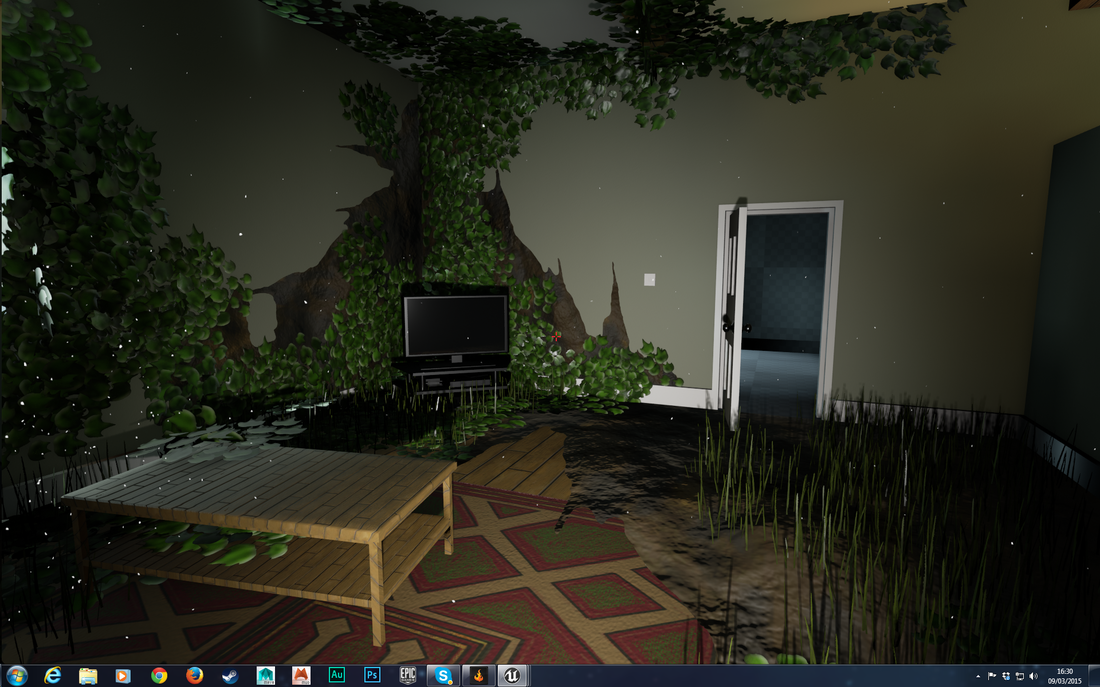
Here you can see how I recoloured the rug later.
Elly's TV set is also now in the scene. She set up the TV so that it used two materials. The screen's faces use a separate material to the rest of the TV. Allowing me to make the screen reflective in Unreal, while keeping the frame looking plastic.
Elly's TV set is also now in the scene. She set up the TV so that it used two materials. The screen's faces use a separate material to the rest of the TV. Allowing me to make the screen reflective in Unreal, while keeping the frame looking plastic.
New Ivy
The aim behind the new ivy was to make it look more real, and to try and make it much less performance hungry. This meant cutting the edge loops closer to the texture.
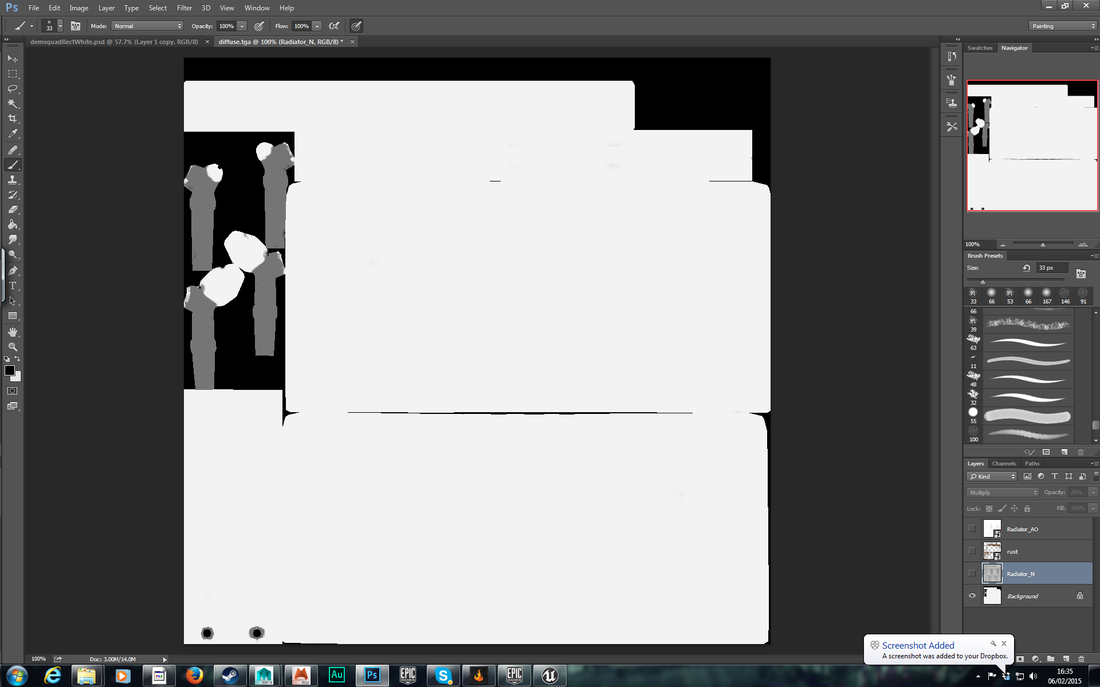
The textures were hand drawn by me in photoshop simply using references from Google images. I then created a black and white stencil from the textures and used this to create normal maps for it in Mudbox.
In the end it looks a lot more like ivy than the old asset.
The textures were hand drawn by me in photoshop simply using references from Google images. I then created a black and white stencil from the textures and used this to create normal maps for it in Mudbox.
In the end it looks a lot more like ivy than the old asset.

Below you can see the shader complexity, compared to the old ivy, there is a lot less red showing through.
As you can see, the dust motes add to the complexity. For now though, it seems like the grass is creating the most problems. They'll be the next piece of foliage needing a redesign.
I also created some vines from the ivy which you can see hanging from the wooden beam.
Another subtle addition was a red variant of the ivy, just to add a little more colour to the scene. You'll notice it crop up now and then in the game.
The new ivy has a lot more faces.
This may seem counter intuitive at first, but from what I've read online, a higher polycount is preferable to over-using transparency in the shaders. Some people in forums recommended that when it comes to creating leaves on trees, you'll achieve better performance if you make high poly leaves with no transparency over low poly leaves that use transparency.
This is one of the great things about modern game engines, the fact that they can actually handle immense polycounts.
Another sneaky point is that I changed the shader for the dust motes around here. I gave them an emissive colour, which means that they always appear as if they are lit. This lets them really pop in the scene.
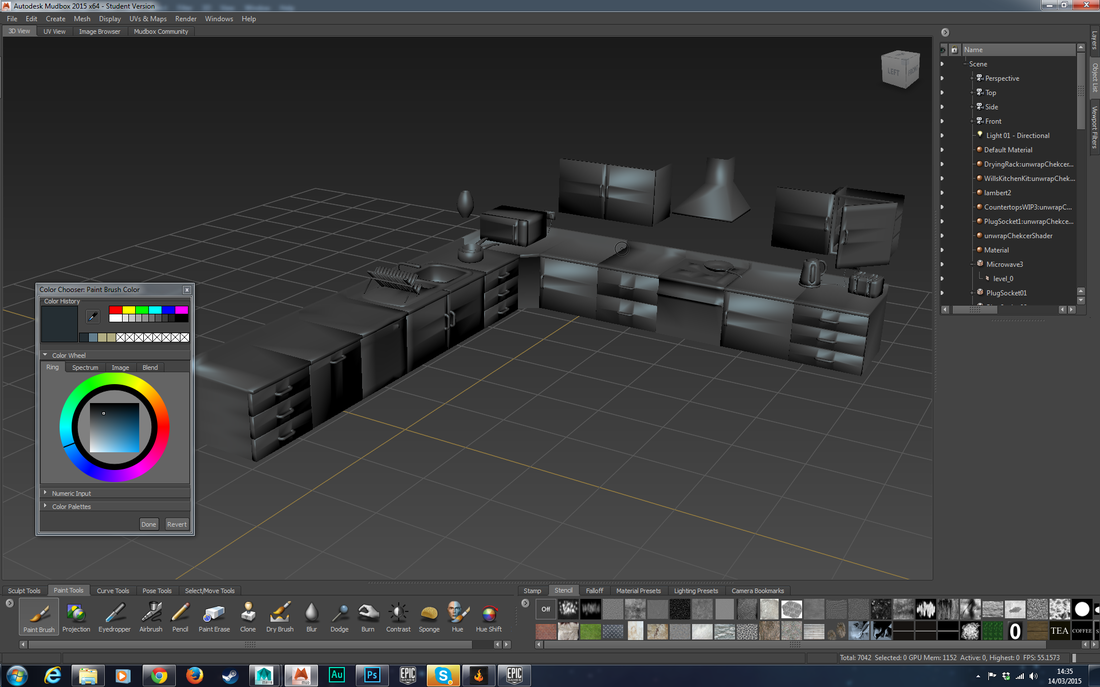
Helping Model for the Kitchen
So far, all of the assets in the scene apart from the foliage and window-frames have been created by Elly.
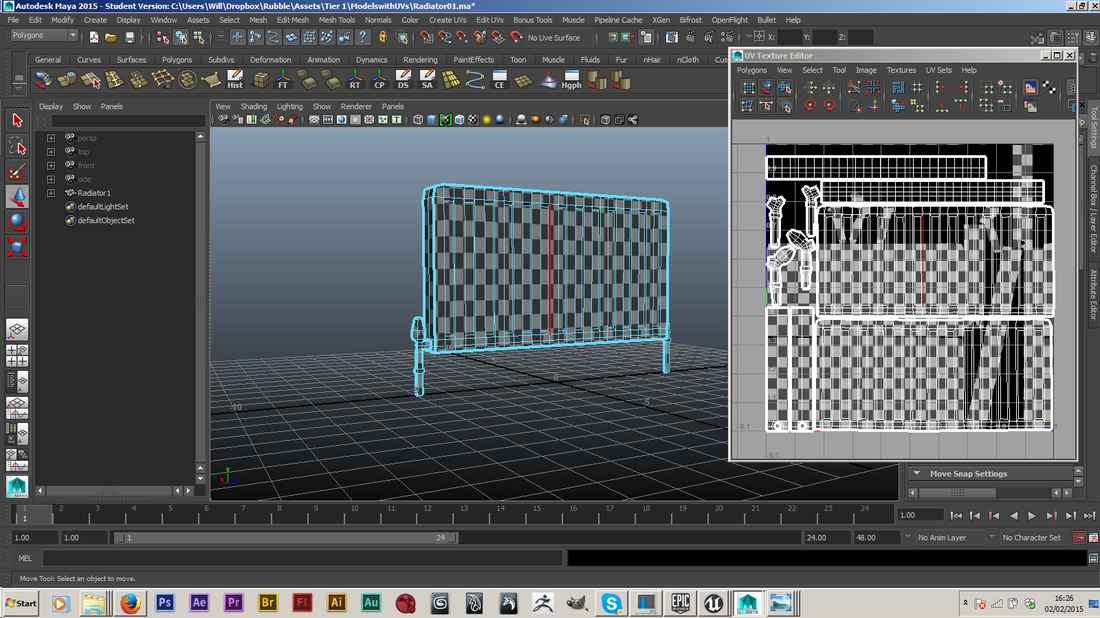
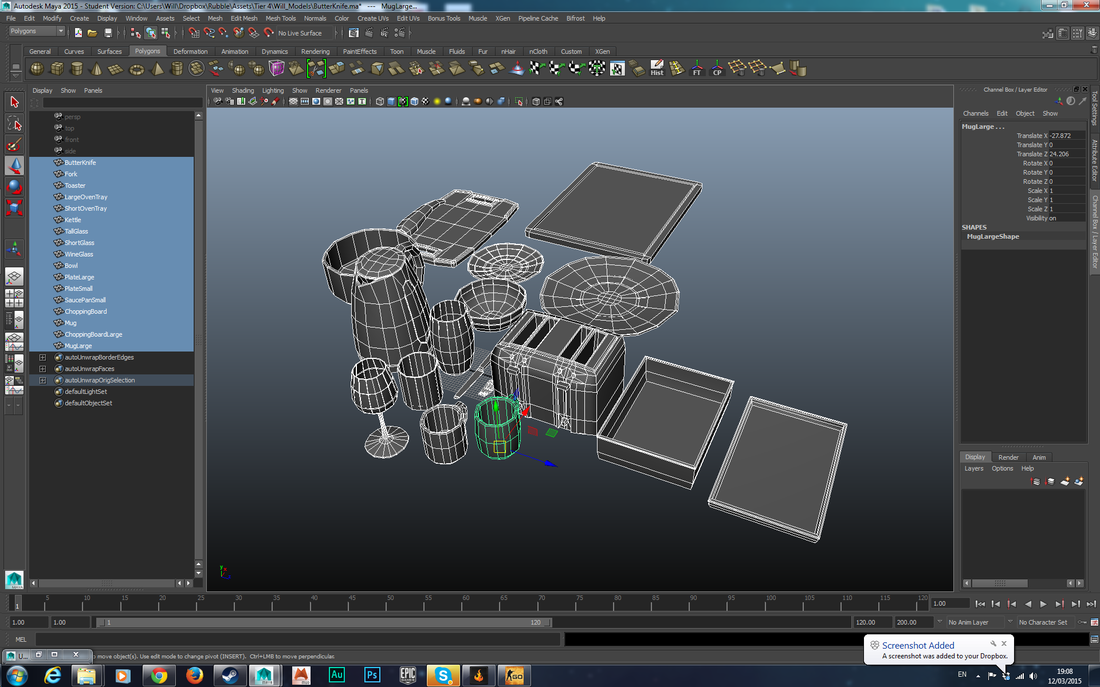
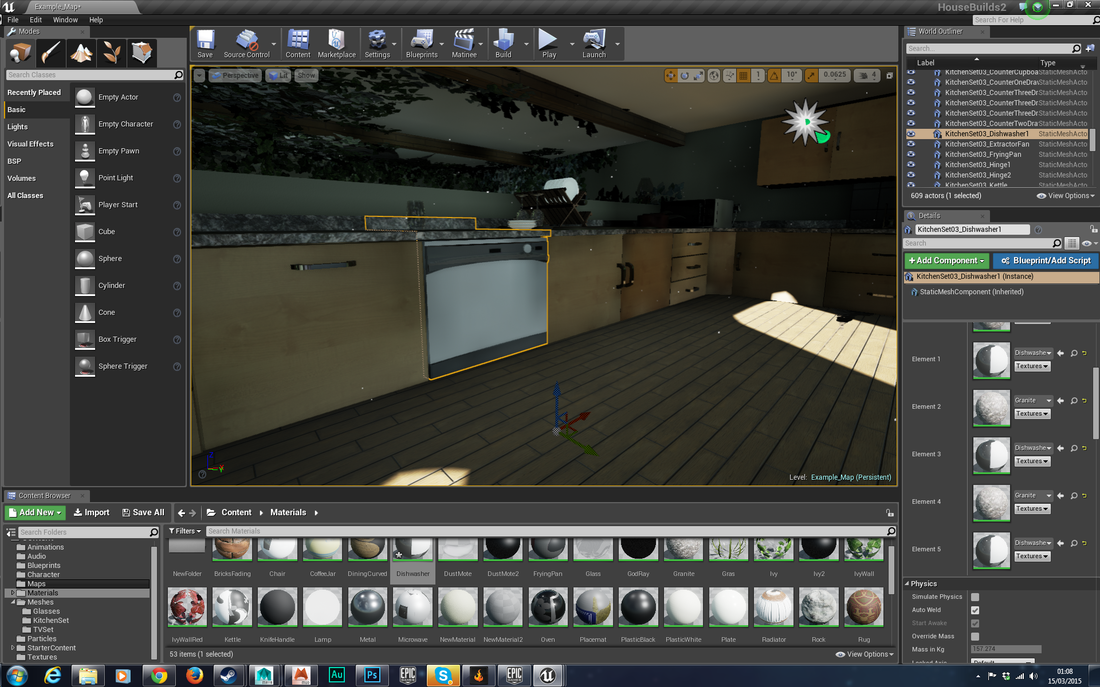
I created a lot of small assets for Elly's kitchen scene. She has made all the counters, the oven, dishwasher and all of the big kitchen pieces. So it was my job to create a lot of the little utensils and appliances.
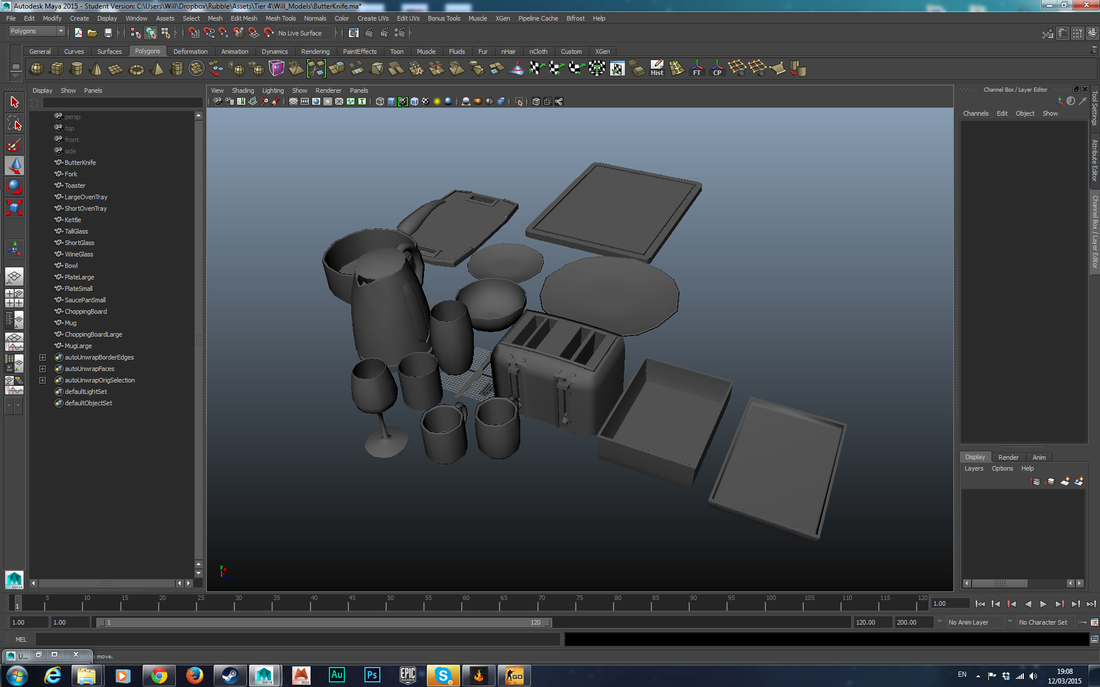
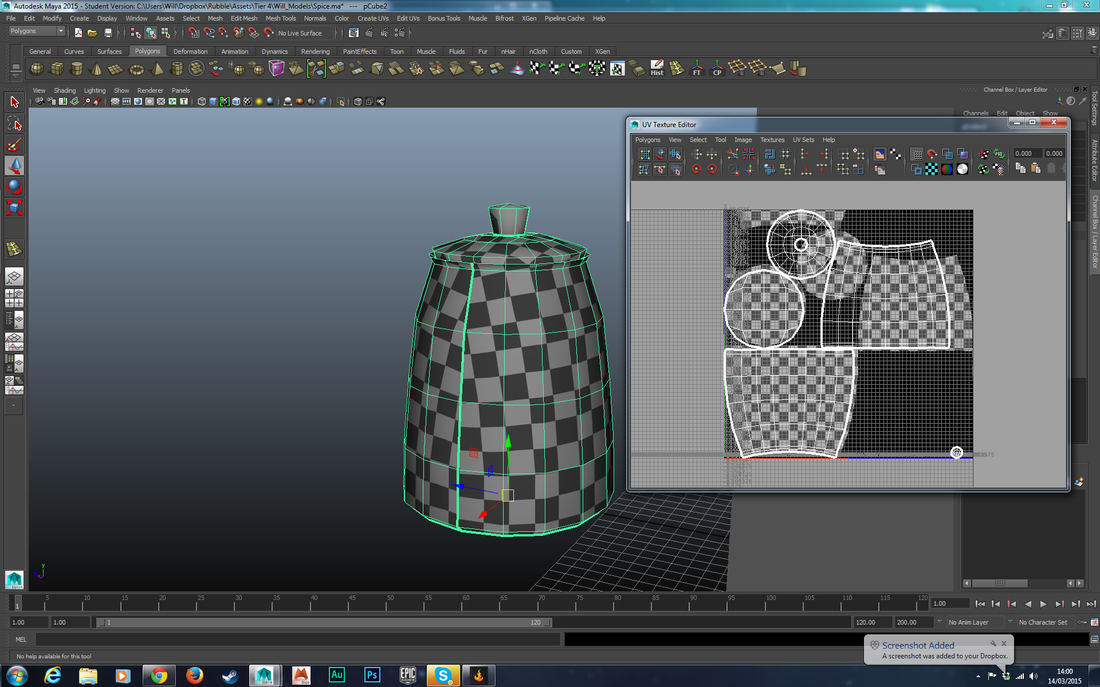
Tea jar with UVs unwrapped and ready for texturing.
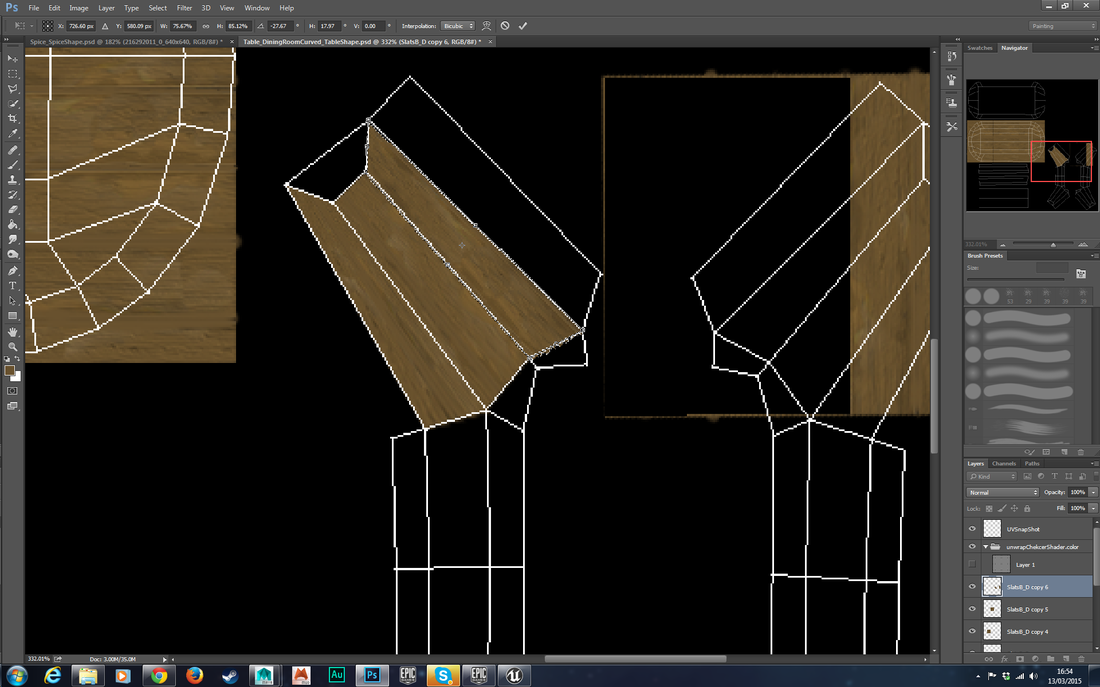
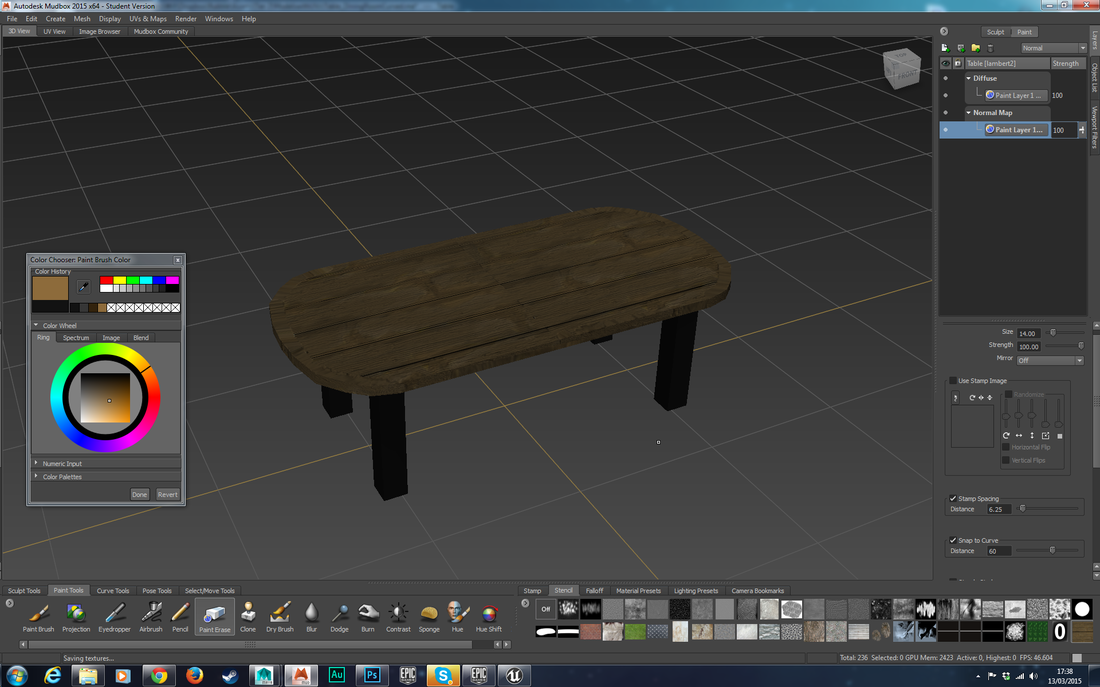
You can see above that I tried to create the texture for the table in Photoshop.
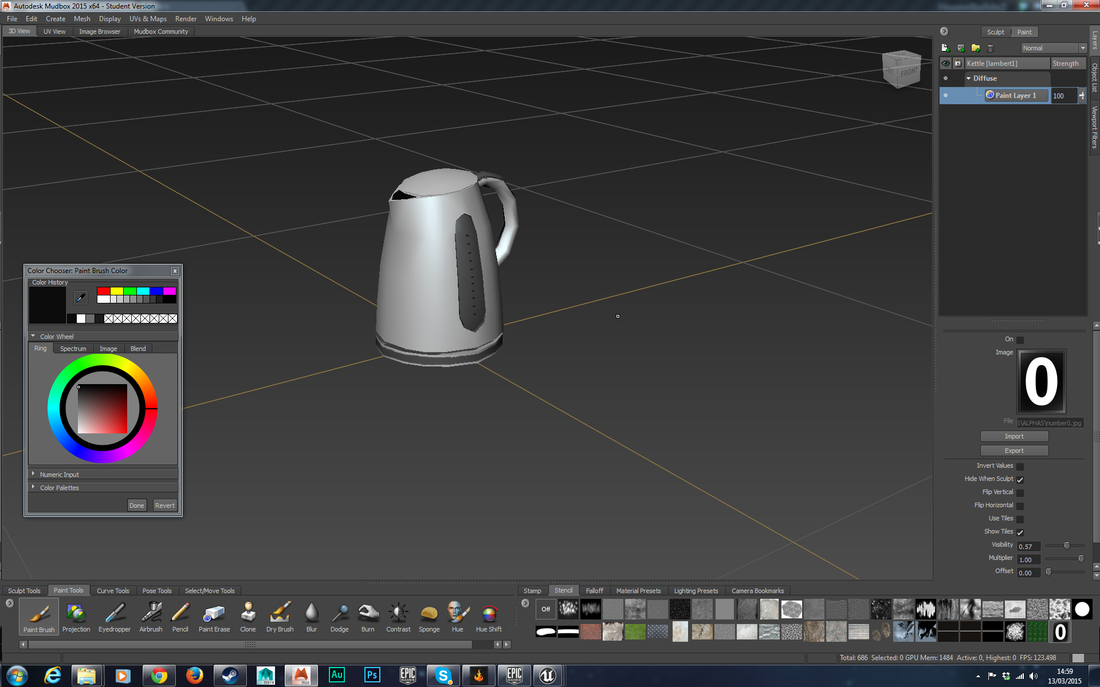
Elly showed me that it would be far quicker if I used projection mapping in Mudbox to do it. So I created the necessary stencils and used her method, which worked amazingly!! As well as taking half the time I'd already spent to get as far as the above picture in Photoshop.
Elly showed me that it would be far quicker if I used projection mapping in Mudbox to do it. So I created the necessary stencils and used her method, which worked amazingly!! As well as taking half the time I'd already spent to get as far as the above picture in Photoshop.
Testing Textures and Shaders

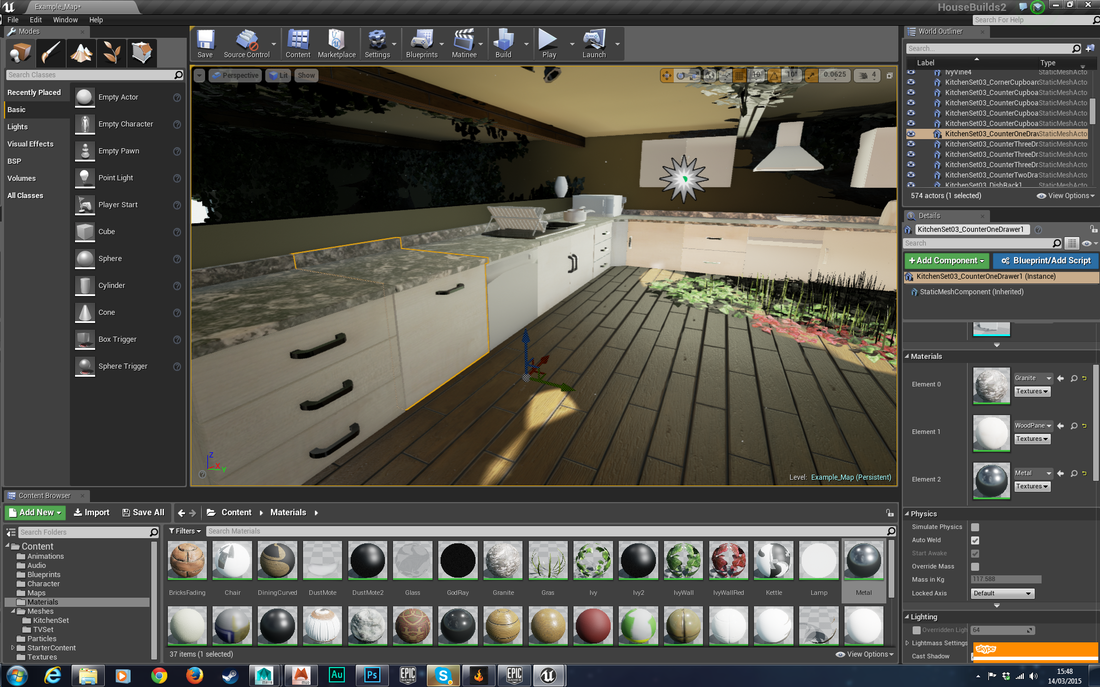
Moving Elly's Kitchen into Unreal
Elly set the entire kitchen scene up in Maya, using a shell of the room which I exported from Unreal as a guide.
This means that it imported into Unreal already laid out, all I had to do was snap it into its place in the room. Then we started texturing it.
This means that it imported into Unreal already laid out, all I had to do was snap it into its place in the room. Then we started texturing it.
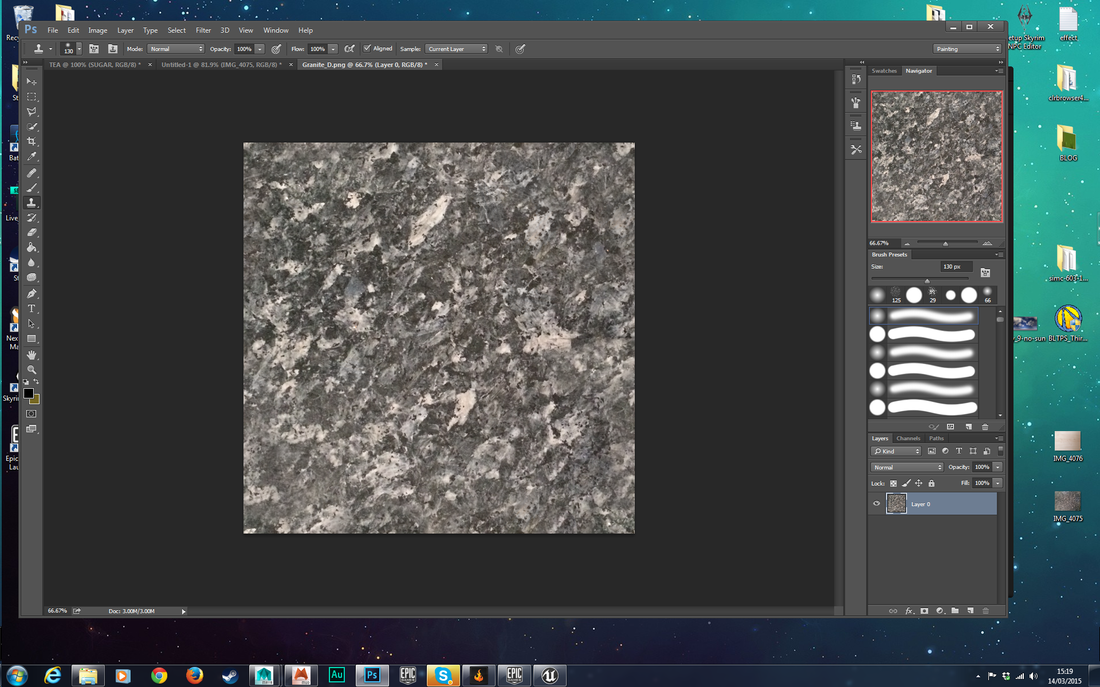

I created these tiling textures from photos of our own kitchen units. I used Photoshop and cropped parts of the photo into 1024x1024 squares. To make the image tile I offset the image by 512 pixels on both the X and Y axes, I then used the clone stamp tool to remove the irregularities on the edges, leaving a perfect tiling texture.
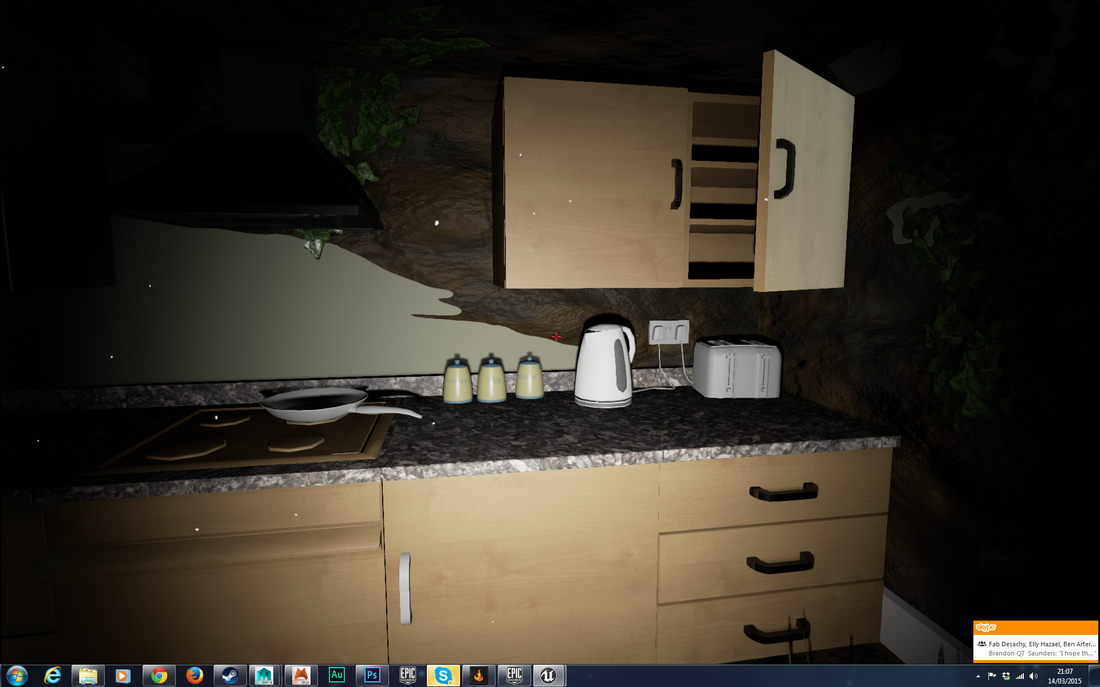
These textures were then applied to all the units, with another chrome texture being used for the handles, sink and extractor fan.
These textures were then applied to all the units, with another chrome texture being used for the handles, sink and extractor fan.
|
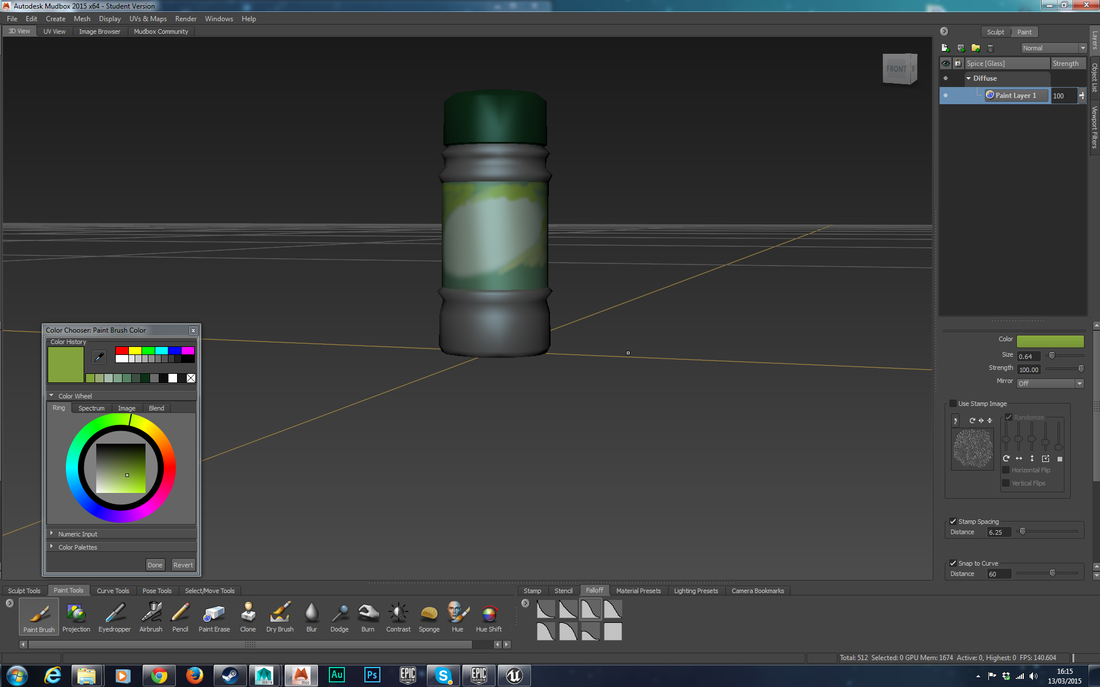
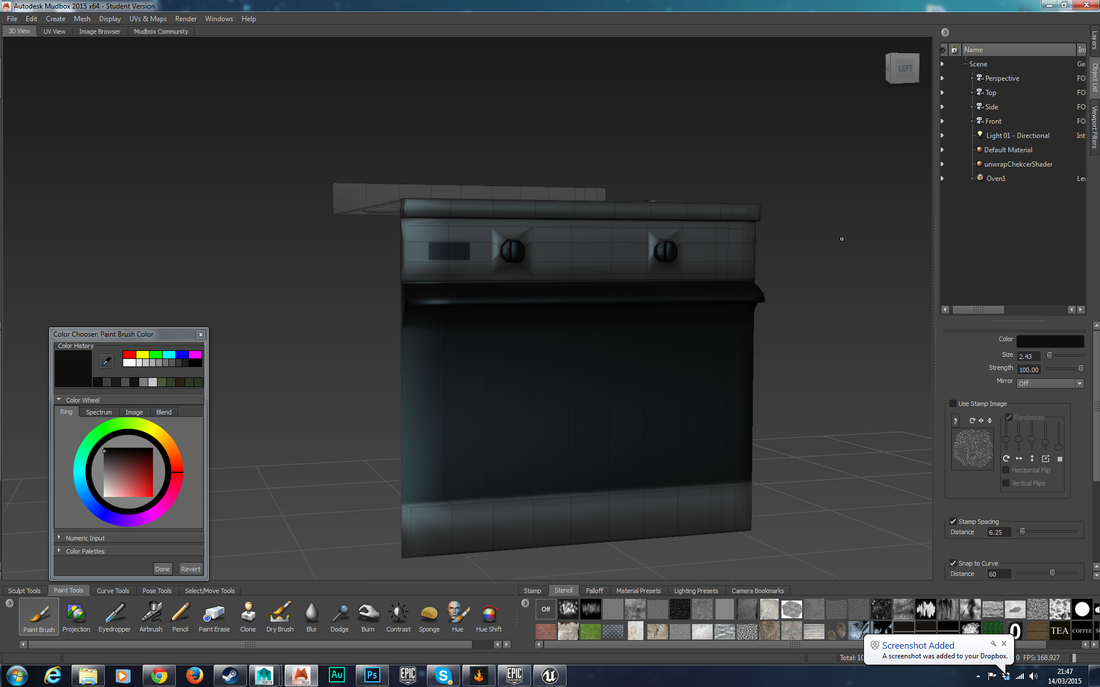
Again I used Mudbox to texture the Oven, I used stencils that I created in Photoshop to achieve the nice square shapes for the timer and the window.
|
I'm quite proud of how nicely the glass knife rack turned out. The glass shaders can turn out looking very nice sometimes.
Adding piles of rubble
I created a simple blob shape in Maya which I used for the piles of dirt in the room, it works perfectly in the corners and looks even better when covered in ivy. They seem to add more depth to the room, and definitely make it look more dilapidated
The light shaft here is simply a post process effect coming from the bloom effect tied to the directional light in the scene. It doesn't require any blueprints and is simply built in to the post process effects for the engine.


I realised that the sky-light that I was using to make the interior of the house lighter was washing out the exterior lighting. Turning this down while boosting the indirect lighting seemed to fix the problem.


We needed new textures on the furniture, so we re-made a lot of them in Mudbox. As you can see above, I worked on the wooden chairs and the sofa.
The wooden chairs where also a new model which replaced the old plastic chairs.
The wooden chairs where also a new model which replaced the old plastic chairs.
I also created a toilet for the bathroom, along with a sink and loo roll.
When we ran our demo level on the Oculus Rift, we found that it was not able to consistently render 75 frames per second. This is what is required for the game to look smooth for the player, any lower and you feel like you're having a slideshow pressed against your eyes, which naturally ruins the immersion.
Having thought that we had solved the shader complexity issue, I looked back at it and found that there was still much that could be causing massive performance hits on the engine. For example, the red squares above were patches of dust on the floor, I deleted all of these in the end, just to keep the scene cleaner.
Having thought that we had solved the shader complexity issue, I looked back at it and found that there was still much that could be causing massive performance hits on the engine. For example, the red squares above were patches of dust on the floor, I deleted all of these in the end, just to keep the scene cleaner.
Creating the Final Level

I put all the knowledge that I had gathered from my tests into creating the final level. I used alpha brushes to create rugged looking terrain. This meant that our hills and mounds had a lot more depth to them, instead of how previous versions of the level had looked all smooth.
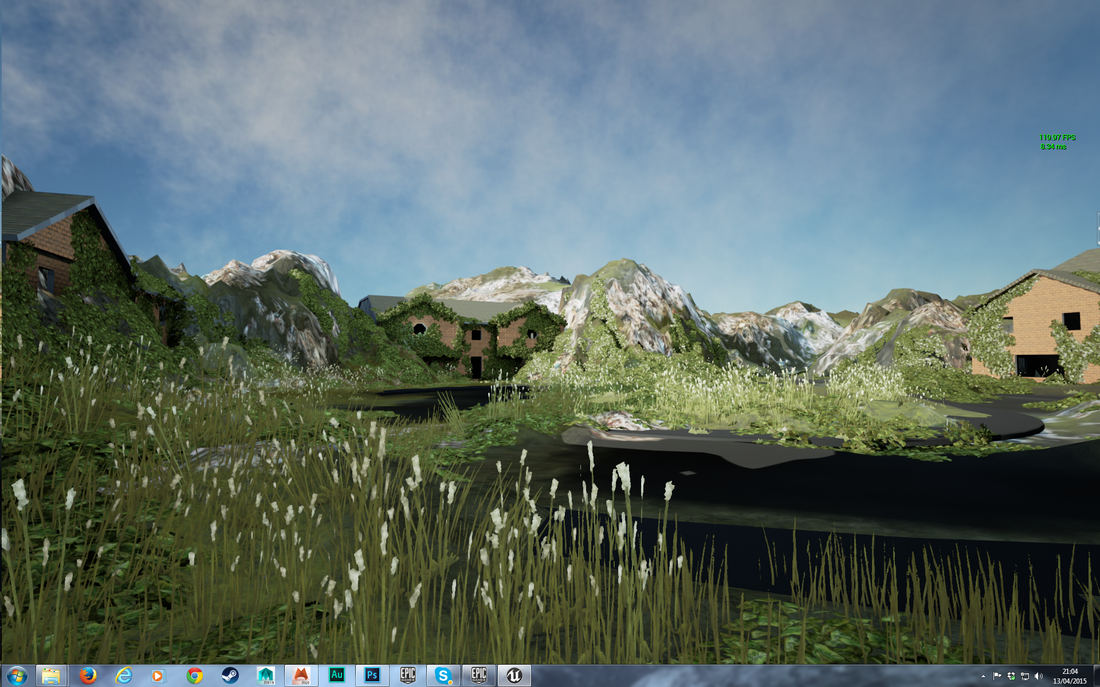
Working out the distance between the houses was also quite a challenge, as we didn't want the player to have a massive space between the houses like in our last demo of the level.
You can see how the sky-light is washing the scene out again in these shots. Later on I removed the skylight completely as it was more trouble than it was worth.
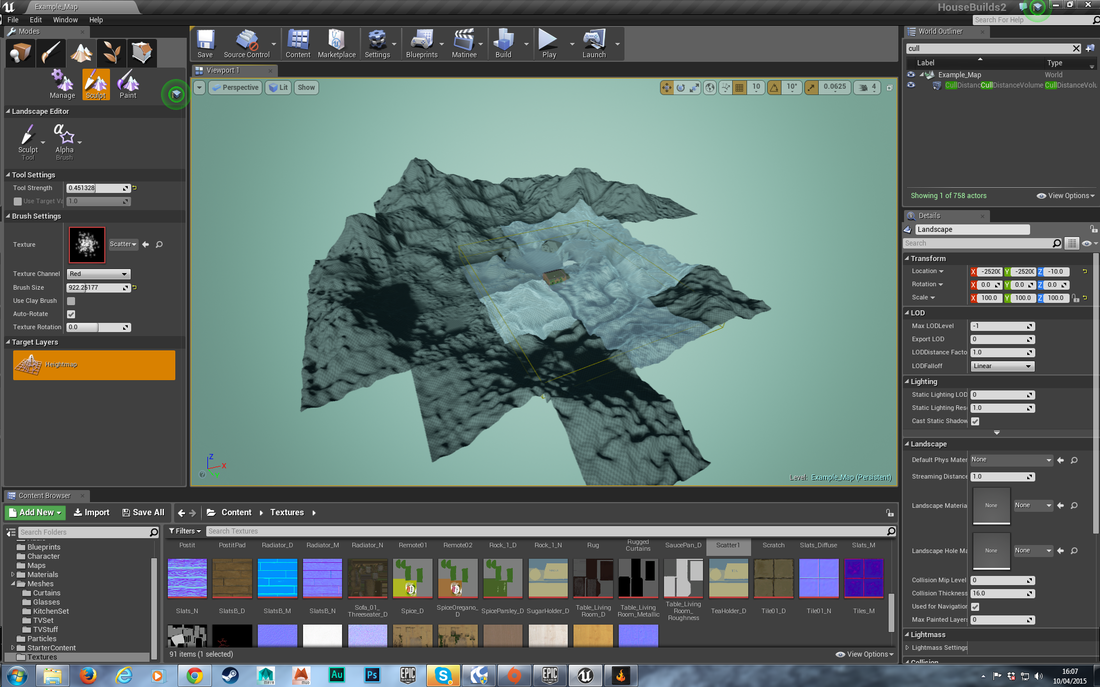
Landscape Textures
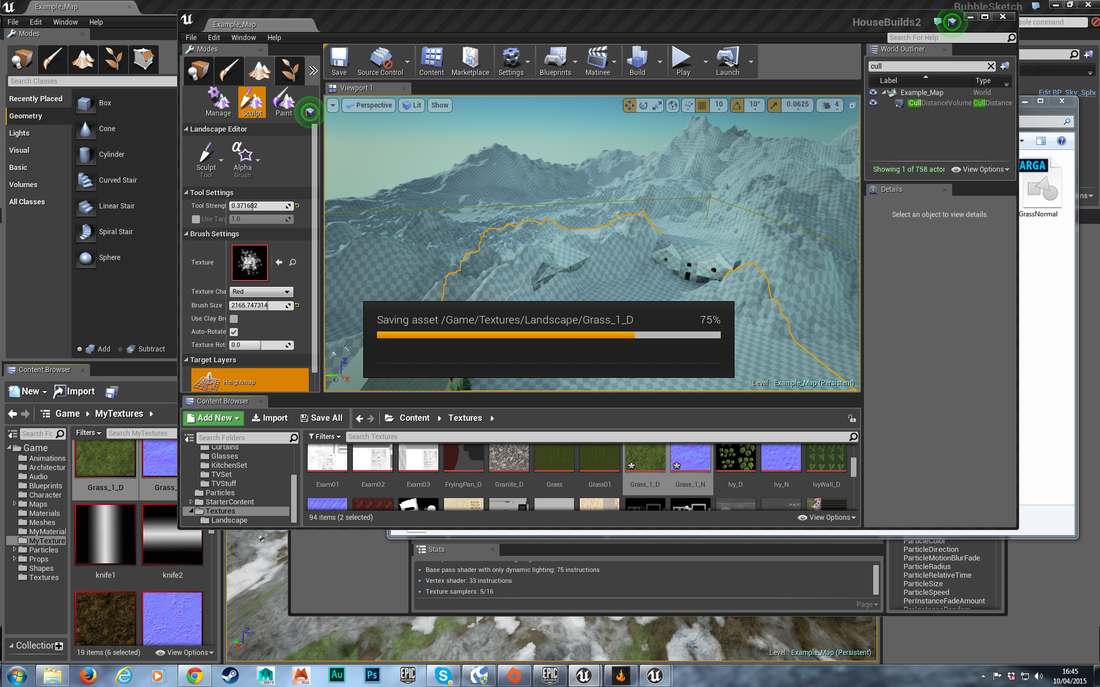
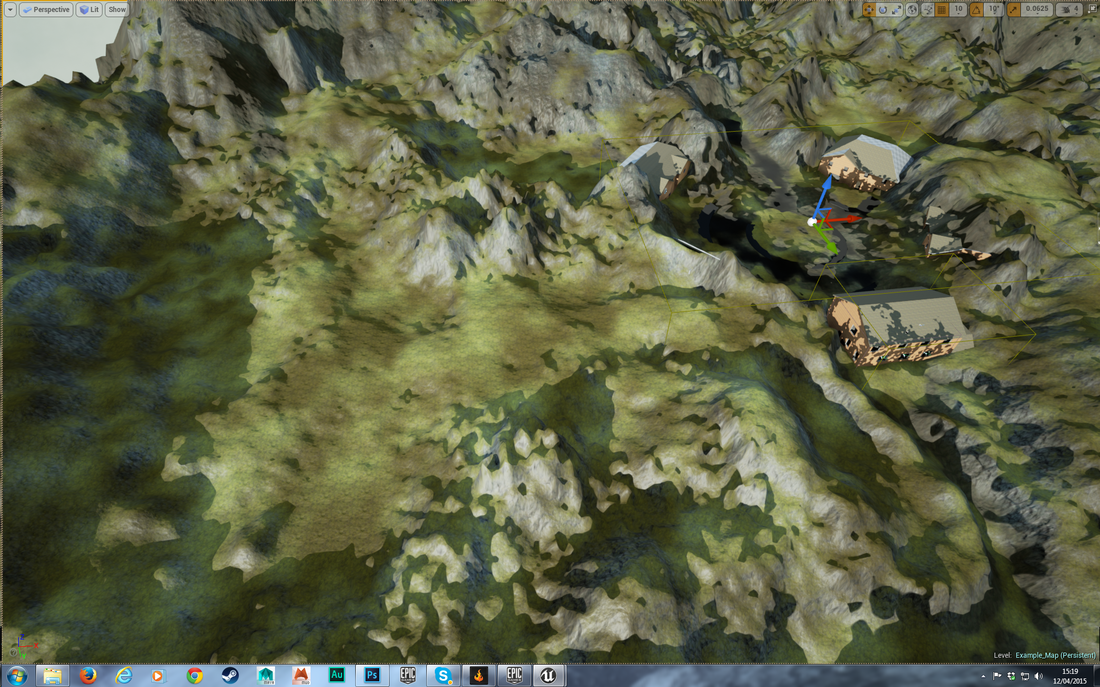
Above shows me importing my automatic landscape texture. This let me quickly get a sense of what the hills and the level would look like. It was only the grass and rock that is automatic depending on flats and slopes.
This meant that I still have to paint almost all of the textures on to the landscape myself, but it was good for getting a quick sketch.
This meant that I still have to paint almost all of the textures on to the landscape myself, but it was good for getting a quick sketch.
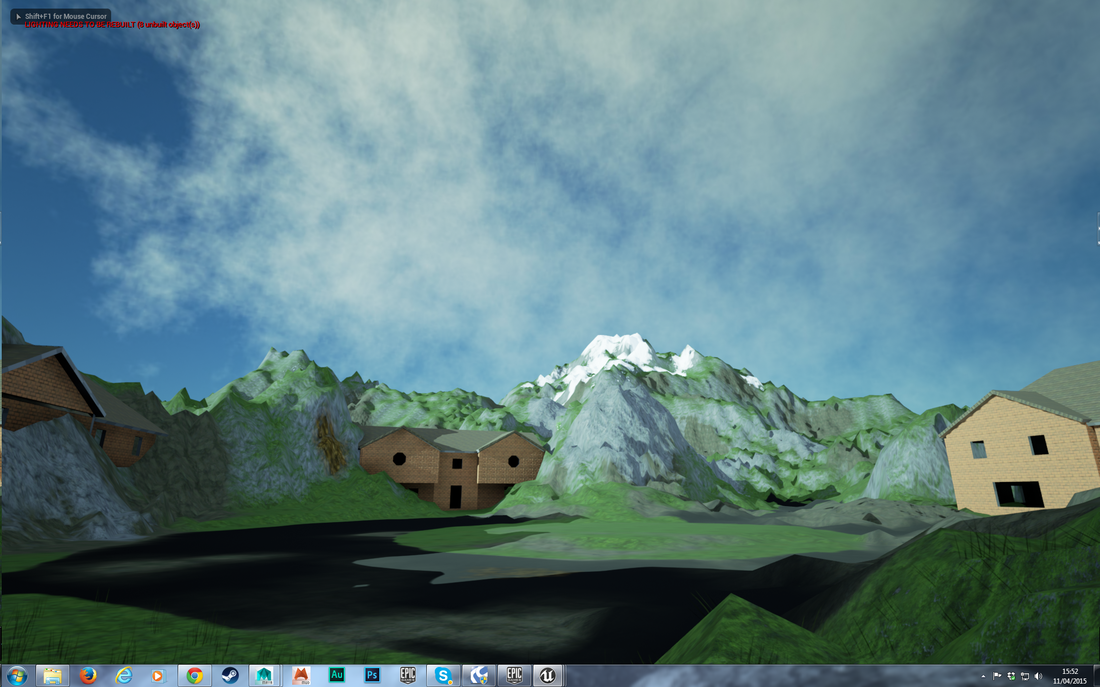
You can see above how the rocks show through on the slopes automatically. You can also see how I have painted snow onto the peaks of the mountains.
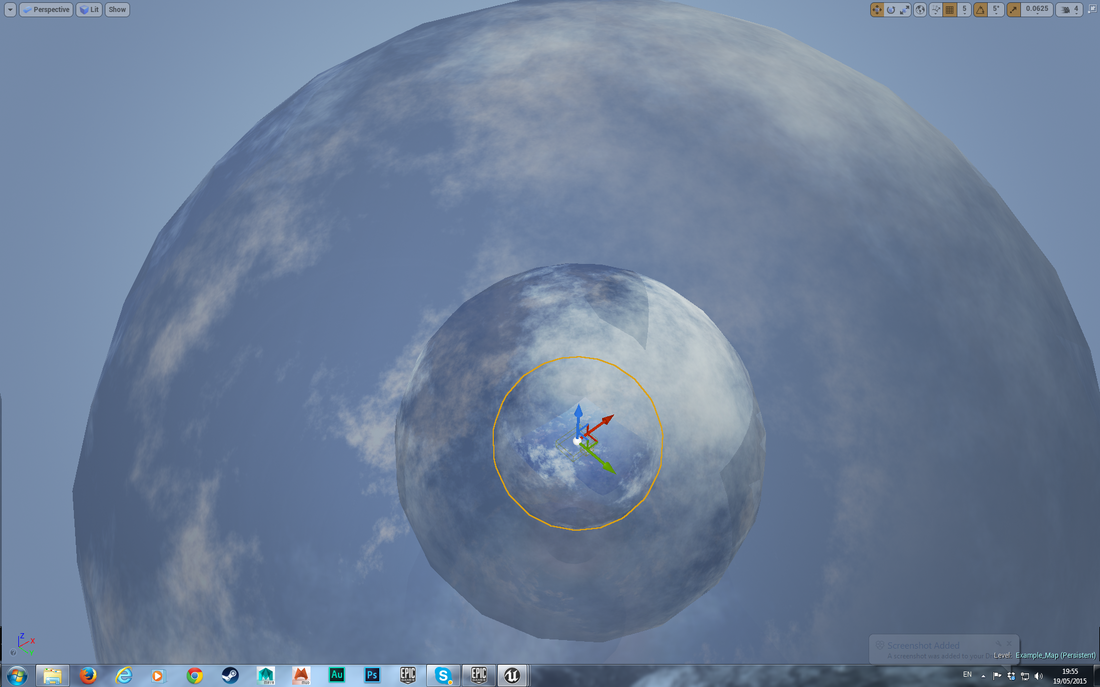
Below shows how I created the sky. I used a free sky texture from http://continuum3d.com/grafix/C3DB-Skies/Skies_Free/SkyBasic-1.html. I applied the texture to 3 different materials. Each of these materials slowly pans the texture across the 3 spheres at different speeds, which means that I created different depths of cloud layers that move at different speeds.
I didn't use any tutorials to make the sky. The starter content for unreal uses an entire blueprint system to create a skybox. This looked too complicated for me, so I decided to create it as simply as I could, and luckily transparent spheres worked perfectly.
In the game it looks fairly convincing, though you only notice the movement if you stare long enough at the sky.
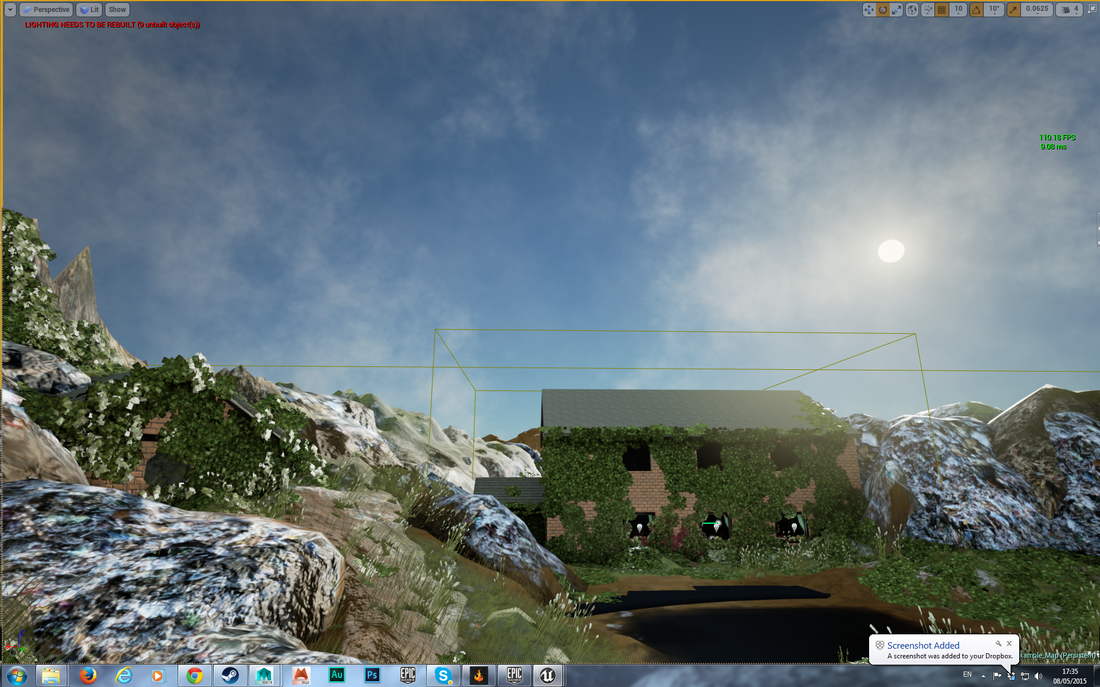
I began building up the ivy and grass onto the houses. At this point we were debating whether or not to include the piles of scrap metal. I thought that what we had here looked fairly good without the scrap.
In the end though, Elly decided that we should obviously stick to our original concepts seeing as we had been working from them for the whole year so far.
In the end though, Elly decided that we should obviously stick to our original concepts seeing as we had been working from them for the whole year so far.
Little touches to the Landscape
The colour variation in the landscape here is caused by another texture that I layered over the landscape material. This would be called a macro texture seeing as it's intended to break up the look of the tiling textures underneath.
I picked up this technique back in term 1 but only thought about applying it now. I think that it looks really good, making the landscape look so much better than the previous flat green that it used to be.
I picked up this technique back in term 1 but only thought about applying it now. I think that it looks really good, making the landscape look so much better than the previous flat green that it used to be.
Problems with Grass
As you can see above, the grass was appearing black when it wasn't facing the sun. This looked awful but I was able to fix it quite easily. I had a brainwave and realised that if I plugged the texture for the grass into its own emmissive colour node, then it would emit its own texture, allowing it to appear as if the light was shining through it.
If I had tried to achieve this by making the grass transparent it would have adversely effected the performance of the game which isn't what I wanted.
If I had tried to achieve this by making the grass transparent it would have adversely effected the performance of the game which isn't what I wanted.
This worked perfectly, as the grass now looked like it was being lit by the indirect lighting.
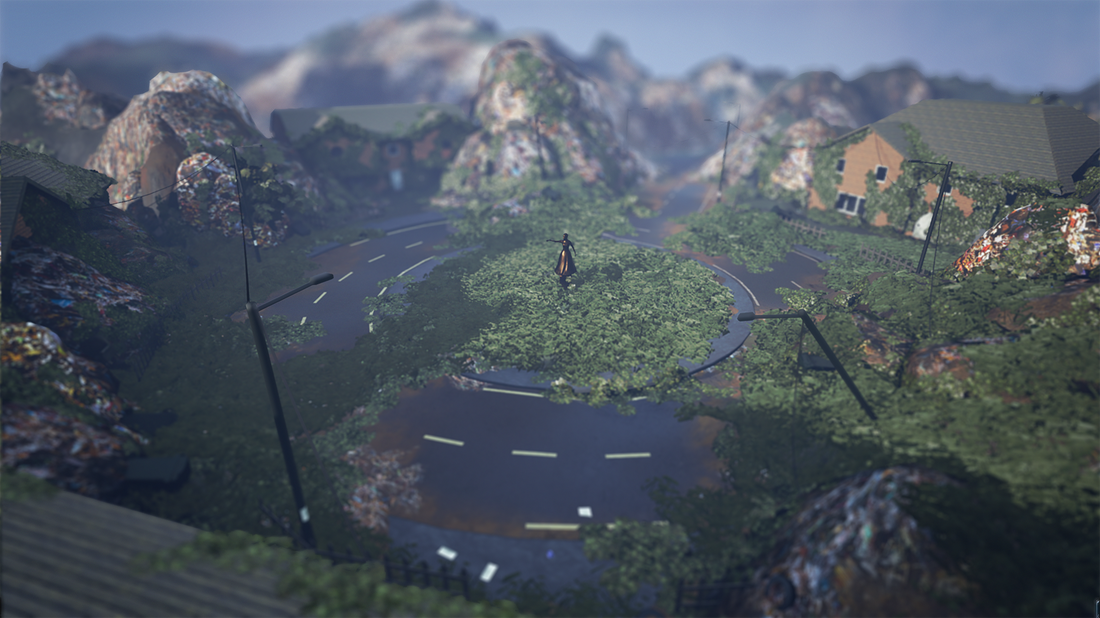
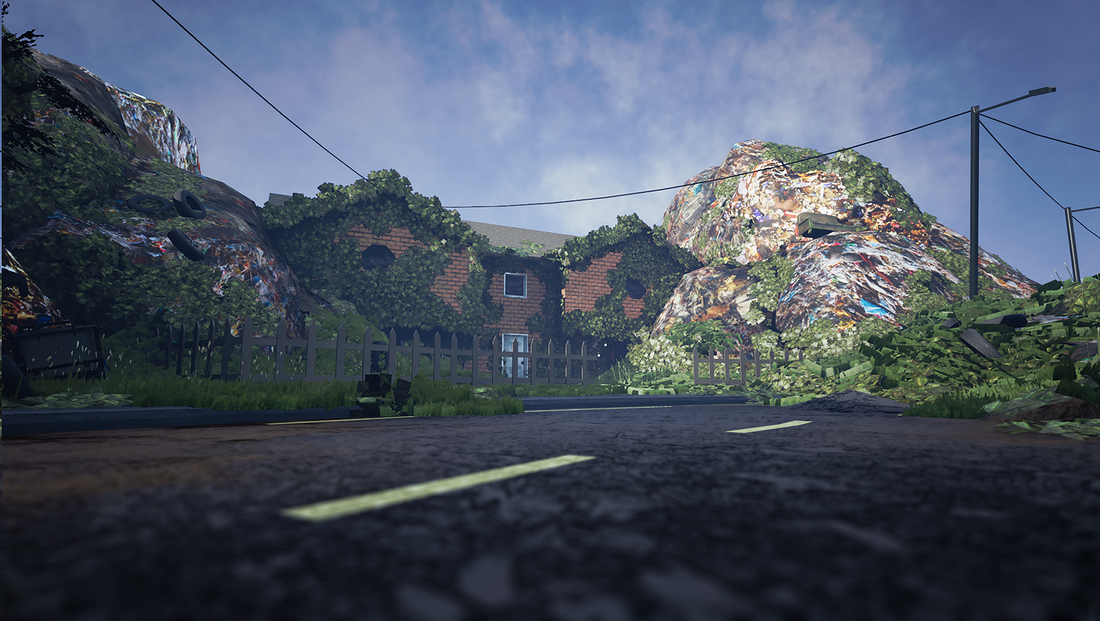
Adding the Scrap
These images show how we added the scrap to the game. We made a decision to remove the mountains from the background as well.
However, we realised that our original scrap texture didn't really look like a scrap heap. The textures just looked muddy from a distance and you really couldn't tell what they were.
Elly and I made a decision to try new textures because of this. We also decided that we needed blocks and piles of rubble as separate assets because so far they were just rolling hills of murky brown texture.
Re-Designing Rubble
Elly came up with a new idea for textures for the rubbish piles. She decided that we needed it to look more like a landfill site, this meant getting a lot more colour into the rubbish textures, so we both got to work on this.
This is what we came up with. A texture that was a lot whiter but also a lot dirtier looking, due to the contrast. This was what we had been looking for since the start of the project.
We were both pretty pleased with the result of this decision to change things up.
We were both pretty pleased with the result of this decision to change things up.
Creating a simple tree for the level
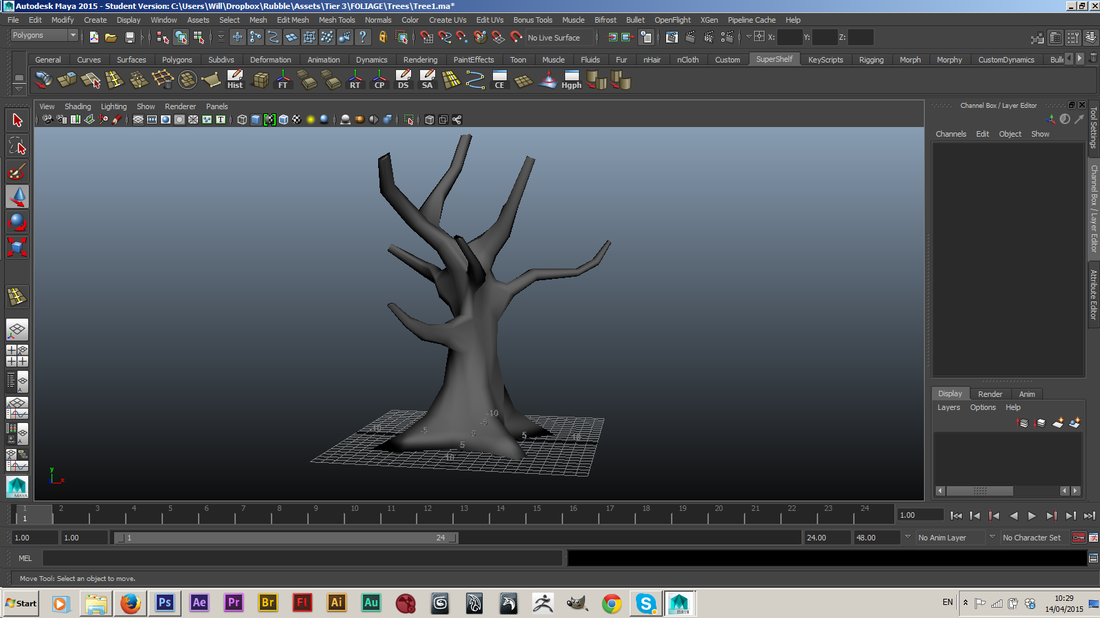

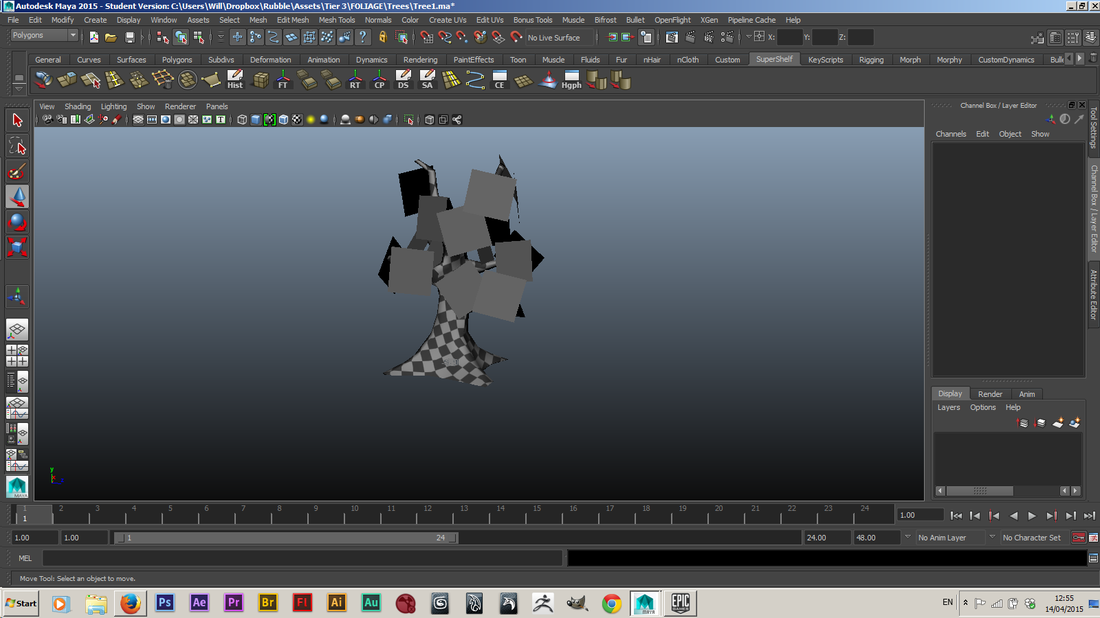
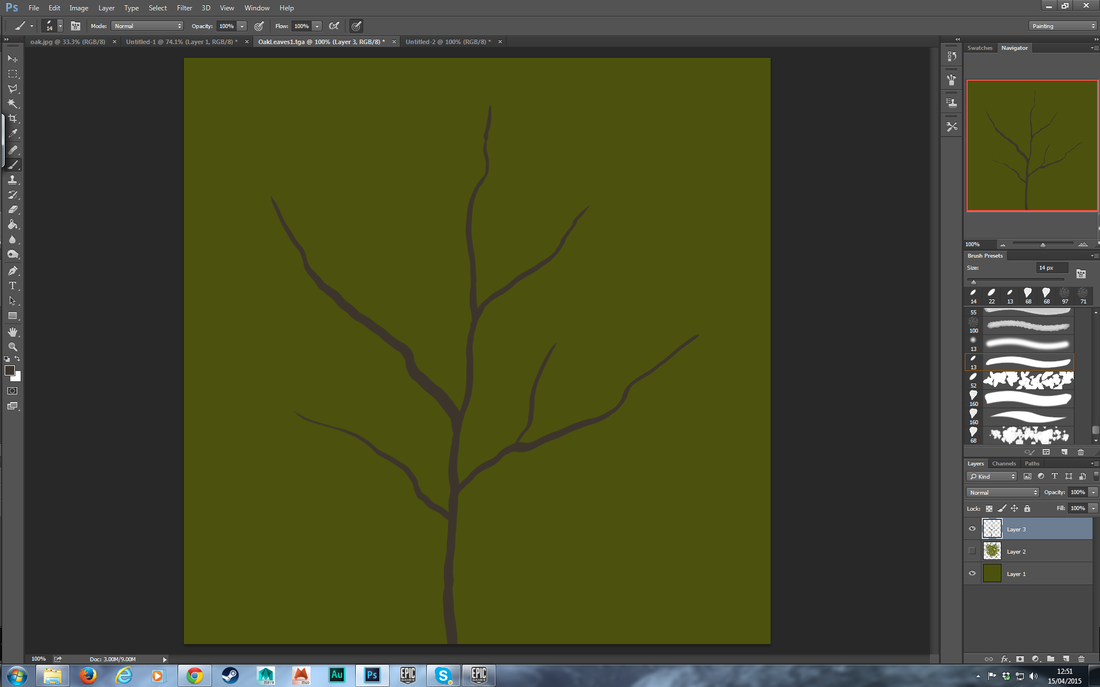
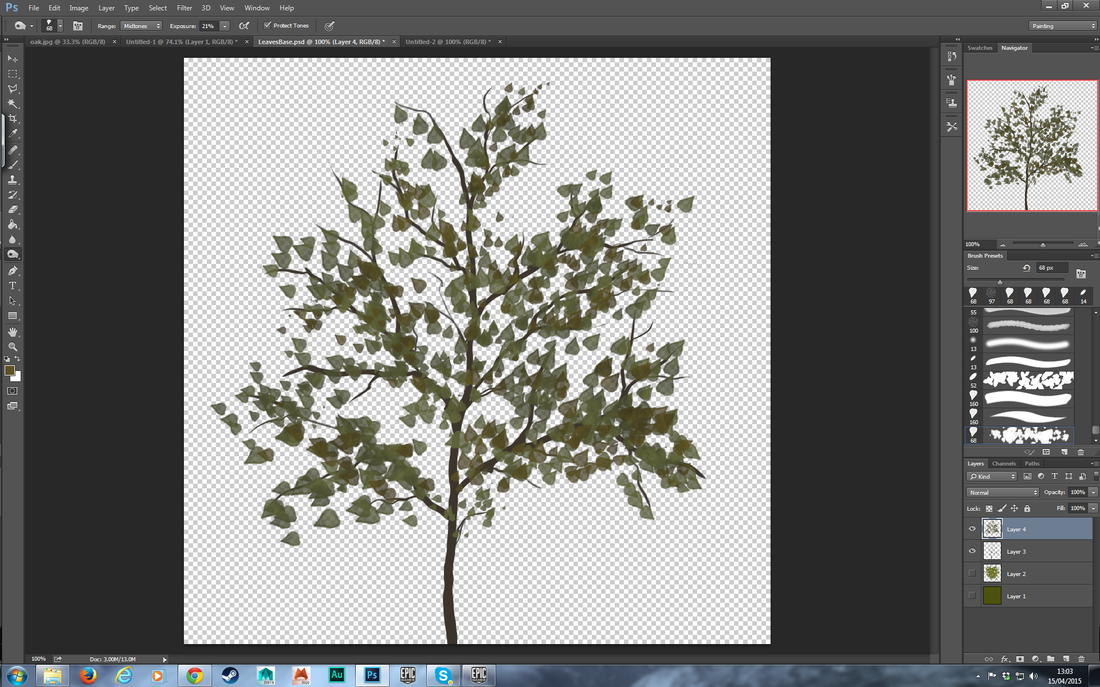


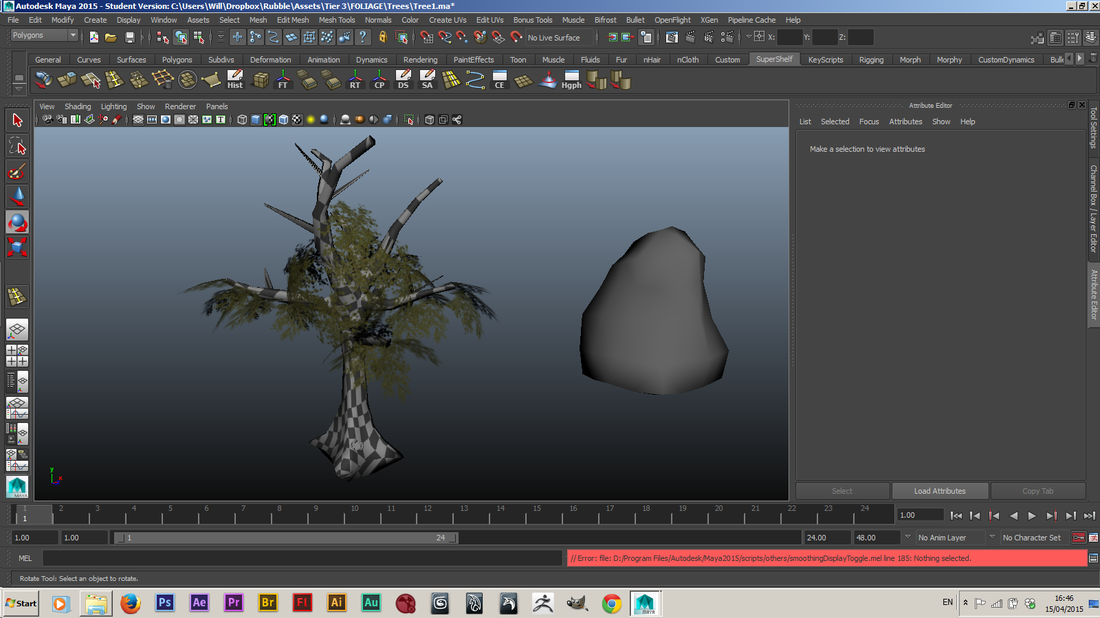
My process for creating the tree in the game is outlined here. It goes through the phases of modeling, unwrapping the UVs, creating textures for the leaves and then layering them up over the tree.
In the game I ended up covering the tree in ivy as well, because the leaves didn't look as good as the ivy.
In the game I ended up covering the tree in ivy as well, because the leaves didn't look as good as the ivy.
Adding blocks of rubble
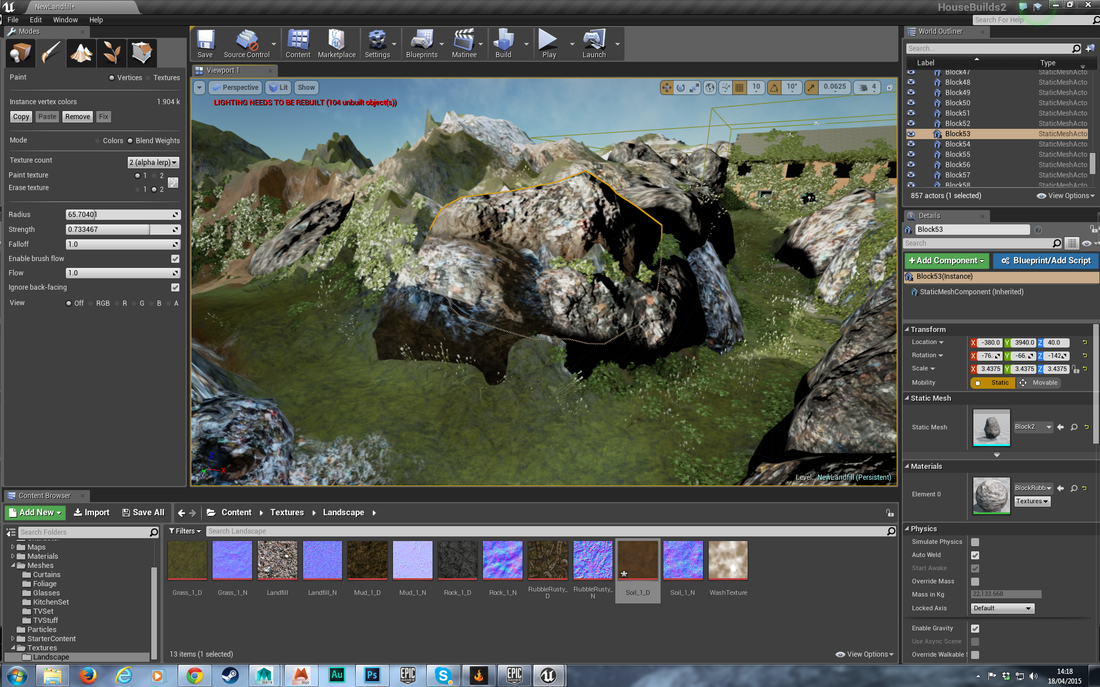
We added the blocks of rubble to the level to make the rubbish piles seem more physical. Before the blocks the landscape just rolled up into rubbish textured hills, but now there is a much starker contrast between the rubble and the ground layer.
This is what we had wanted from the start. We also ended up making the blocks blend into a dirt texture by vertex painting the blocks. We changed the dirt texture so it was much more orange than before. This change came about because our research into landfill sites always showed orange tinged dirt near them.
This is what we had wanted from the start. We also ended up making the blocks blend into a dirt texture by vertex painting the blocks. We changed the dirt texture so it was much more orange than before. This change came about because our research into landfill sites always showed orange tinged dirt near them.
Problems with Decals
I wanted to add the road markings to the roundabout using deferred decals. These plaster a new material over a current mesh in the area that you set.
Unfortunately I ran into a problem where they would not render when in shadows. I looked at documentation and forums online where I found an answer (https://answers.unrealengine.com/questions/25508/decals-not-rendered-without-direct-lighting.html) which involved changing some settings in the project. However, when I altered these settings it broke my landscape texture and stopped it from rendering, shown below.

I then had to look for more help on how to resolve this problem. I assumed it was to do with having too many textures on one material seeing as the shader model can only render 16 textures in one material.
Following this answer https://answers.unrealengine.com/questions/16947/landscape-visibility-material-bug.html I found that you can now have hundreds of textures on one material by changing the sampler for the texture samples to 'wrapped'. What this does is store all of your 'wrapped' textures in one huge texture file, essentially meaning that it tricks the shader model into thinking there is only one texture on the material. Then the material can pick from areas of that one texture to sample your original textures. Think of a patchwork quilt made of different textures and that's basically what it is.
Following this answer https://answers.unrealengine.com/questions/16947/landscape-visibility-material-bug.html I found that you can now have hundreds of textures on one material by changing the sampler for the texture samples to 'wrapped'. What this does is store all of your 'wrapped' textures in one huge texture file, essentially meaning that it tricks the shader model into thinking there is only one texture on the material. Then the material can pick from areas of that one texture to sample your original textures. Think of a patchwork quilt made of different textures and that's basically what it is.
Decals working, and reflection capture
So with all that fixed the level was looking good. The road now had markings which looked brilliant.
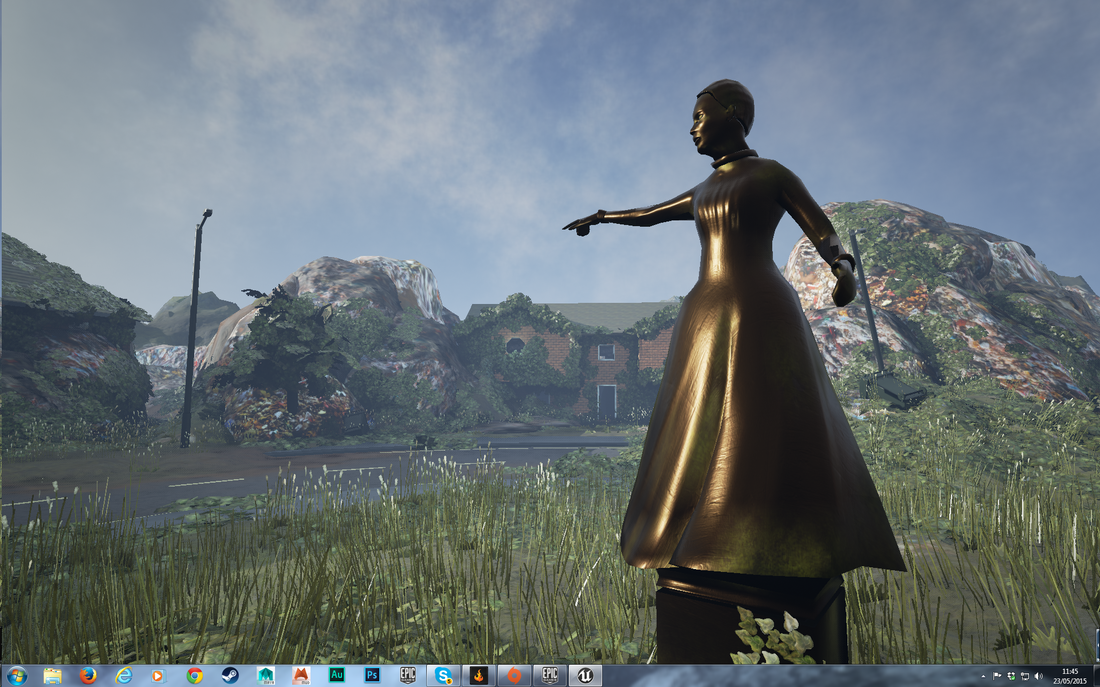
I added the lamp-posts and dustbins into the game, these definitely added depth to the cul de sac scene. Most of all though, the statue that Elly created brought real character to the scene.
To top off all these additions, I added reflection spheres to the level, these add HDRI captures of the surroundings to the affected areas. This meant that the road and ground now reflected the sky and looked a lot more real! The reflections work especially well on the statue as she is metallic and the glass in the windows.
Fleshing out the Upstairs
To touch off the first house we added the upstairs assets that Elly and I had created. This included beds, bathroom things, drawers etc. The upstairs wasn't anywhere near as complete as the lower floors but it still looked good.


More problems with Decals
I realised at this point that the game was running slower than usual. I checked out the shader complexity and found this.
All of my foliage was rendering as if it was transparent instead of masked, usually where the texture blocks your vision the complexity is green.
I found online that this was caused by my new decal settings. So basically I had to end up reverting all the changes I'd made to include the road markings!
Luckily though, I found that I could still apply decals with the old settings, the only drawback was that I could not choose how transparent they were on the road surface but this wasn't too much of a problem.
The screenshots below show the game after I fixed the decals.
By this stage I had also added distance based fog to the game which created a lovely atmosphere. I removed the default atmospheric fog from the game, this removed the sun disk but made the sky seem much more real. Adding a new sun would have to be done now though.


Below shows how I added wires to the game. I did this by using Unreal Engine's built in Cable Actor which allows you to drag and drop cables into the game, setting their end point and length as well. This really brought the exterior scenes to life.

You can also see that I have optimised a lot of the grass above, it is rendering far off into the distance. This is because I added LODs for all the foliage meshes. Basically once you are far enough away, the new mesh loads in. Except that this time, the mesh is the same, but the LOD material has no transparency at all. You can see this in the updated shader complexity below. There are now no bad red bits in the distance!
This allows the game to run even faster than ever, and for us to render grass at a further distance than ever.
This allows the game to run even faster than ever, and for us to render grass at a further distance than ever.
As a side note, I was inspired to optimise the grass like this by a new game I played called The Witcher 3, below are some screenshots I took from the game that made me realise they were using LODs on their grass to make it render so far away!


Finalizing the Grass
Again inspired by The Witcher 3 I felt that our current grass was too skinny and didn't really cover the ground in a way that grass would.
So I remade the grass from scratch. I used a photo of grass from a free desktop background website and cut it up in photoshop so that it would render properly in Unreal. Then I applied the texture to a new grass mesh in Maya which was much more dense and squat than the old mesh.
When I brought the final asset into Unreal the results were astonishing:
As you can see, the grass now looks far better than any of the previous attempts I had done. This has helped me see that using photoreal textures is definitely the way forward for us!
Below is an example of the new grass' high detail LODs with transparency only loading when you are close.
Creating Physics Doors
One of our big goals in terms of game design was to have doors that you could open. I assumed that this would involve blueprint scripting to get doors to swing open when you click them, and it does if you want doors that open when you press a button or click a mouse.
I found a simpler method though, and one that I think looks far better.
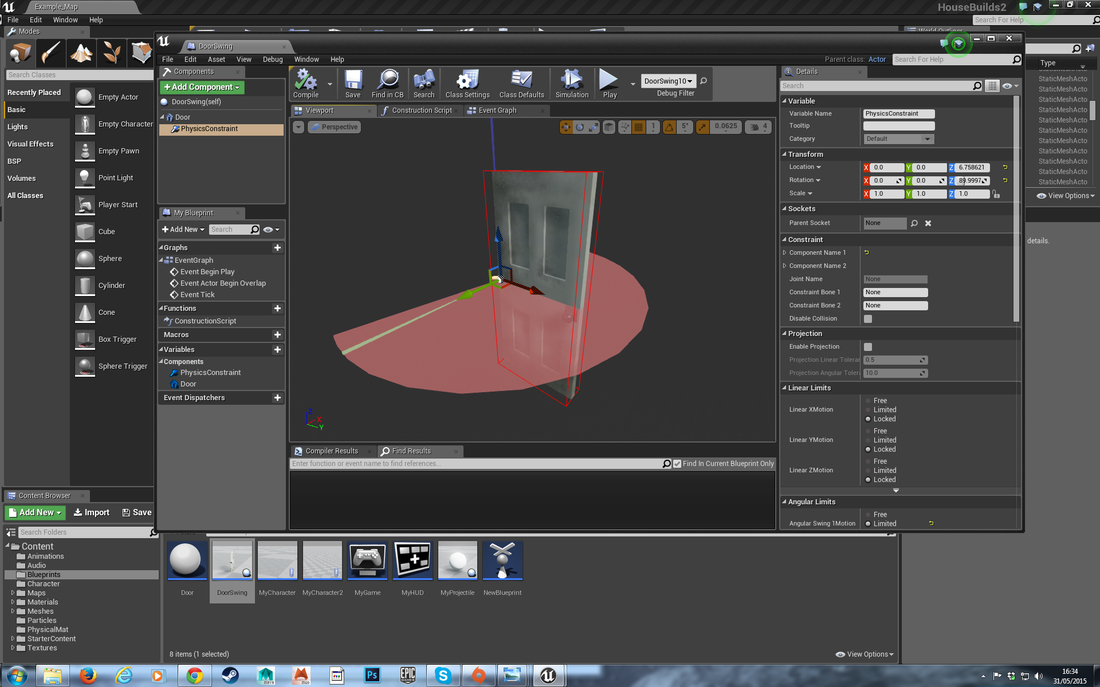
I simply created a blueprint based on the door mesh and added a physics constraint to it. I placed the constraint at the edge of the door and set it to be a hinge, locking its motion to the swing axis.
Then, when I placed this blueprint in the game, it gives you a door that swings on its hinge. So the player can just walk into our doors to push them open!
This was a great development, as I didn't have to follow any tutorials or create any blueprint scripts, it was very intuitive.
Picking up objects
Ok, so this one was a massive challenge. Being able to pick up physics-enabled objects was not something as intuitive as adding a hinge to a door.
I had looked into creating a pick-up system halfway through the year with this tutorial https://wiki.unrealengine.com/Pick_Up_Physics_Object_Tutorial
The trouble was that I did not understand how to create Blueprint scripts properly and therefore had no success for months with this tutorial.
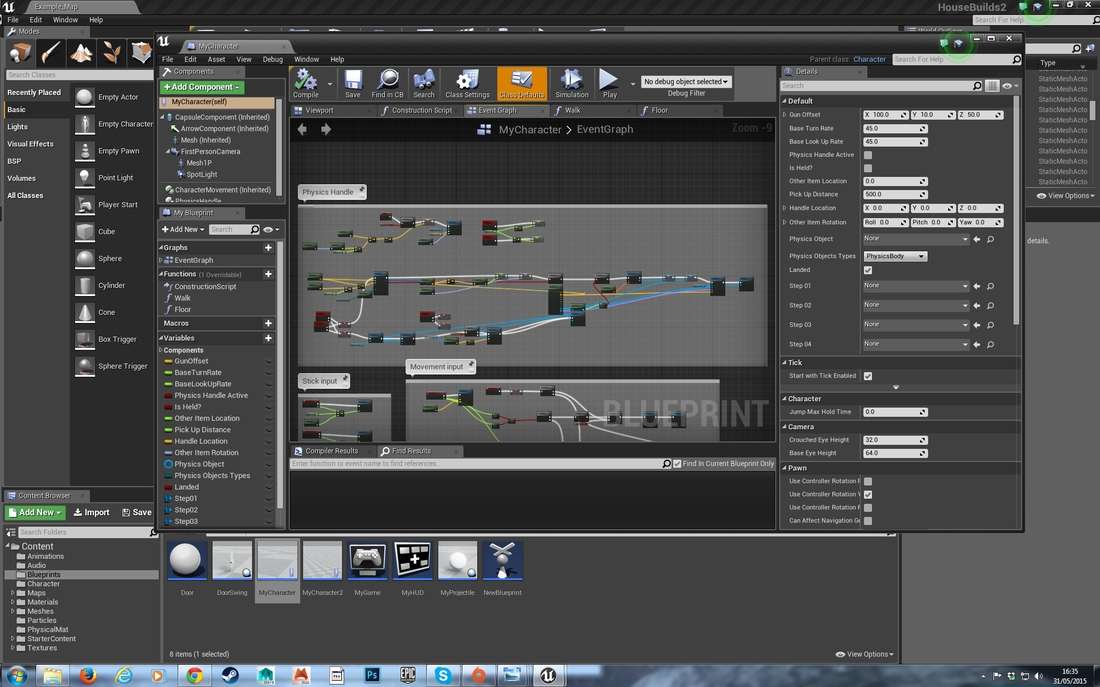
In the second last week or so, I finally looked into blueprints in more depth and discovered how to create half the nodes that I hadn't been able to make previously. After this, I realised how to add variables to blueprints, these were the key things that I had missed while I had been trying to create the blueprint before.
You actually enter the variables yourself, they are questions for the script such as 'is the object held?', 'is the physics handle active?', 'object location' and so on.
Once I realised this, I was able to follow the tutorial fully! It was like putting together an electrical circuit, making sure that every node was in the right place, connected to the right inputs and outputs.
In the end, it worked perfectly and we a now able to pick up all the items in our game! Allowing the player to pick up and inspect clues!
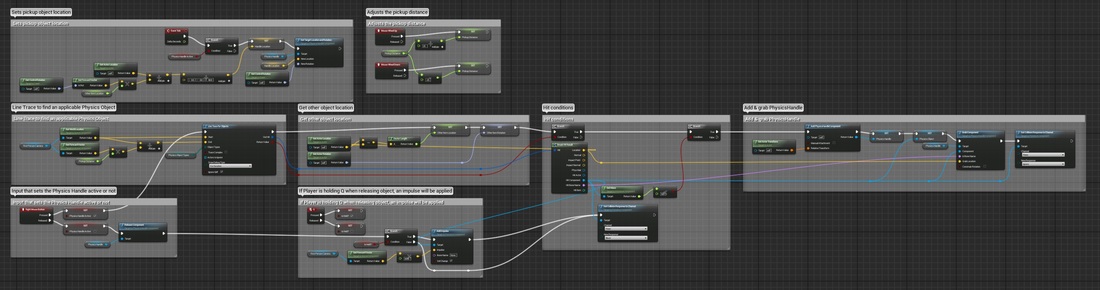
Above: TJ Ballard's tutorial for physics pick up handle
Below: His tutorial applied to our character in our game
Below: His tutorial applied to our character in our game
Creating A Dirt Mask
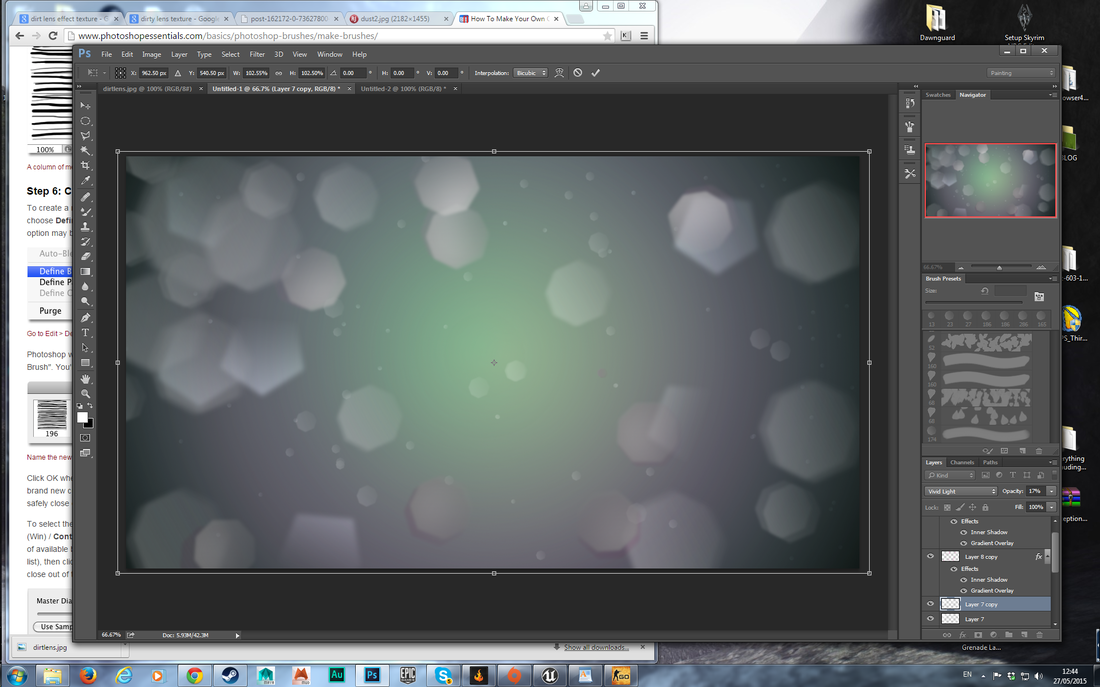
Creating a Dirt mask was more of a look development challenge. I knew that I wanted one because they look good in other games. They are overlays that fit over the screen to create a lens effect when lights glare at the camera.
I used photoshop to create the mask. Making a bokeh brush shape first and then painting bokeh effects over the screen, as well as scratches and a glow effect in the middle. I then boosted the overall vibrance of the image and made sure the bokeh effects were bright enough to show up.

Creating the SUn
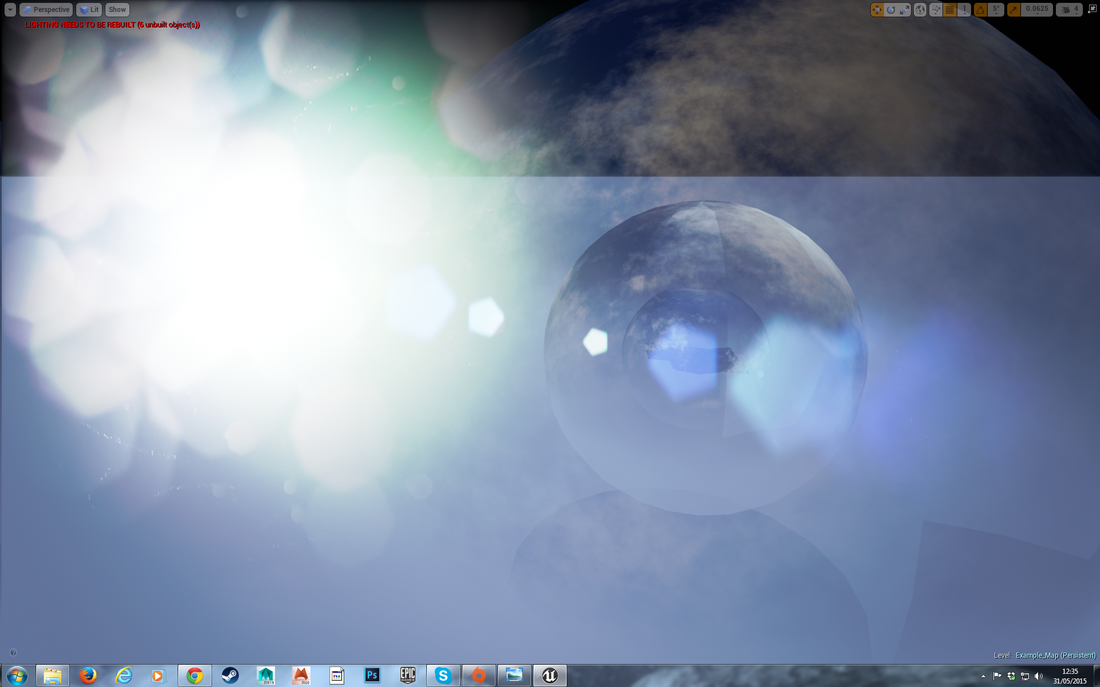
Our dirtmask worked perfectly. You can see how the TV screen causes the lens to flare up beautifully. You can also see next to it that there is no such effect when you look towards the sun. This meant that I had to create a physical sun for our scene.


Which is what I did.
Like the sky, this could have probably been done through blueprint scripting.
It was a thousand times simpler to simply create a huge disc, plug in a white texture and set the emmissive colour value to 3000 which makes it glare when you look at it with the camera.
Seeing as time doesn't change in our game, it's no problem that the sun just sits there in the sky!
It really lets the dirt mask show off as well.
Finishing touches
We both decided to keep the other two houses as skeletons compared to the first one, they would have a few assets in them, but not be anywhere near as fleshed out as the first house.
This was due to time constraints realistically. We bit off more than we could chew, although this was arguably because we were a two man team working on something that could have benefited from more team members.
With that decision the project was close to finished. We implemented sound into the game in the form of ambient noise, a low wind sound for the exterior and a deep humming sound for the interior of the houses. The ambient sounds a visualised below.
With this, the game was ready to hand in.
Looking back, the project has let me learn so much. It has left me with an intermediate knowledge of Unreal Engine 4 and the feeling that I could really enter the video game development world. I feel so much more experienced and confident when it comes to project work.
Most of all, I feel that we succeeded in creating something that people will be able to enjoy playing!
And so, below is the walkthrough of the game and some screenshots.